I love painting small artworks, they are great especially if you are a beginner. You can paint them more quickly, they are good for practising your painting techniques, they make great little paintings, they are easier to sell and you can use them for colour studies for bigger paintings.
In this tutorial, I am going to show you how I painted a small mountain landscape of Mt Talbot and Mt Crosscut in New Zealand in five easy stages which include:
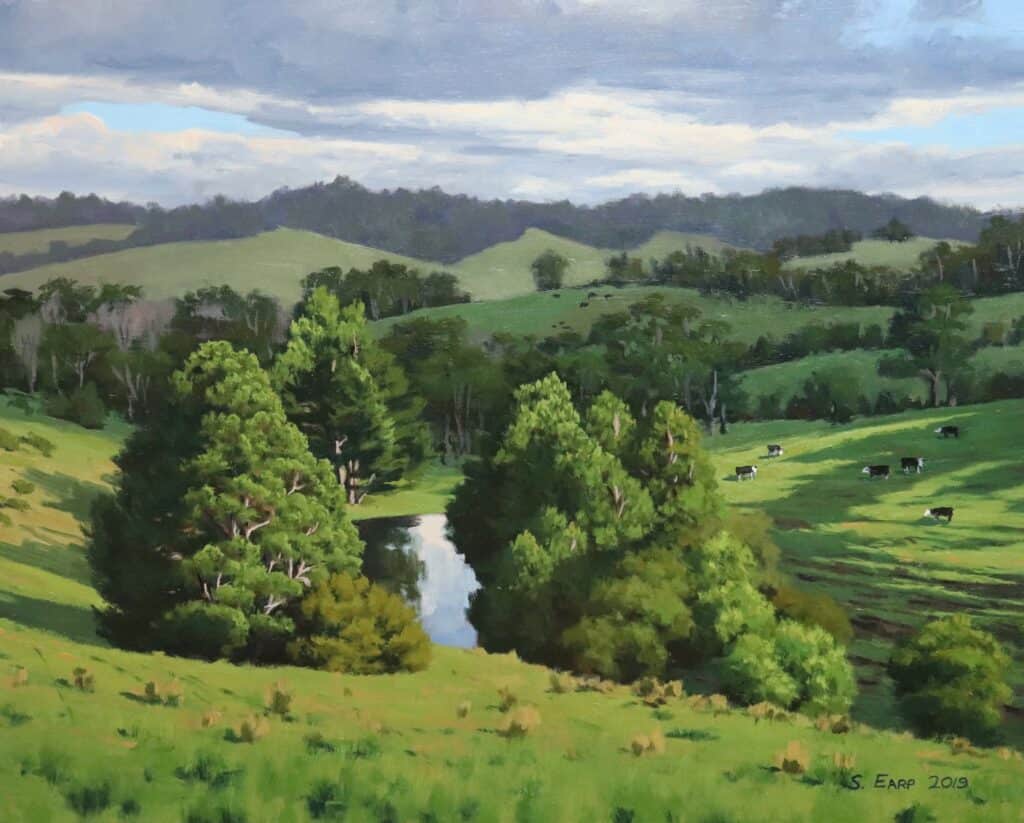
I have painted these mountains many times as it’s one of my favourite places in New Zealand.
I painted this artwork in oils but you can just as easily paint this using acrylics.
STAGE 1 – CREATING THE COMPOSITION
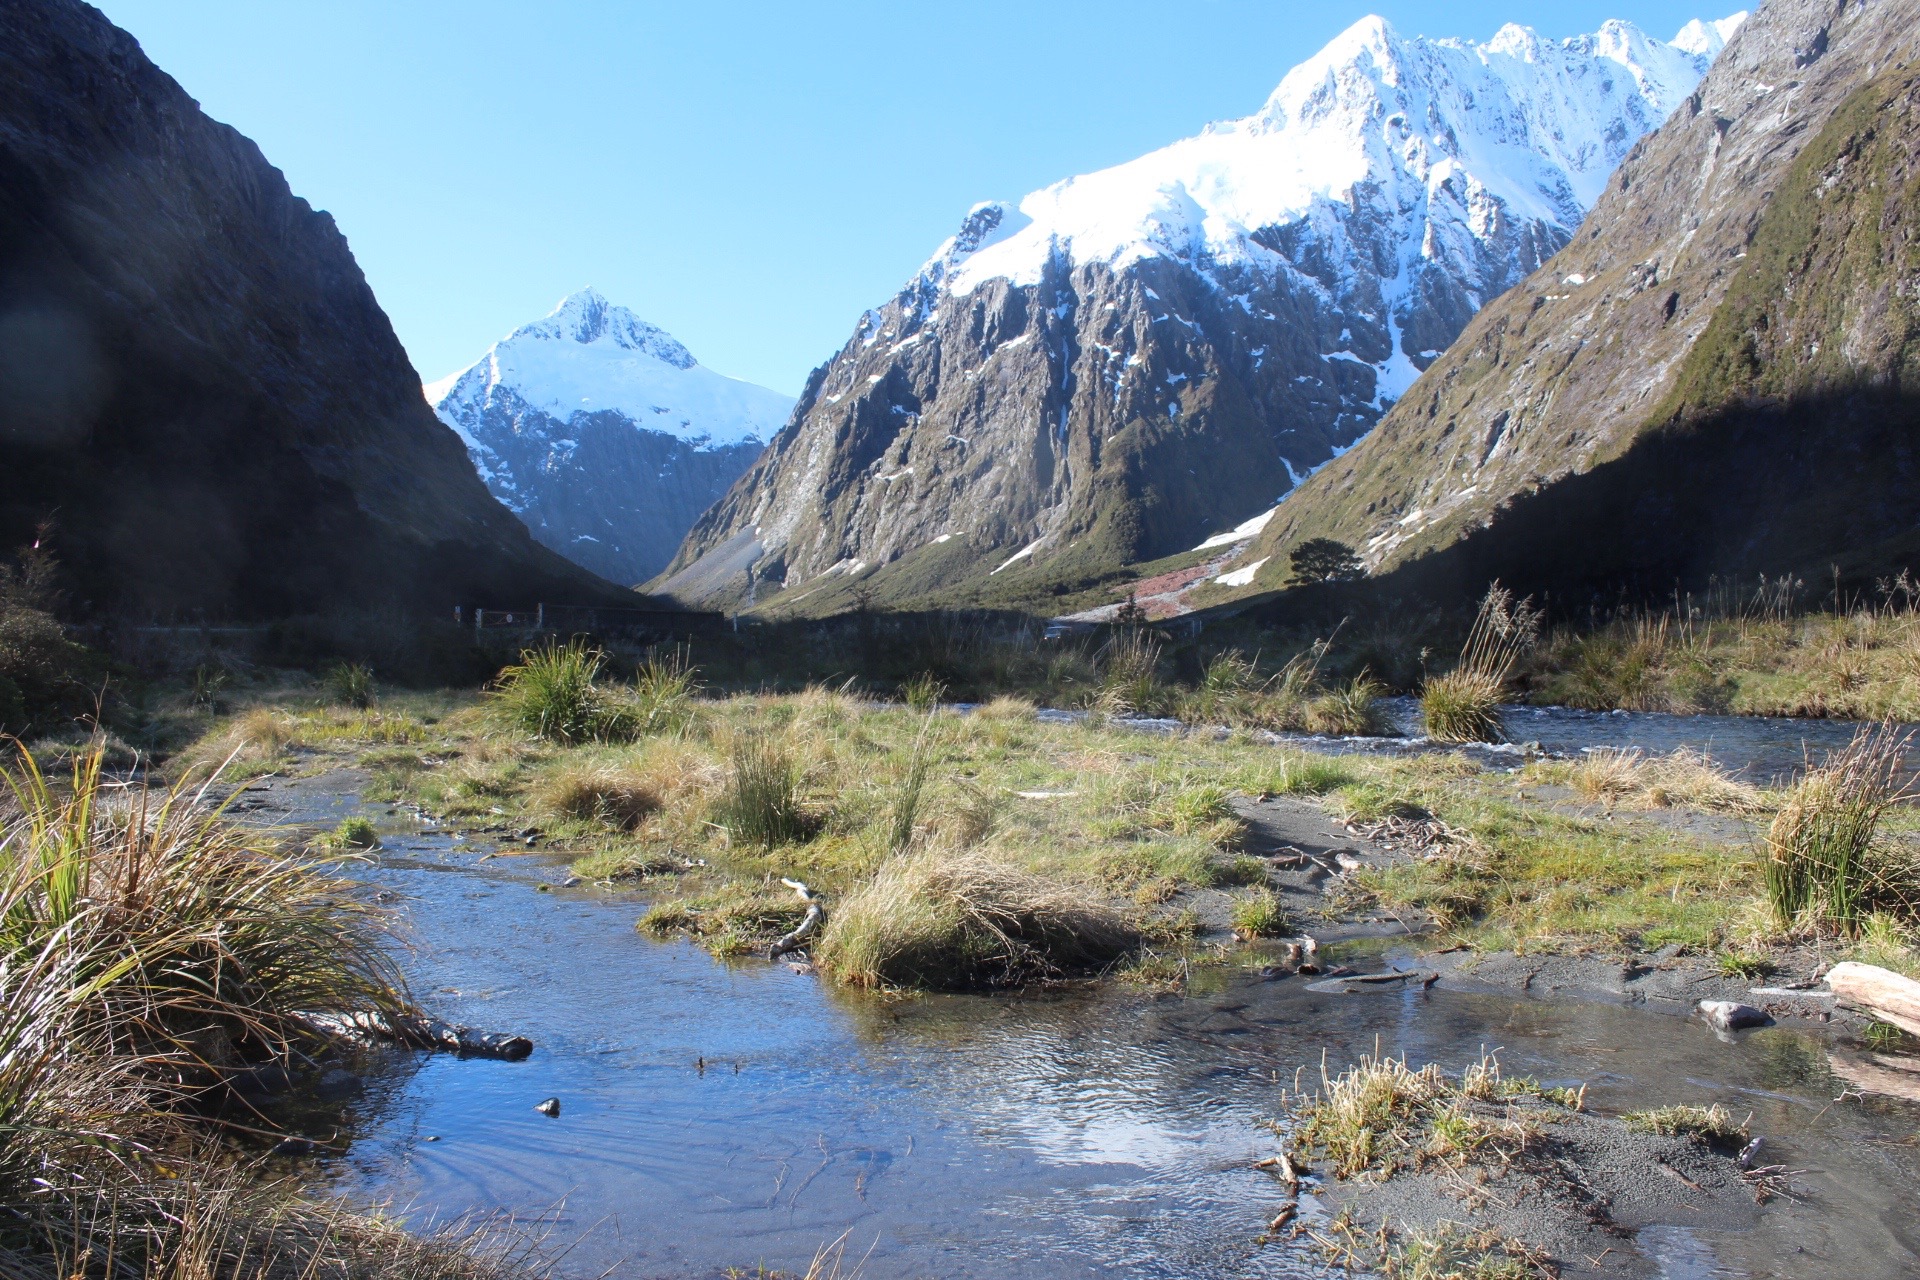
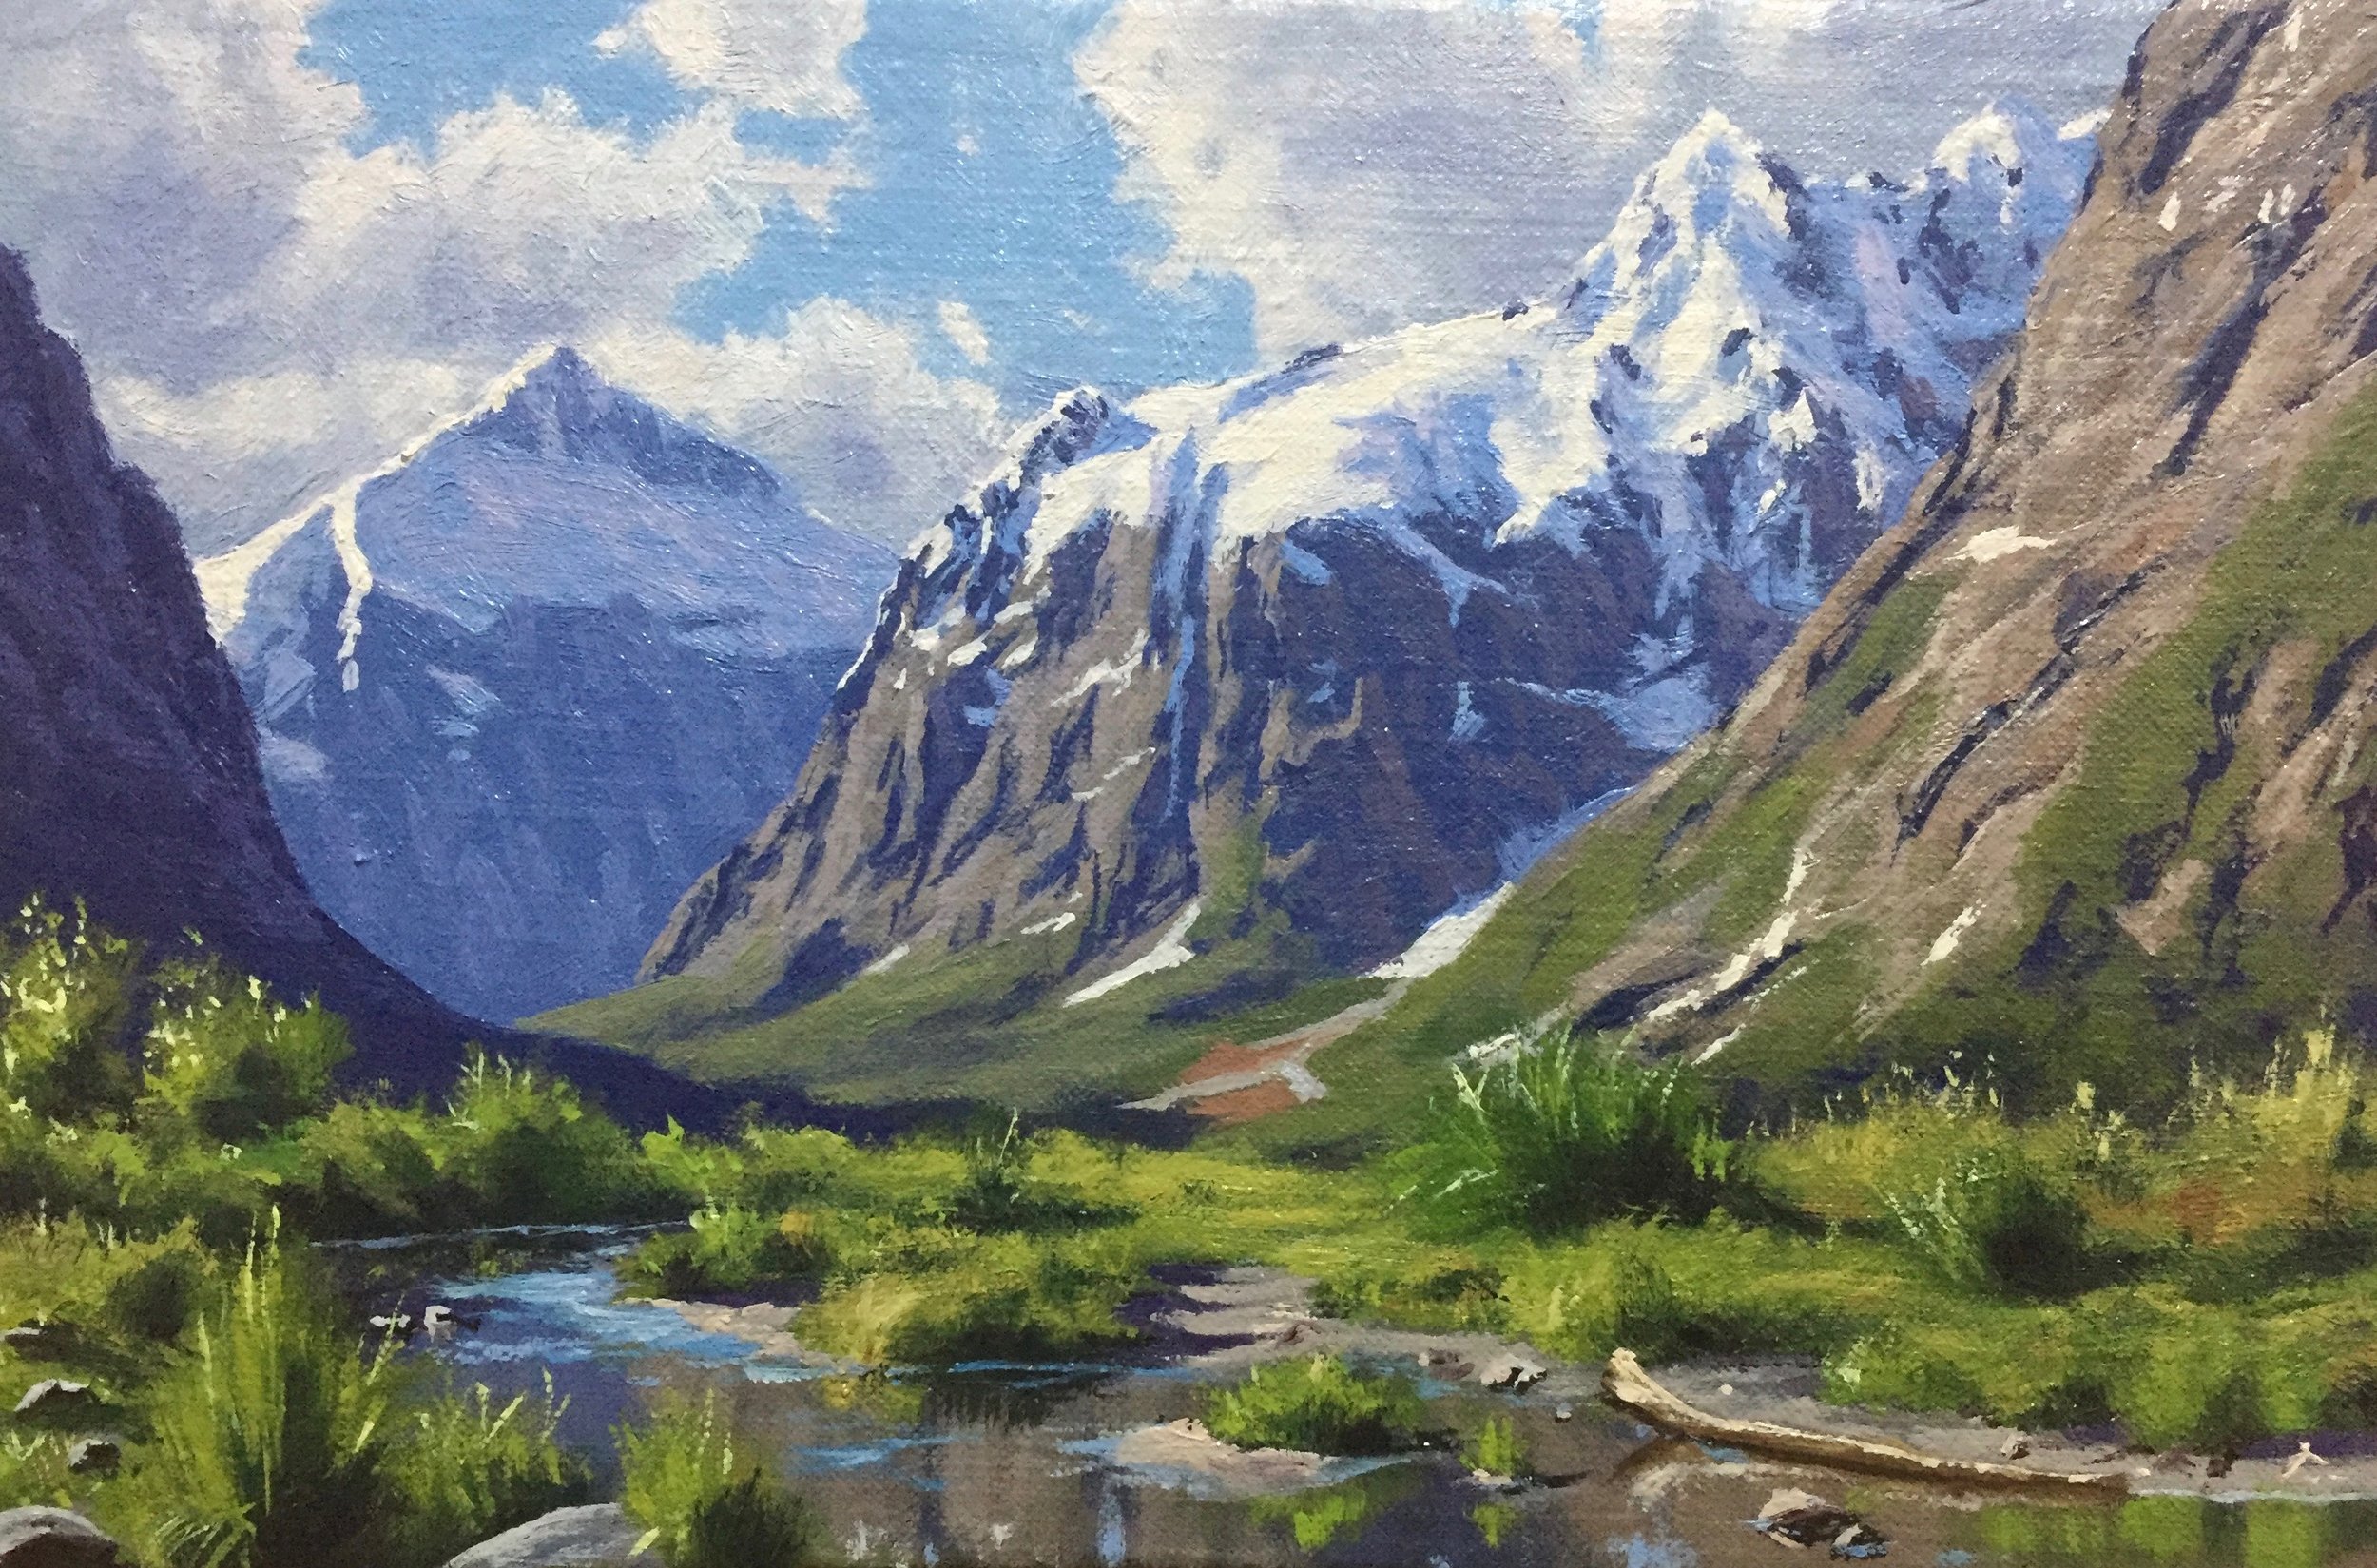
This is one of the reference photos I used, feel free to copy and use it. From this, I went to my sketchbook and drew some thumbnail sketches to design a composition.
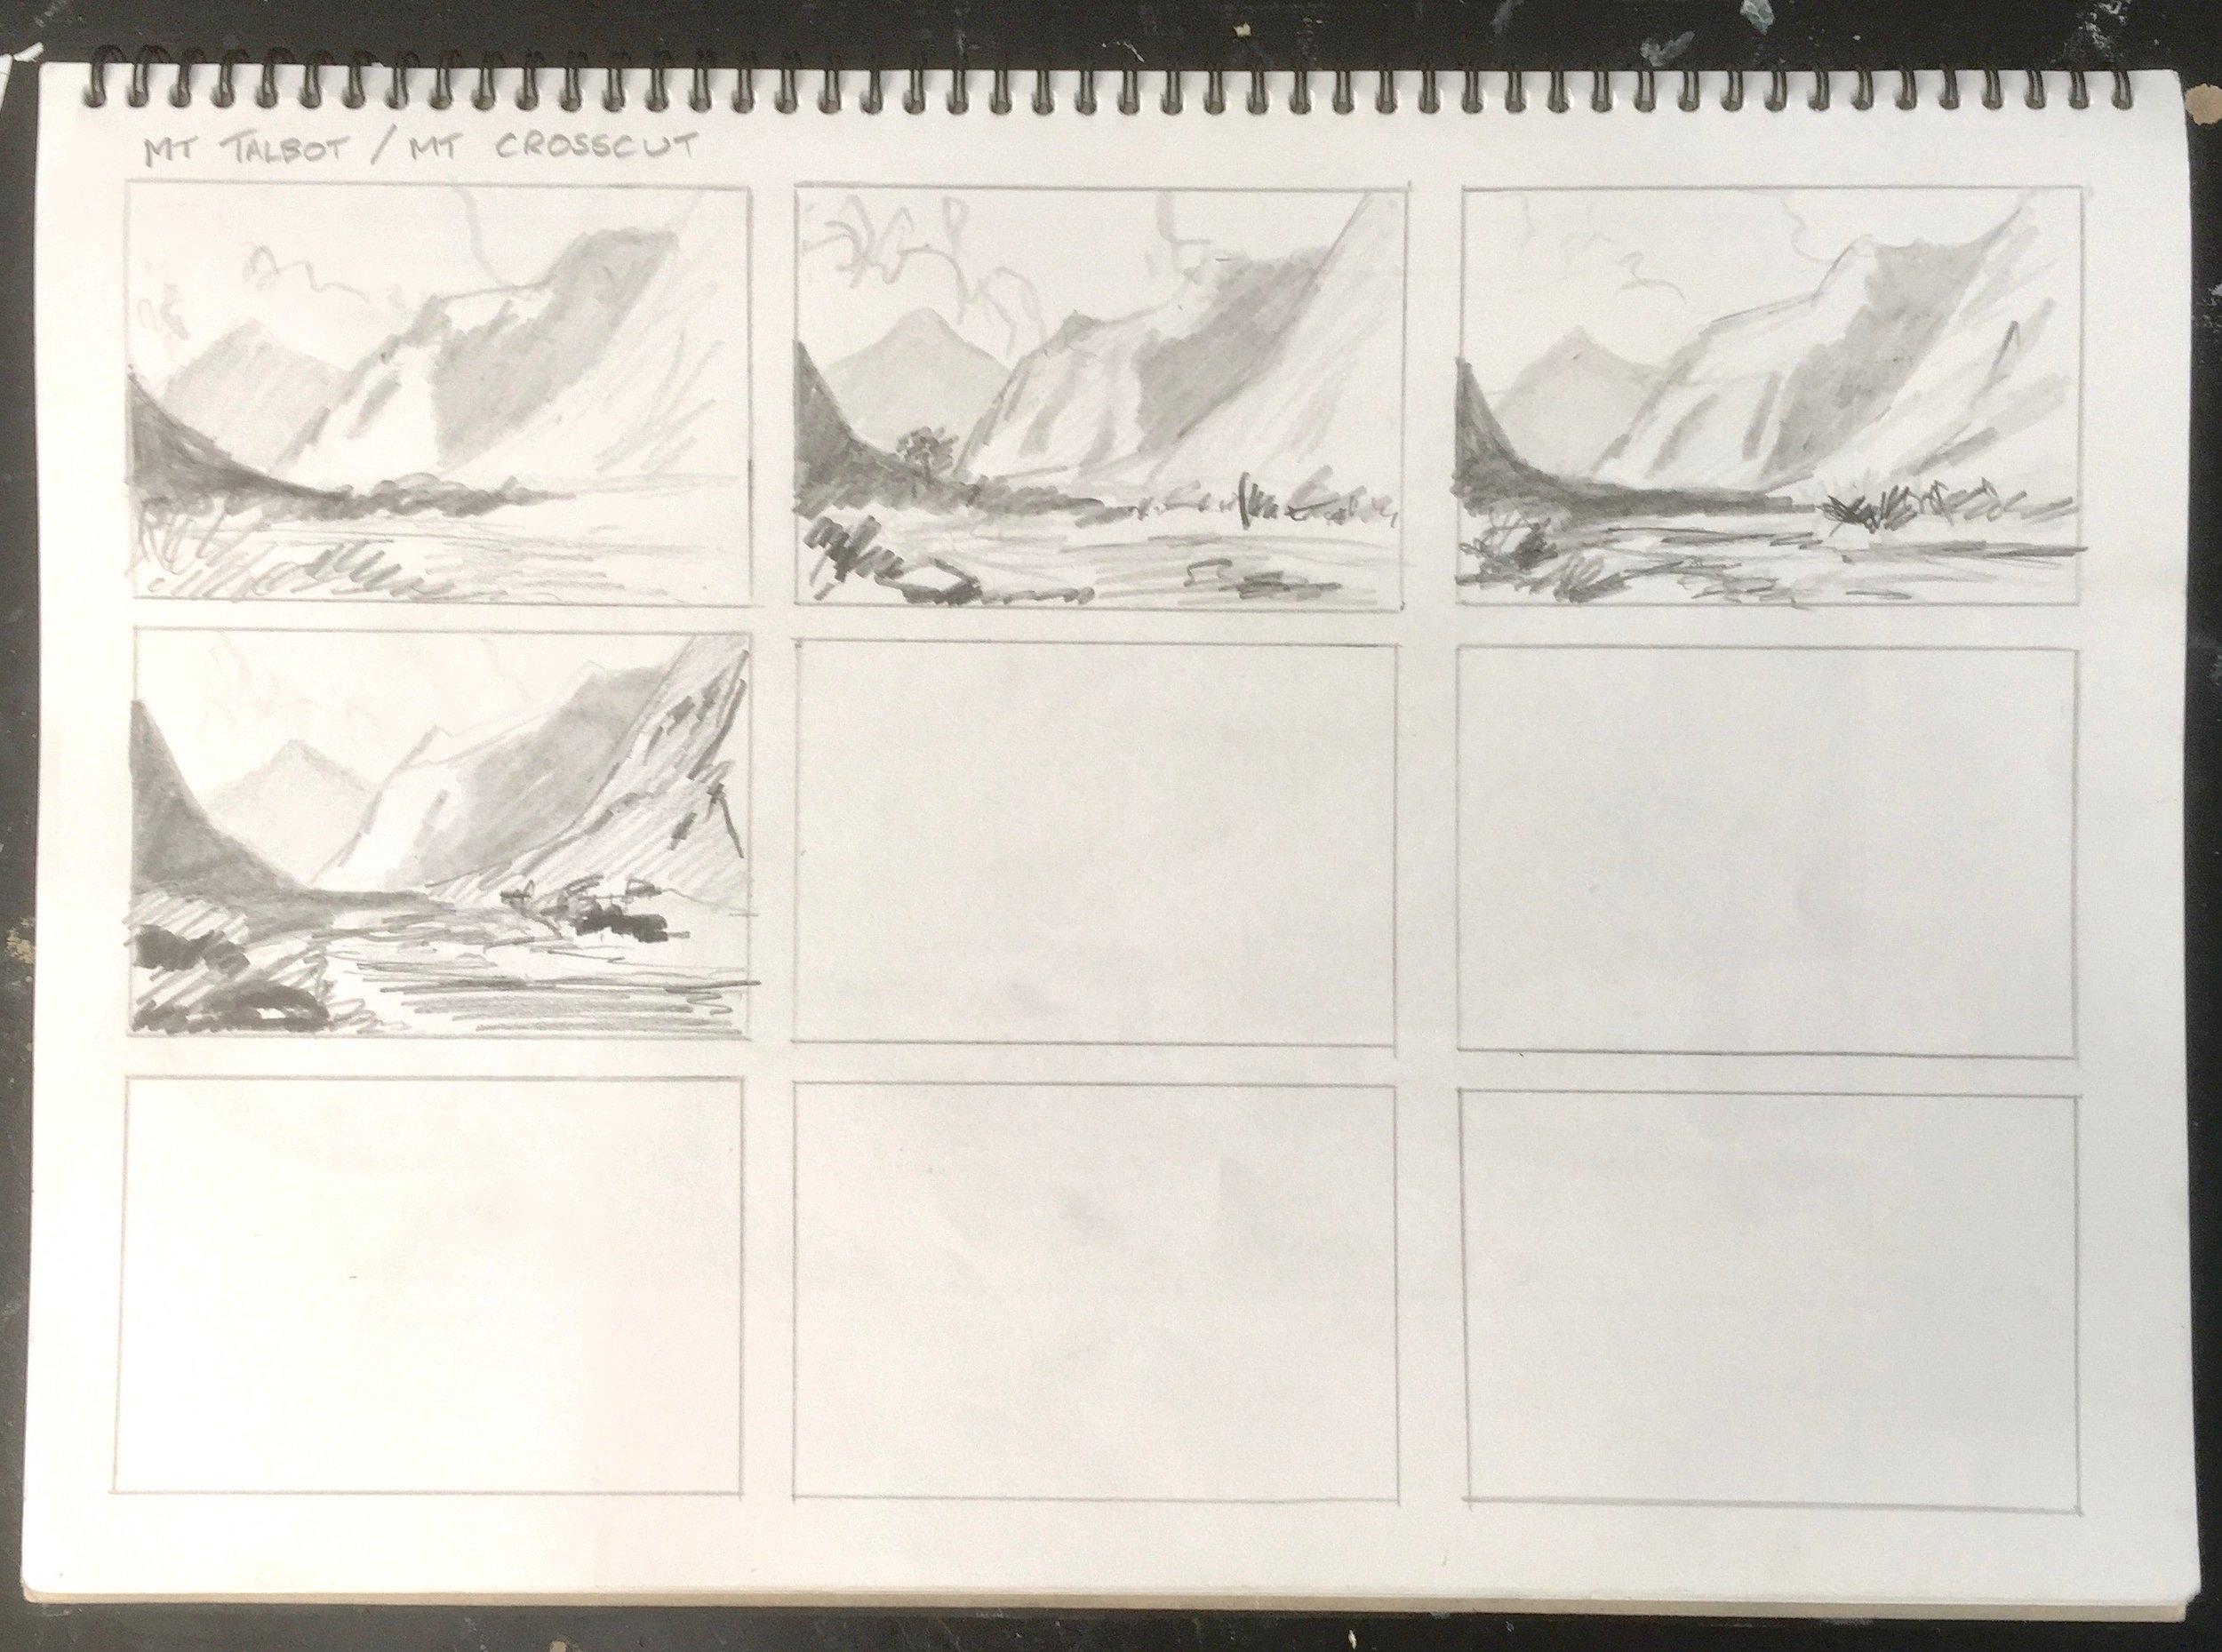
Once I have a rough idea of a composition I then continue with a final pencil sketch.
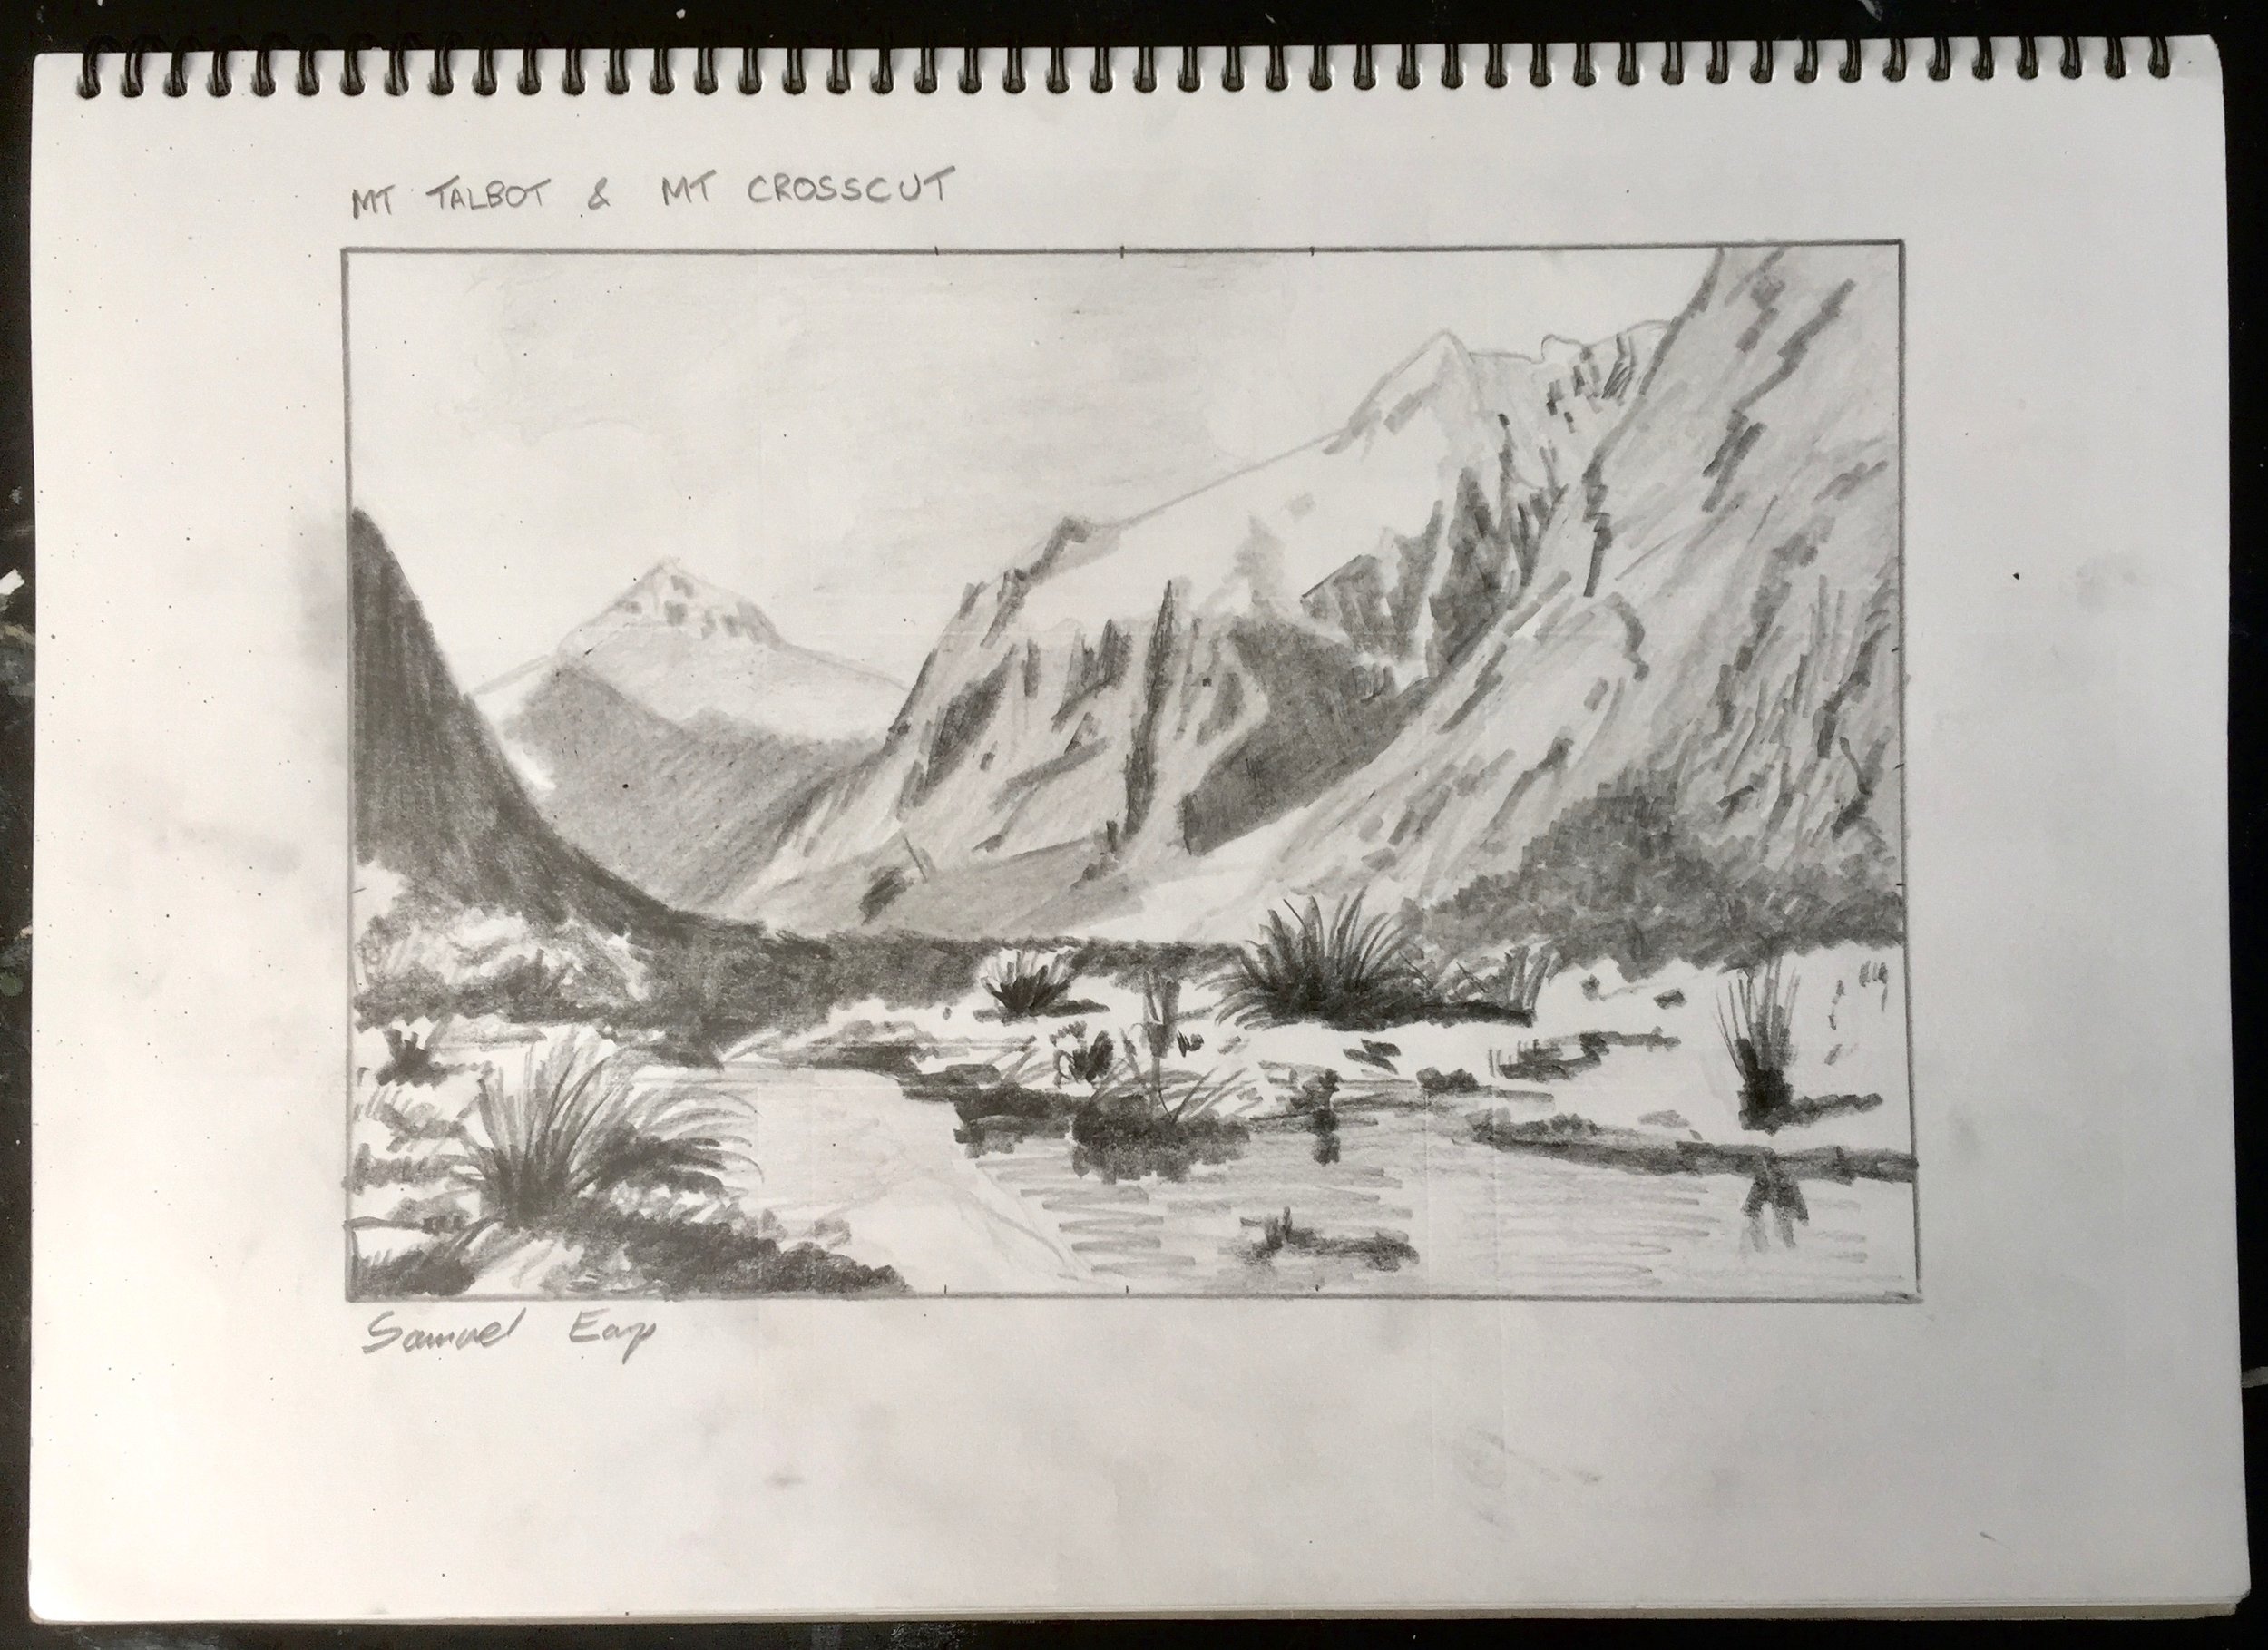
I use a range of graphite pencils including 4H, 2H, HB, 2B and 4B. I use hard pencils for such as the 4H and 2H for areas of my drawing with lighter tones. I use my softer pencils 2B and 4B for dark shadows.
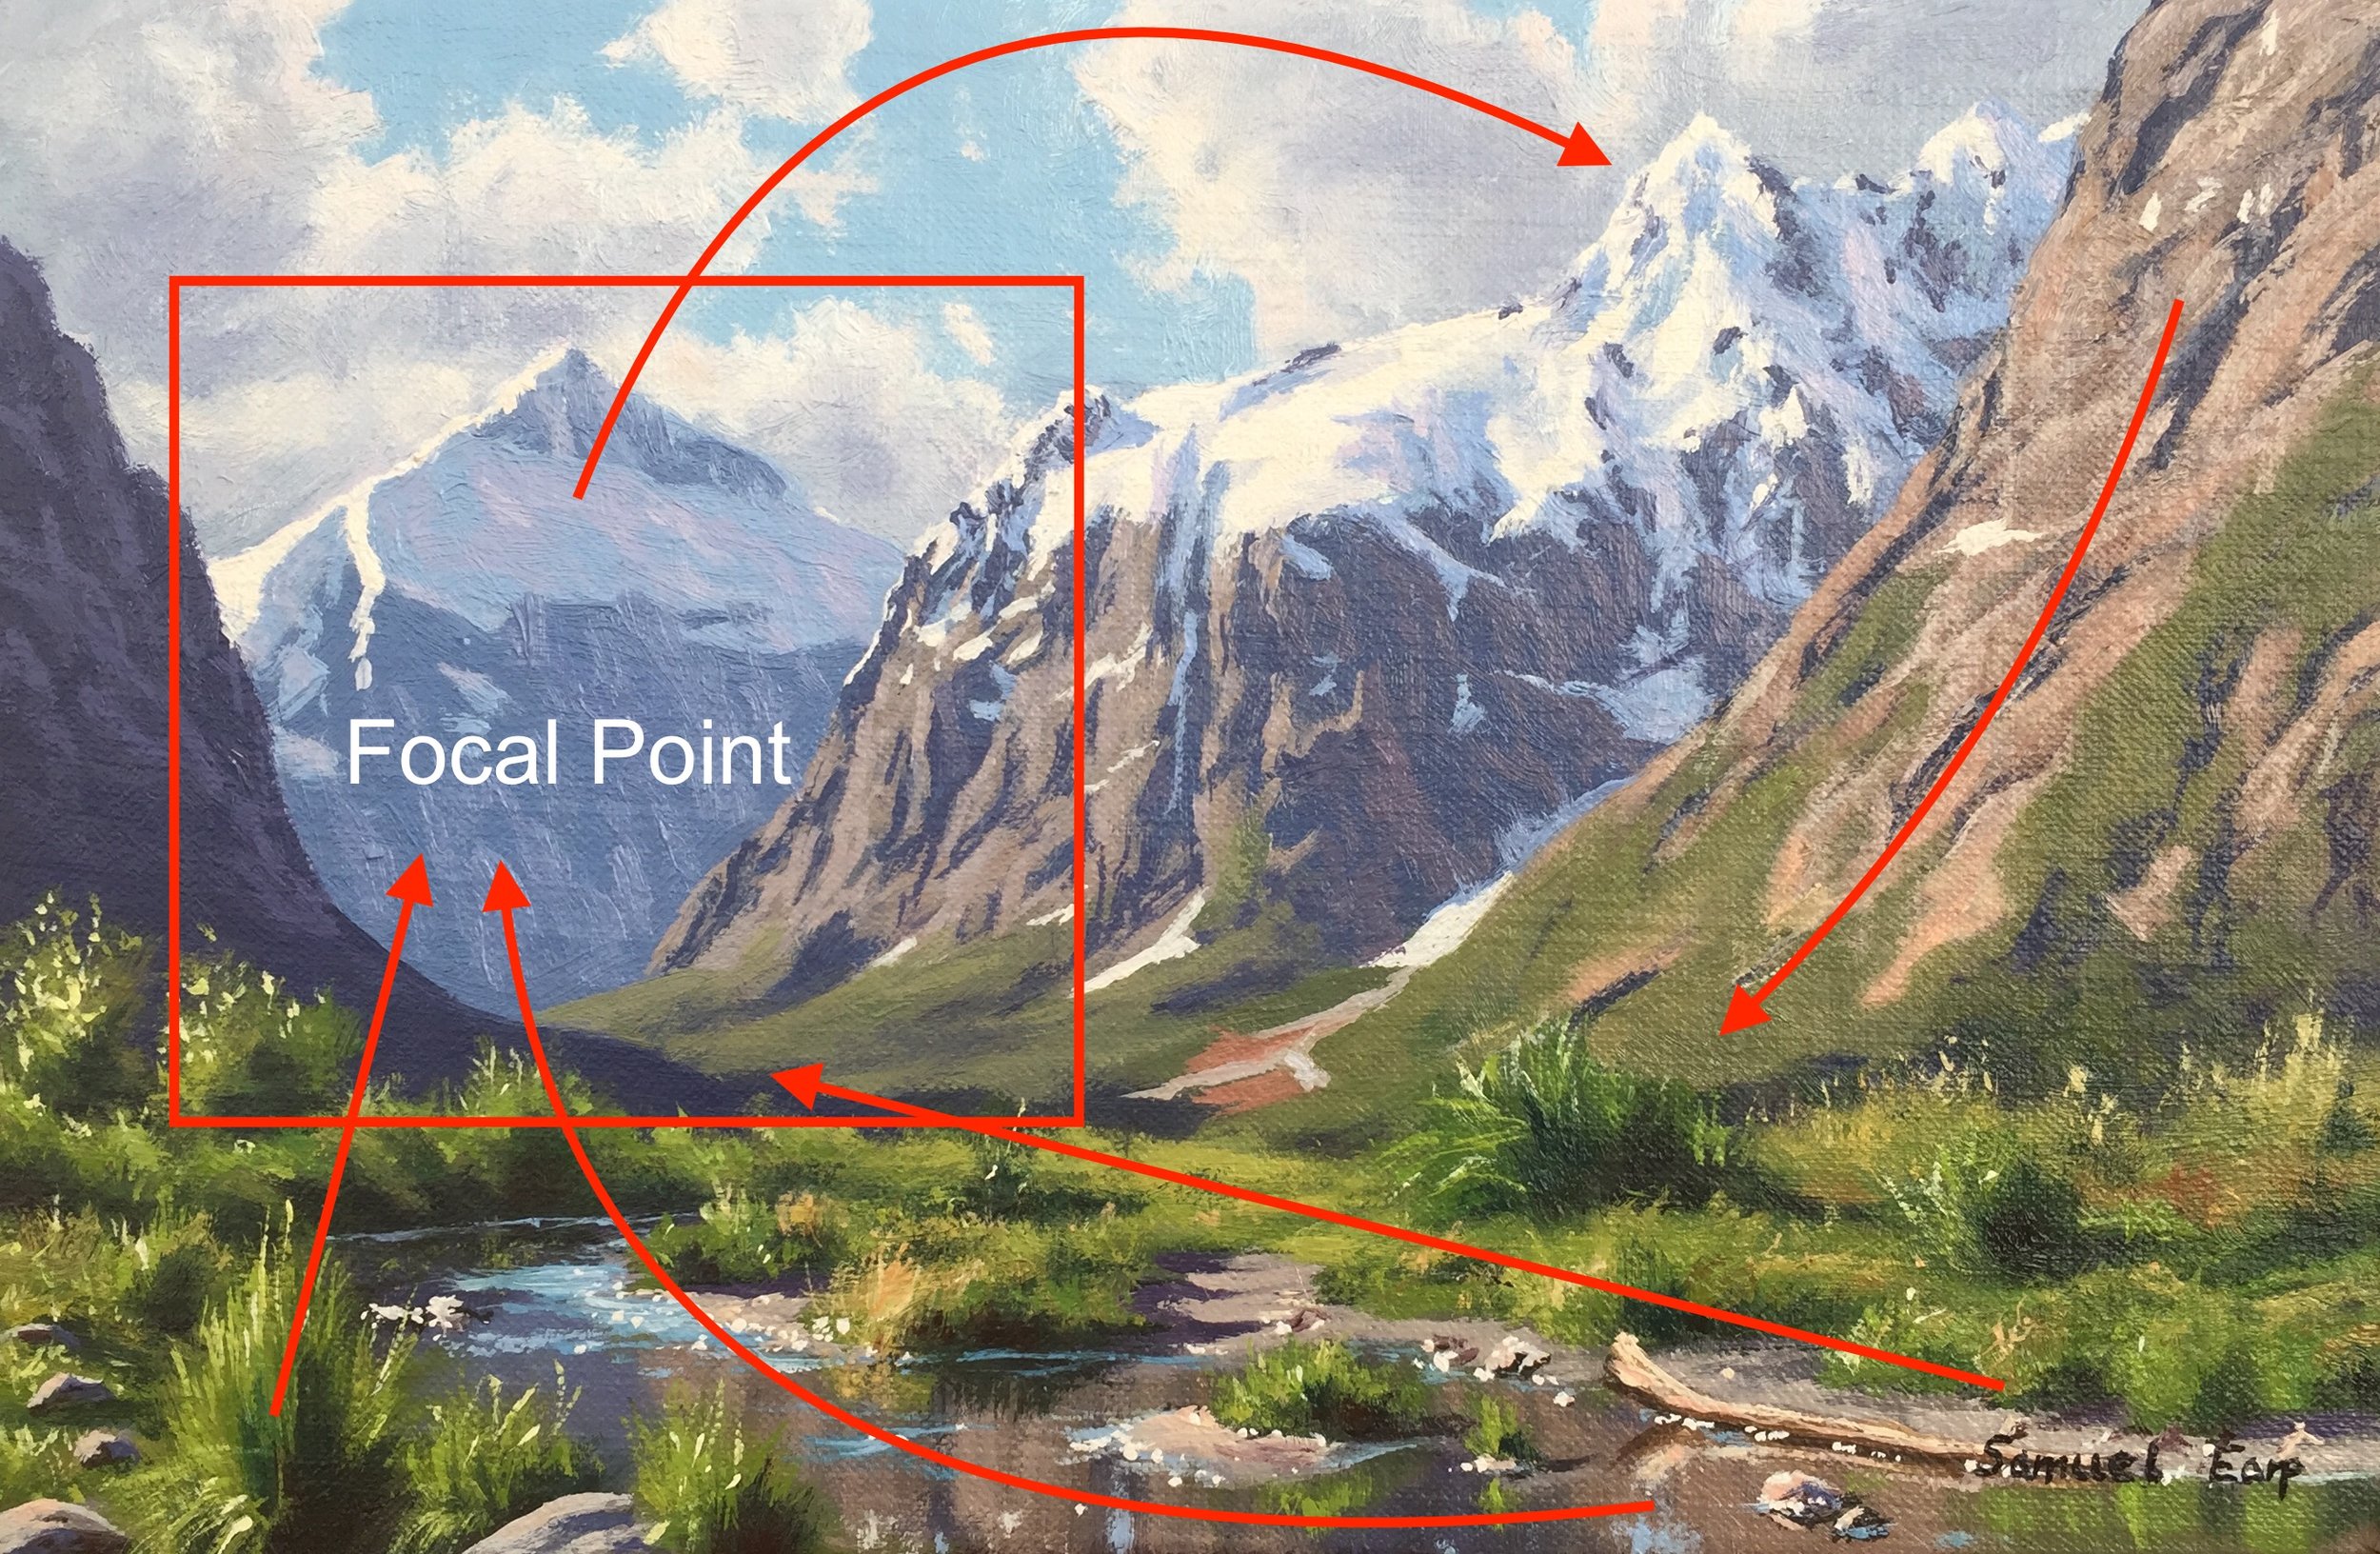
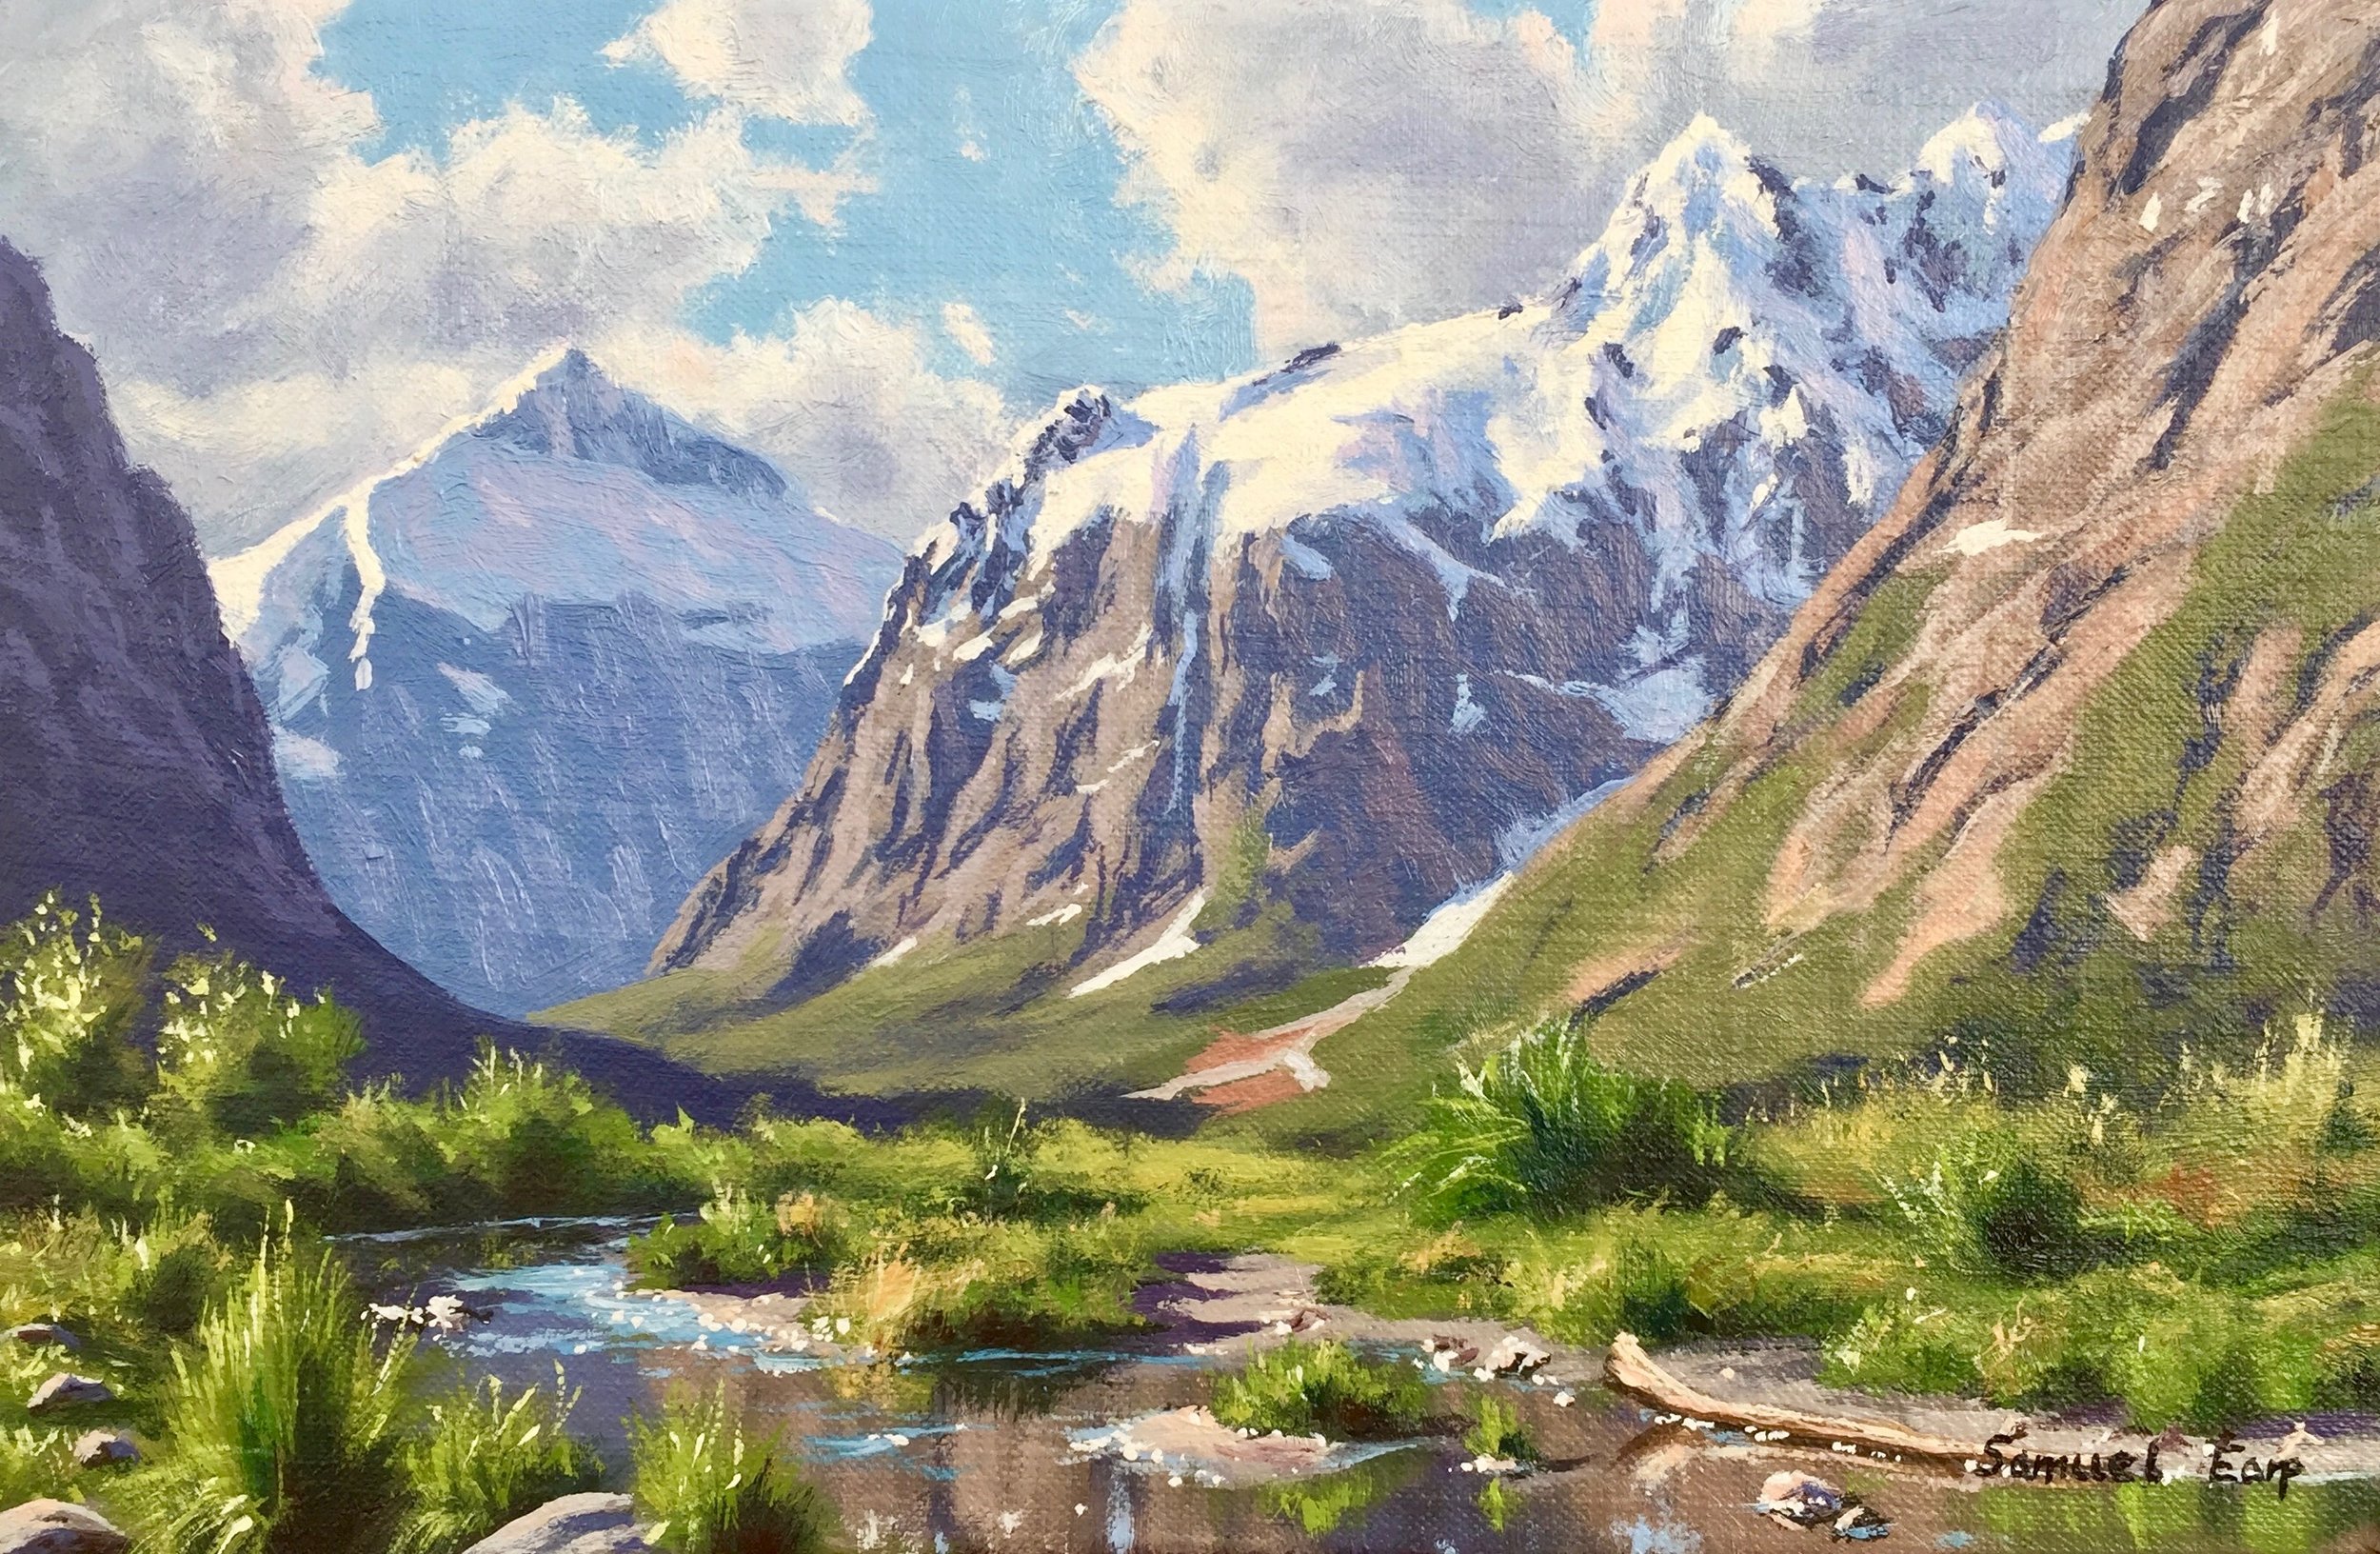
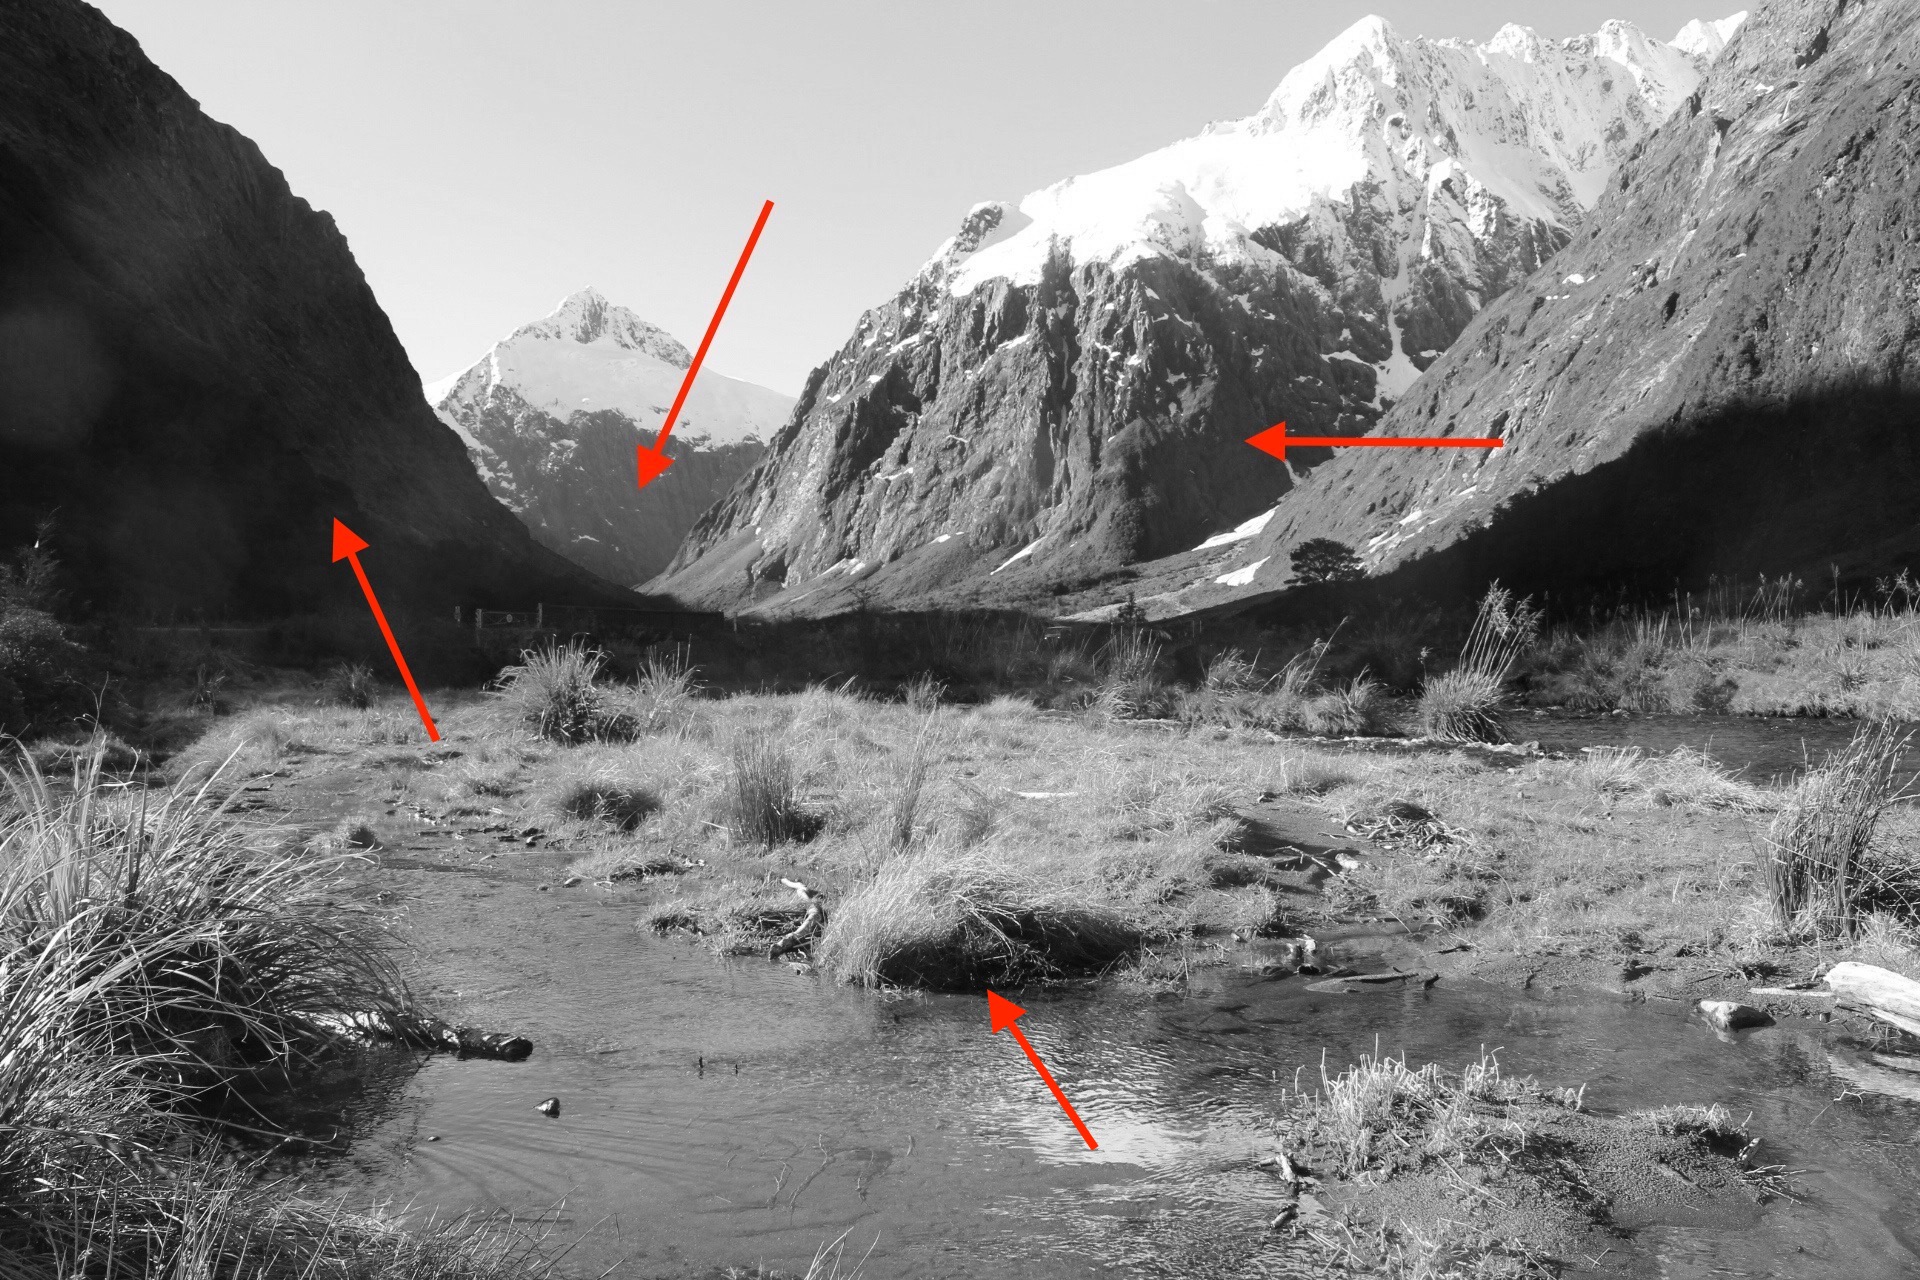
Mt Talbot which is the distant mountain within the red square is the focal point of the painting. The actual location itself is not too dissimilar to the composition in this painting so it didn’t require too many changes.
When painting a landscape it’s a good idea to establish a focal point in the painting. Your focal point should never ever be in the middle of your painting as it’s boring and distracting.
Having decided on where my centre of attention will be in the painting I then add other elements, forms and vectors to subtly lead the eye to the focal point. In this case, the direction of the stream and the log leads towards Mt Talbot. The direction of the clouds directs the eye to Mt Crosscut, the mountain in the mid-ground. The slope of the mountain on the right side of the painting leads the eye back towards the stream helping to keep the eye on the painting.
ARE YOU STRUGGLING WITH YOUR PAINTING?
JOIN MY ONLINE ART SCHOOL AND UNLEASH YOUR INNER ARTIST.
- Step-by-Step Painting Tutorials
- Helpful Tips and Techniques
- In-depth lesson notes
- Inspiring reference photos
- Instant access to all content, including videos, lesson notes, reference photos and more.
- A vibrant and friendly community, meet other members, ask questions, and share your art.
- Zoom meetings for Q&A’s, painting critiques and painting livestreams.
- Ideal for beginners and experienced painters.
- Lots of inspiration, help and support to take your painting skills to the next level.
MY COLOUR PALETTE
I am using oils and I’m using the following colours:
- Titanium white
- Cadmium yellow
- Cadmium yellow deep
- Yellow oxide
- Burnt Sienna
- Burnt Umber
- Cadmium red light
- Quinacridone magenta
- Ultramarine blue
- Cobalt blue
- Cobalt teal
- Pthalo green
Artists!!! Are you needing oil paints but need help figuring out where to start?
Are you a beginner painter or a professional artist looking to try using oil paints or switch to a different brand but need help deciding which brand to choose?
Then look no further. Check out this guide to the best oil paints on the market.
Whether you’re an aspiring artist or a seasoned painter, this blog post is your ultimate resource. Click the button below.
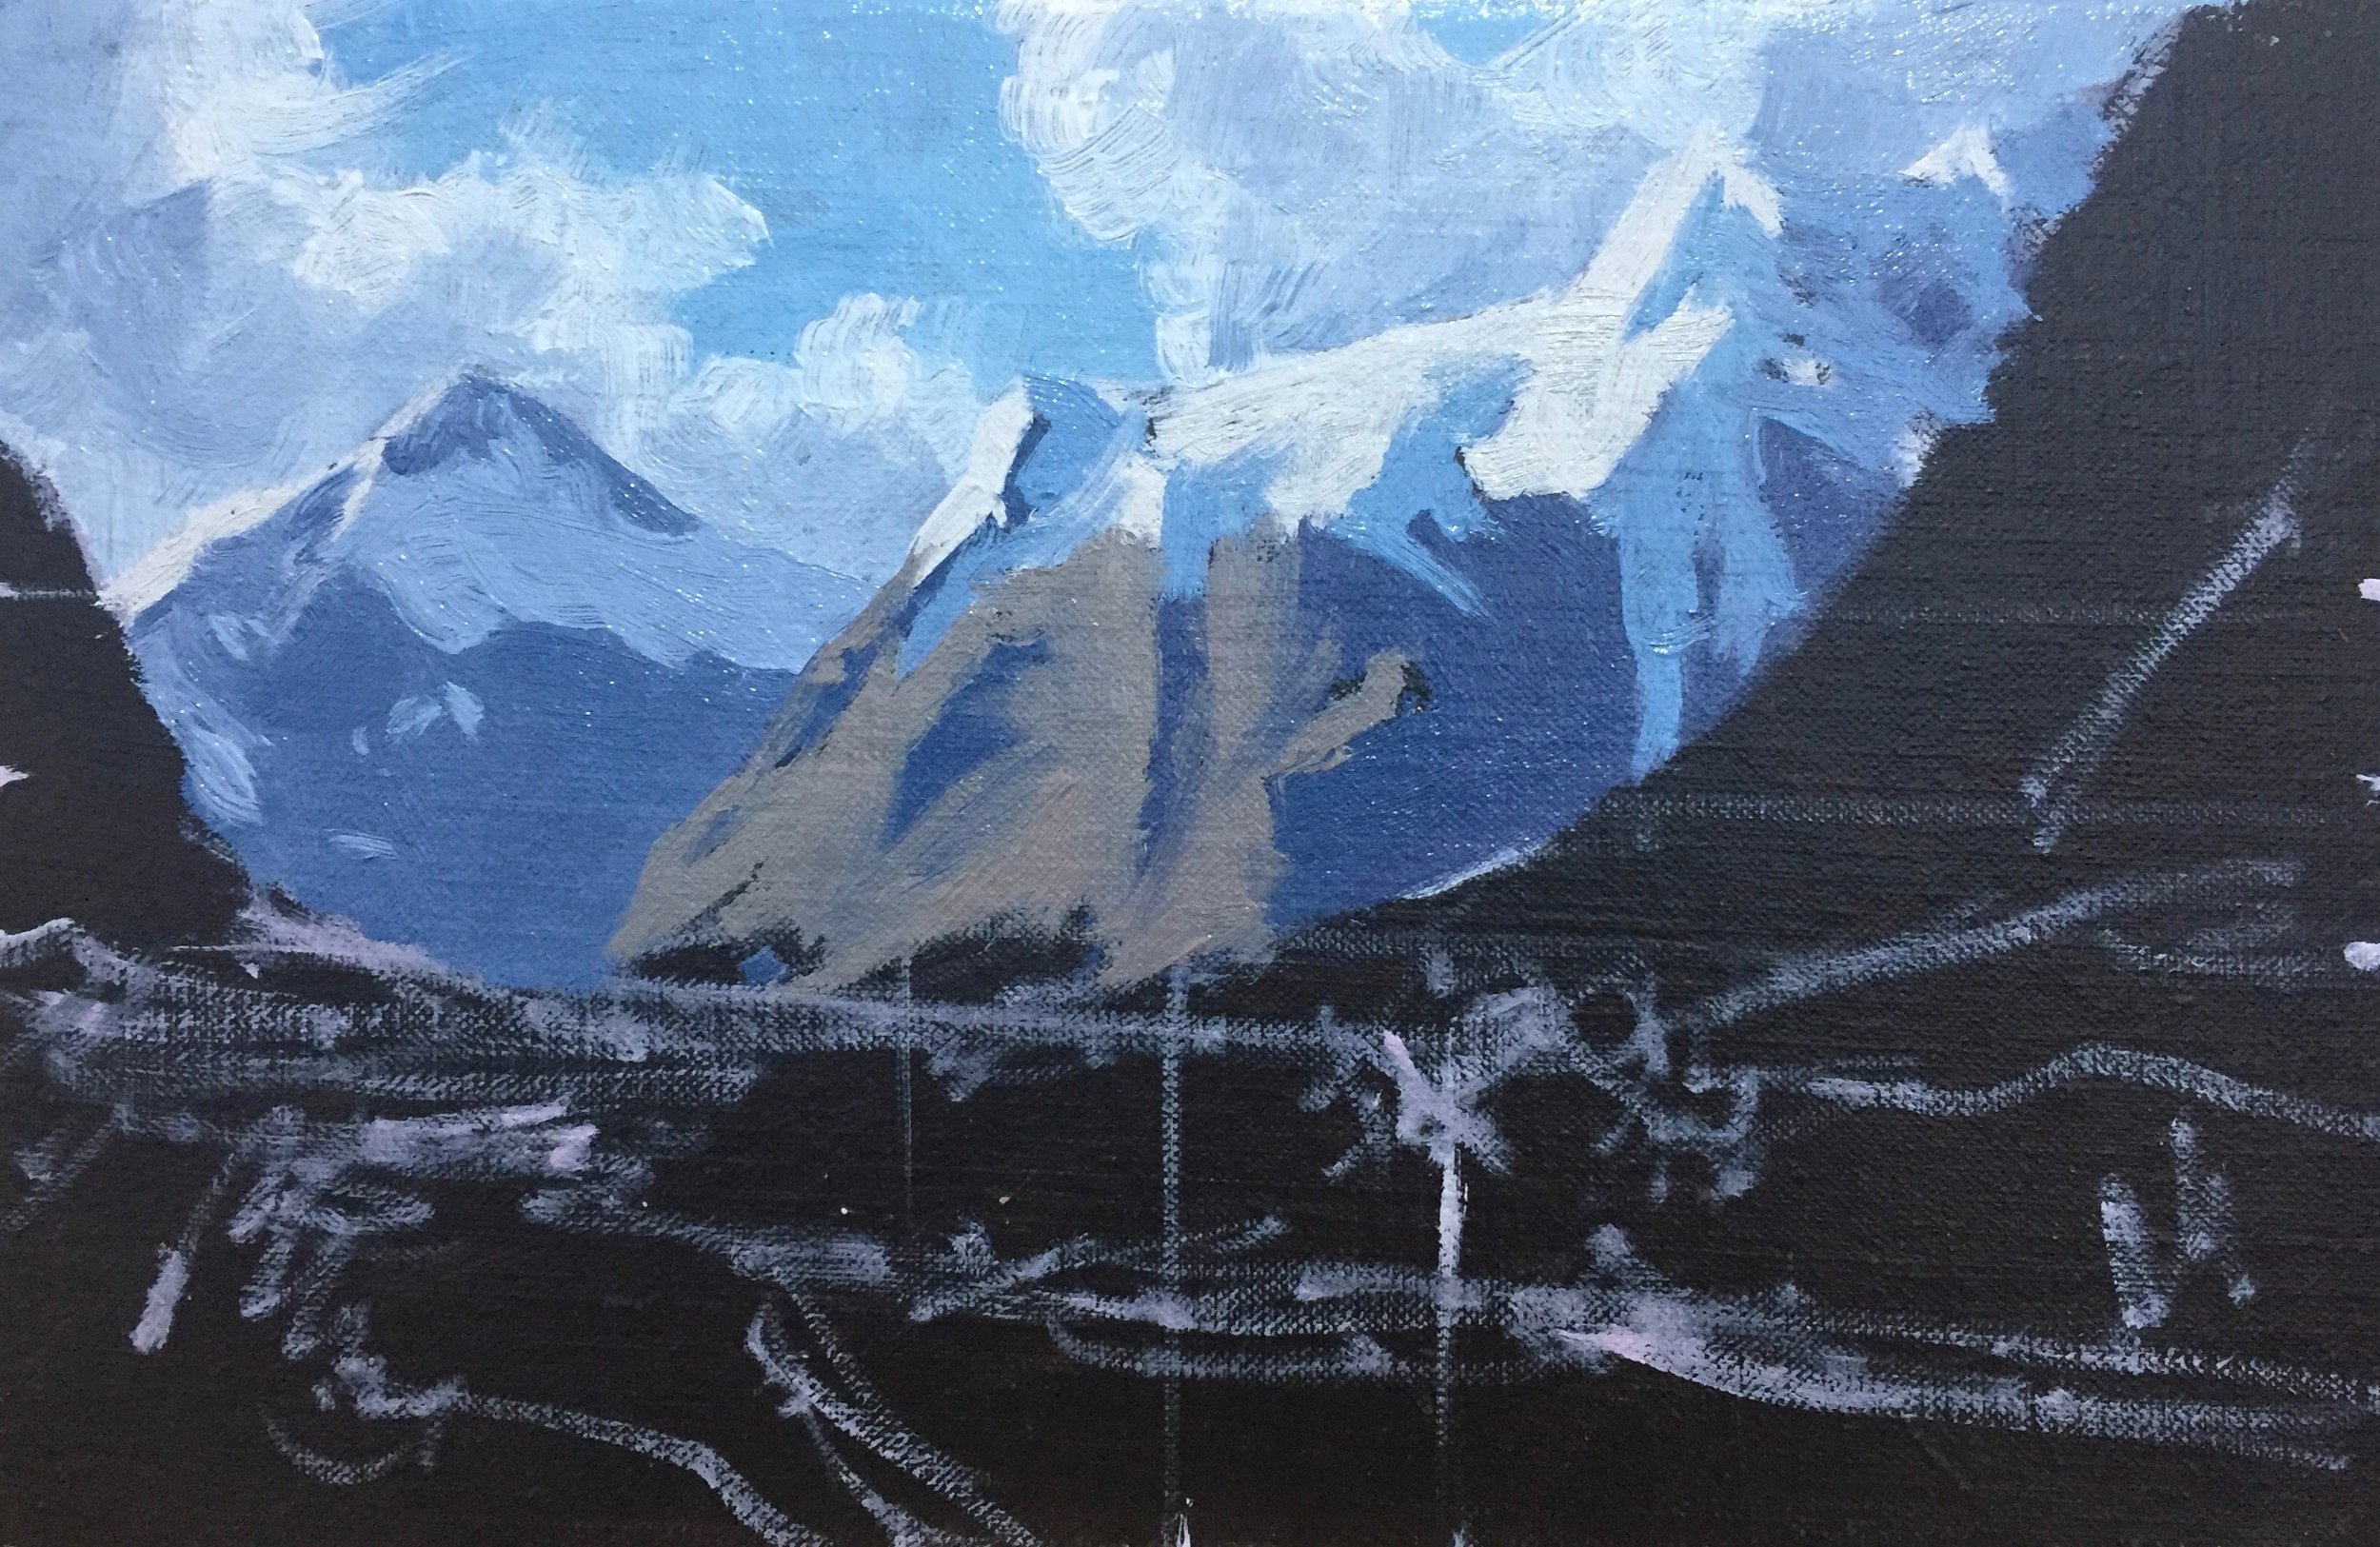
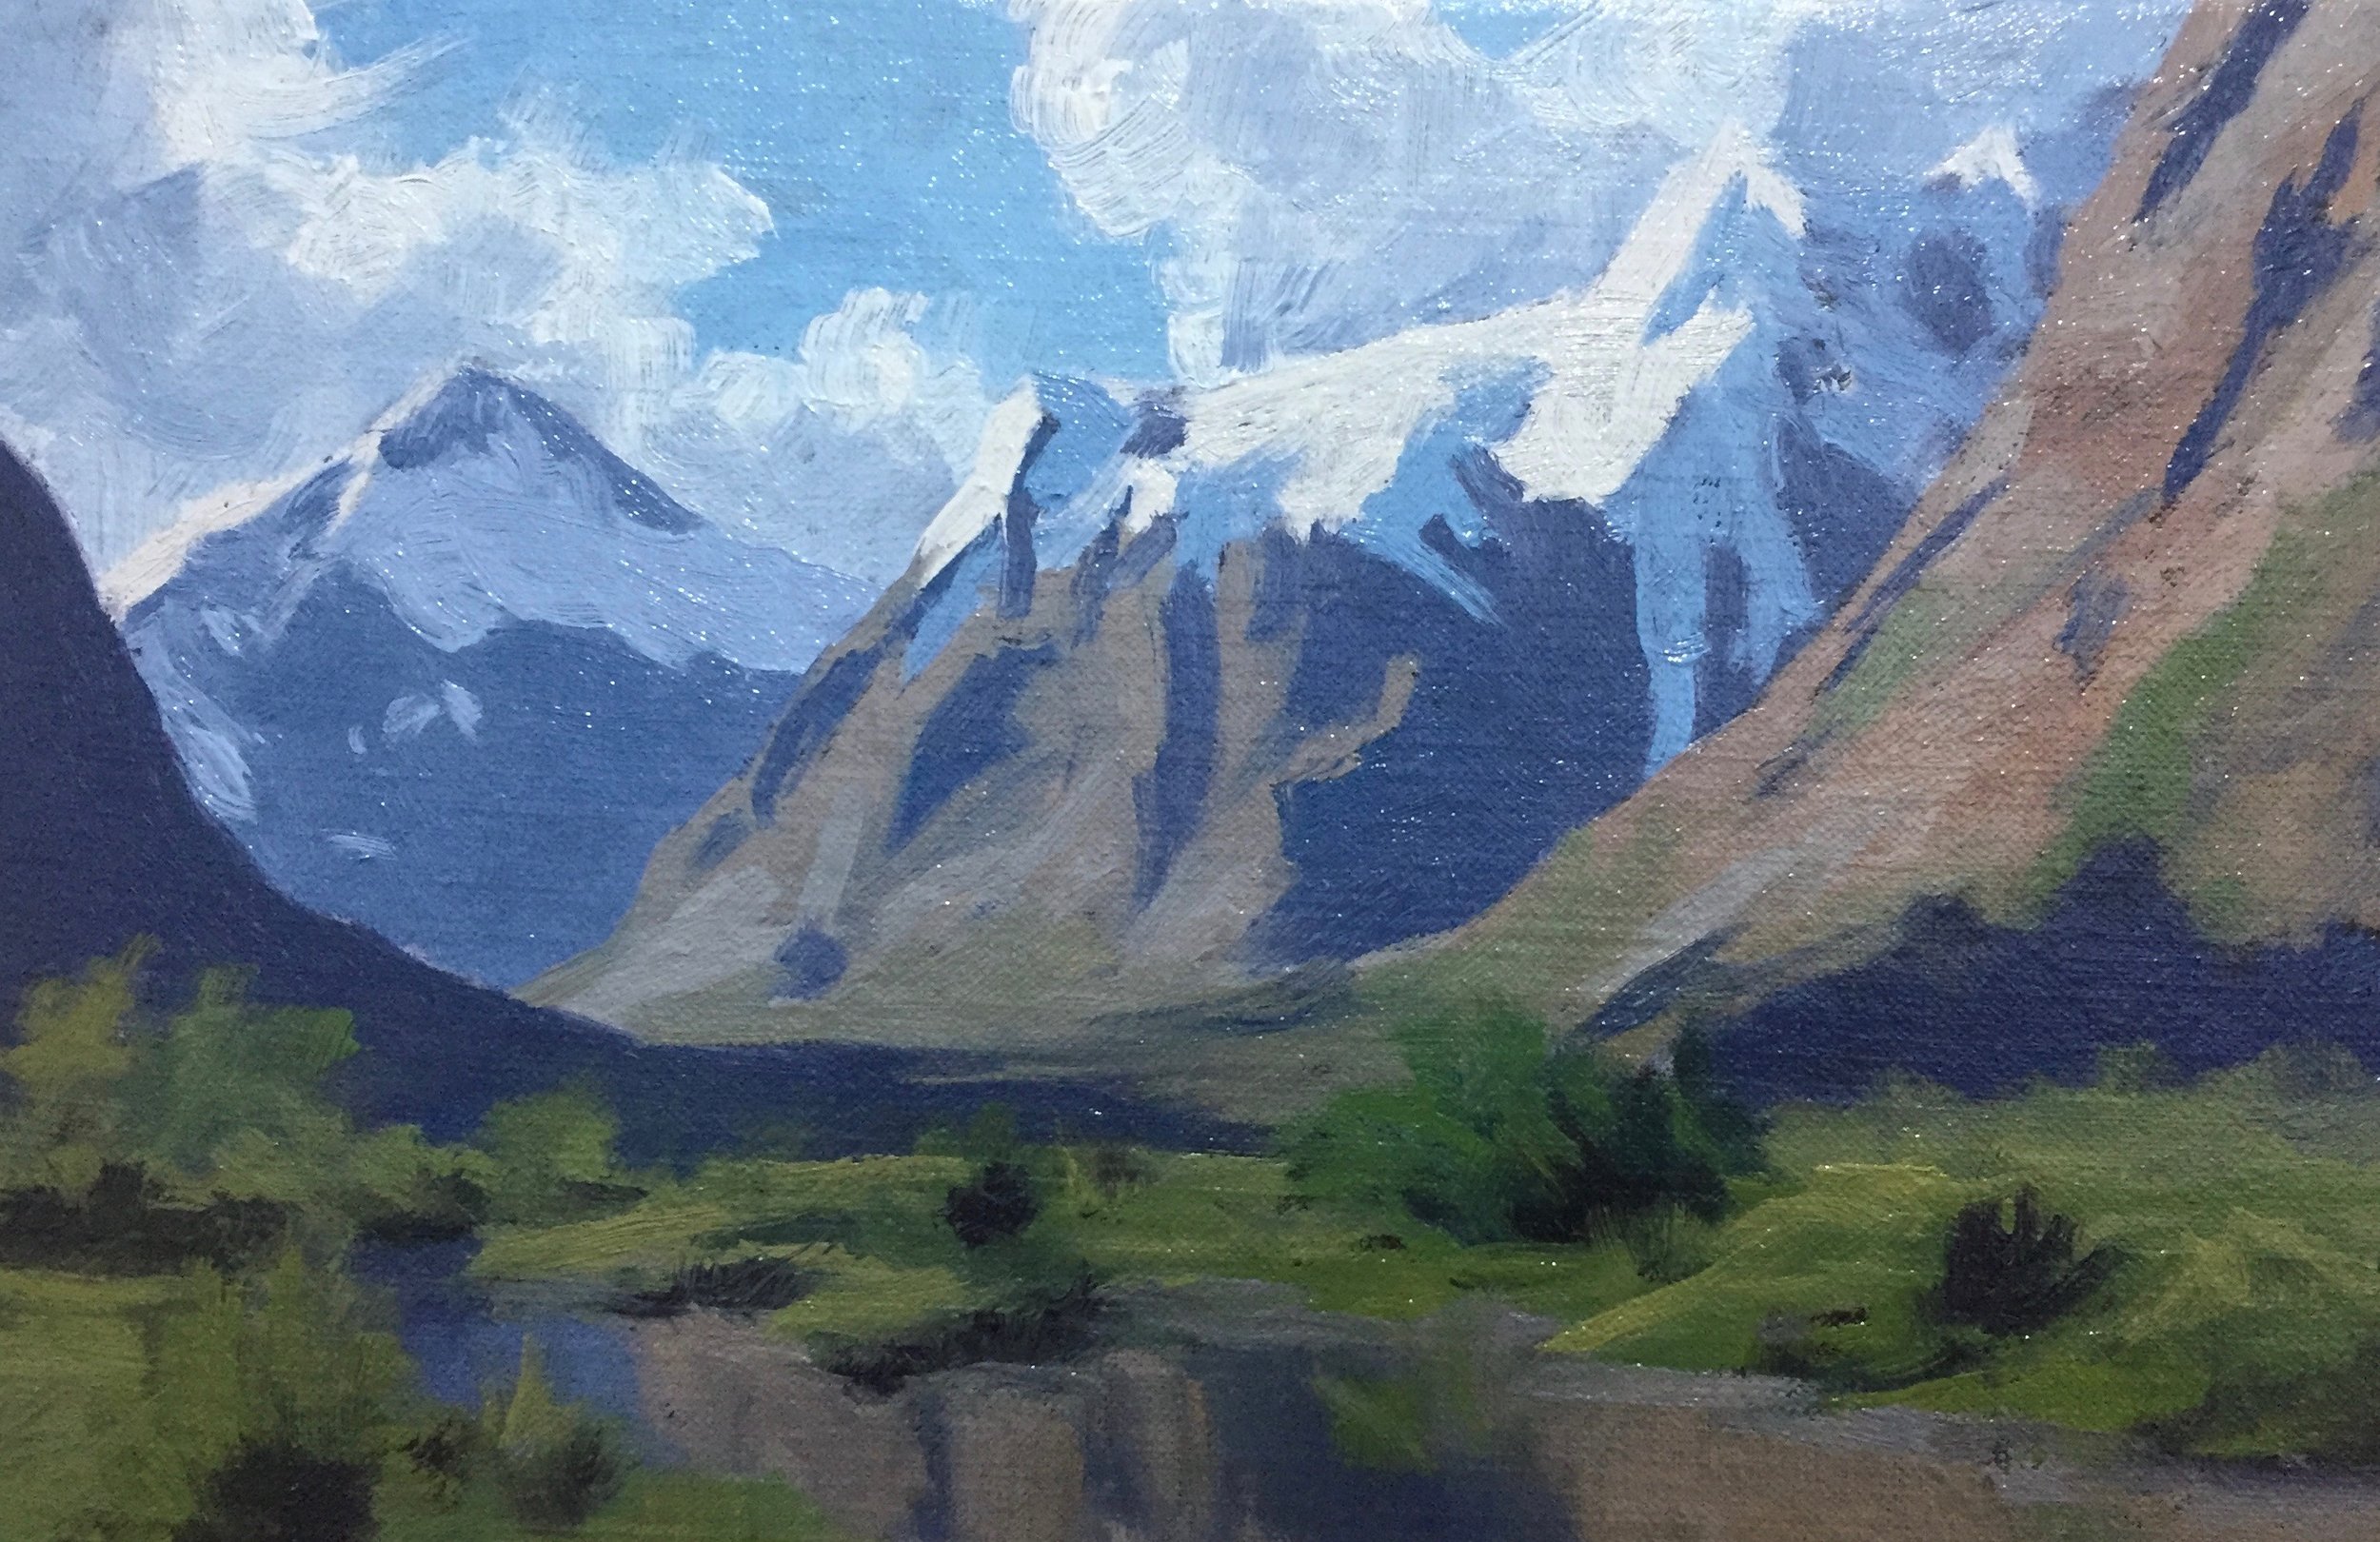
STAGE 2 – BLOCKING IN THE PAINTING

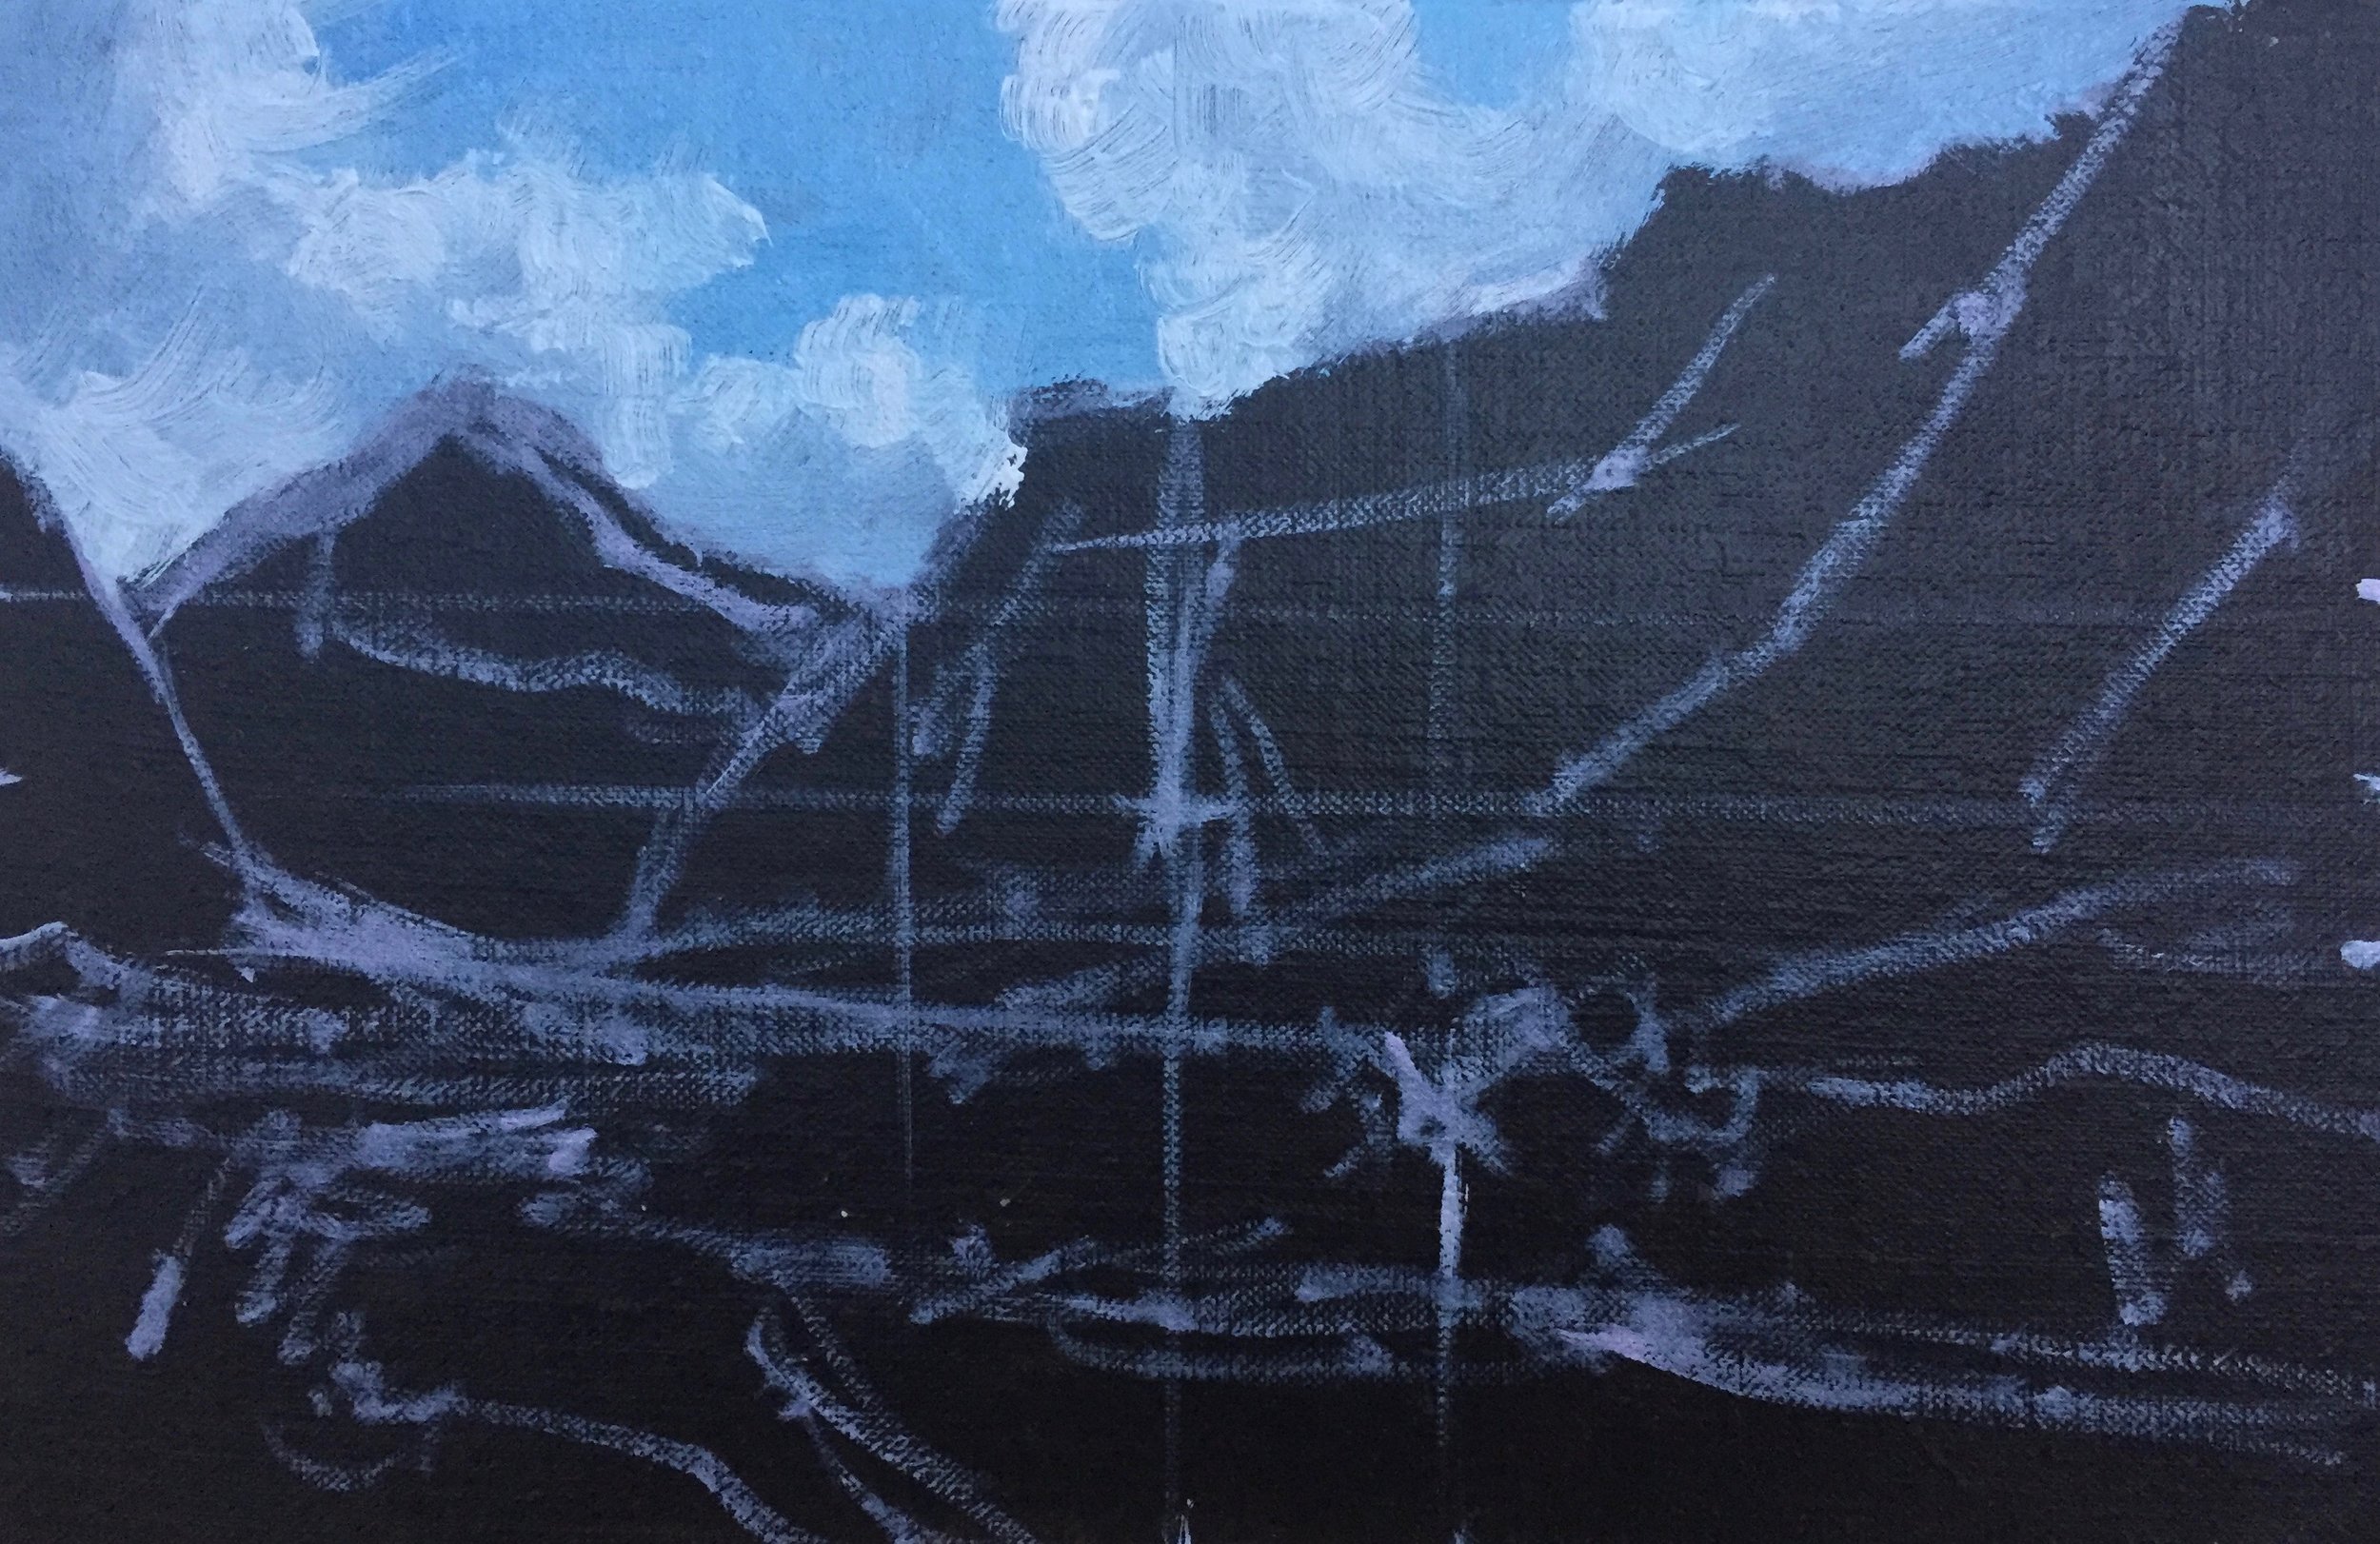
I start with my canvas panel which I prepared with a layer of ultramarine blue mixed with burnt umber. This creates a near black but it means my colours will jump out at me when I start painting this art work and it won’t have a distorting effect on the colours which can occur when painting on a white surface.
I sketch out the scene using titanium white mixed with a little quinacridone magenta and Liquin Original.
Once I have sketched out the scene I start with the thing that is furthest away in the painting, the sky. I mix the sky with cobalt blue, cobalt teal and titanium white.
I mix the colours for the clouds with ultramarine blue, burnt umber, and quinacridone magenta to give the clouds a little violet tint and titanium white.
For the highlights of the clouds, I use pure titanium white as I know it’ll mix with my shadow colours and that I’ll be returning to it later on in the painting.
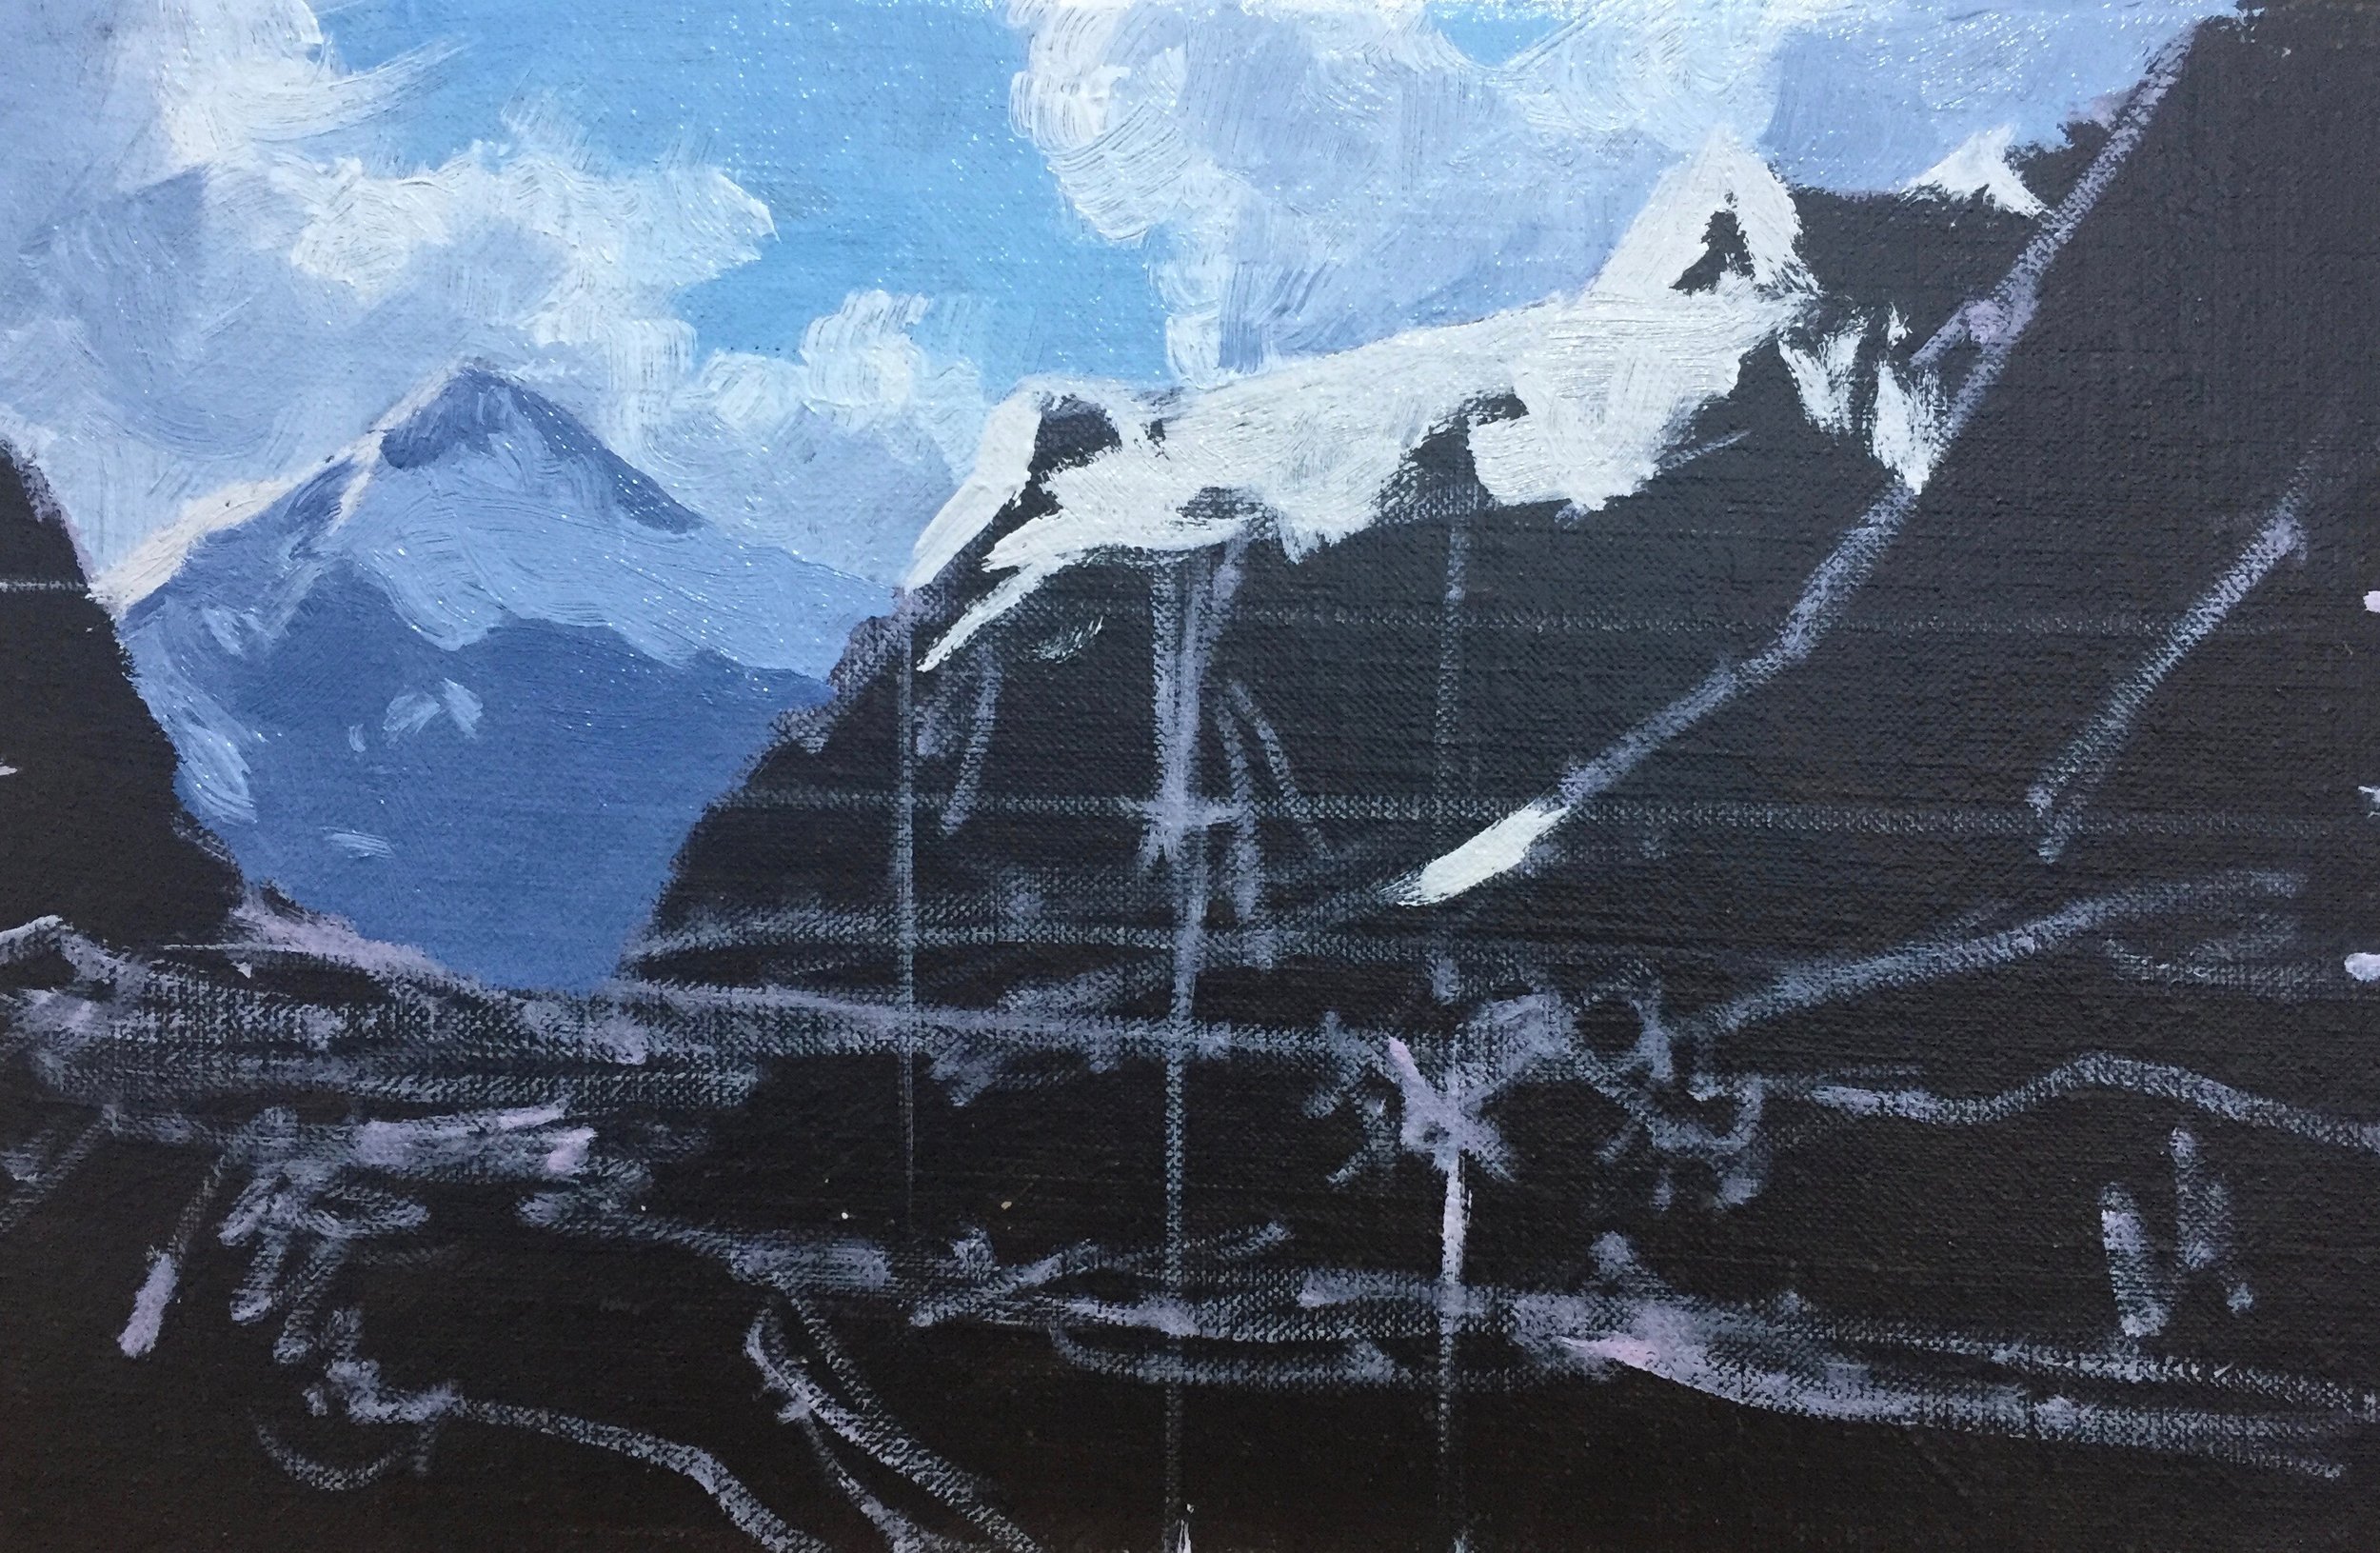
I start painting Mt Talbot the distant mountain and you may be wondering, how do we make our distant mountains and clouds look further away, whilst at the same time making our mid-ground mountains look closer to the viewer?
Well, this all comes down to our use of tone in which the primary elements are dark, light and mid tones. If we take our reference photo and switch it to black and white and then imagine a scale with dark and one end and light at the other, then this photo contains lots of lights, darks and mid-tone
So if we have a look at the shadow in Mt Talbot the distant mountain it is tonally lighter than the shadow in Mt Crosscut the mountain in the mid-ground. The shadow in Mt Crosscut is tonally lighter than the next tier of mountains until we get to the foreground in the grass for example which are virtually black.
This is because when landforms, objects etc recede the difference between light and dark is much smaller, darks are not quite dark and lights are not quite light and often fall into the light to mid-tone area of the tonal scale.
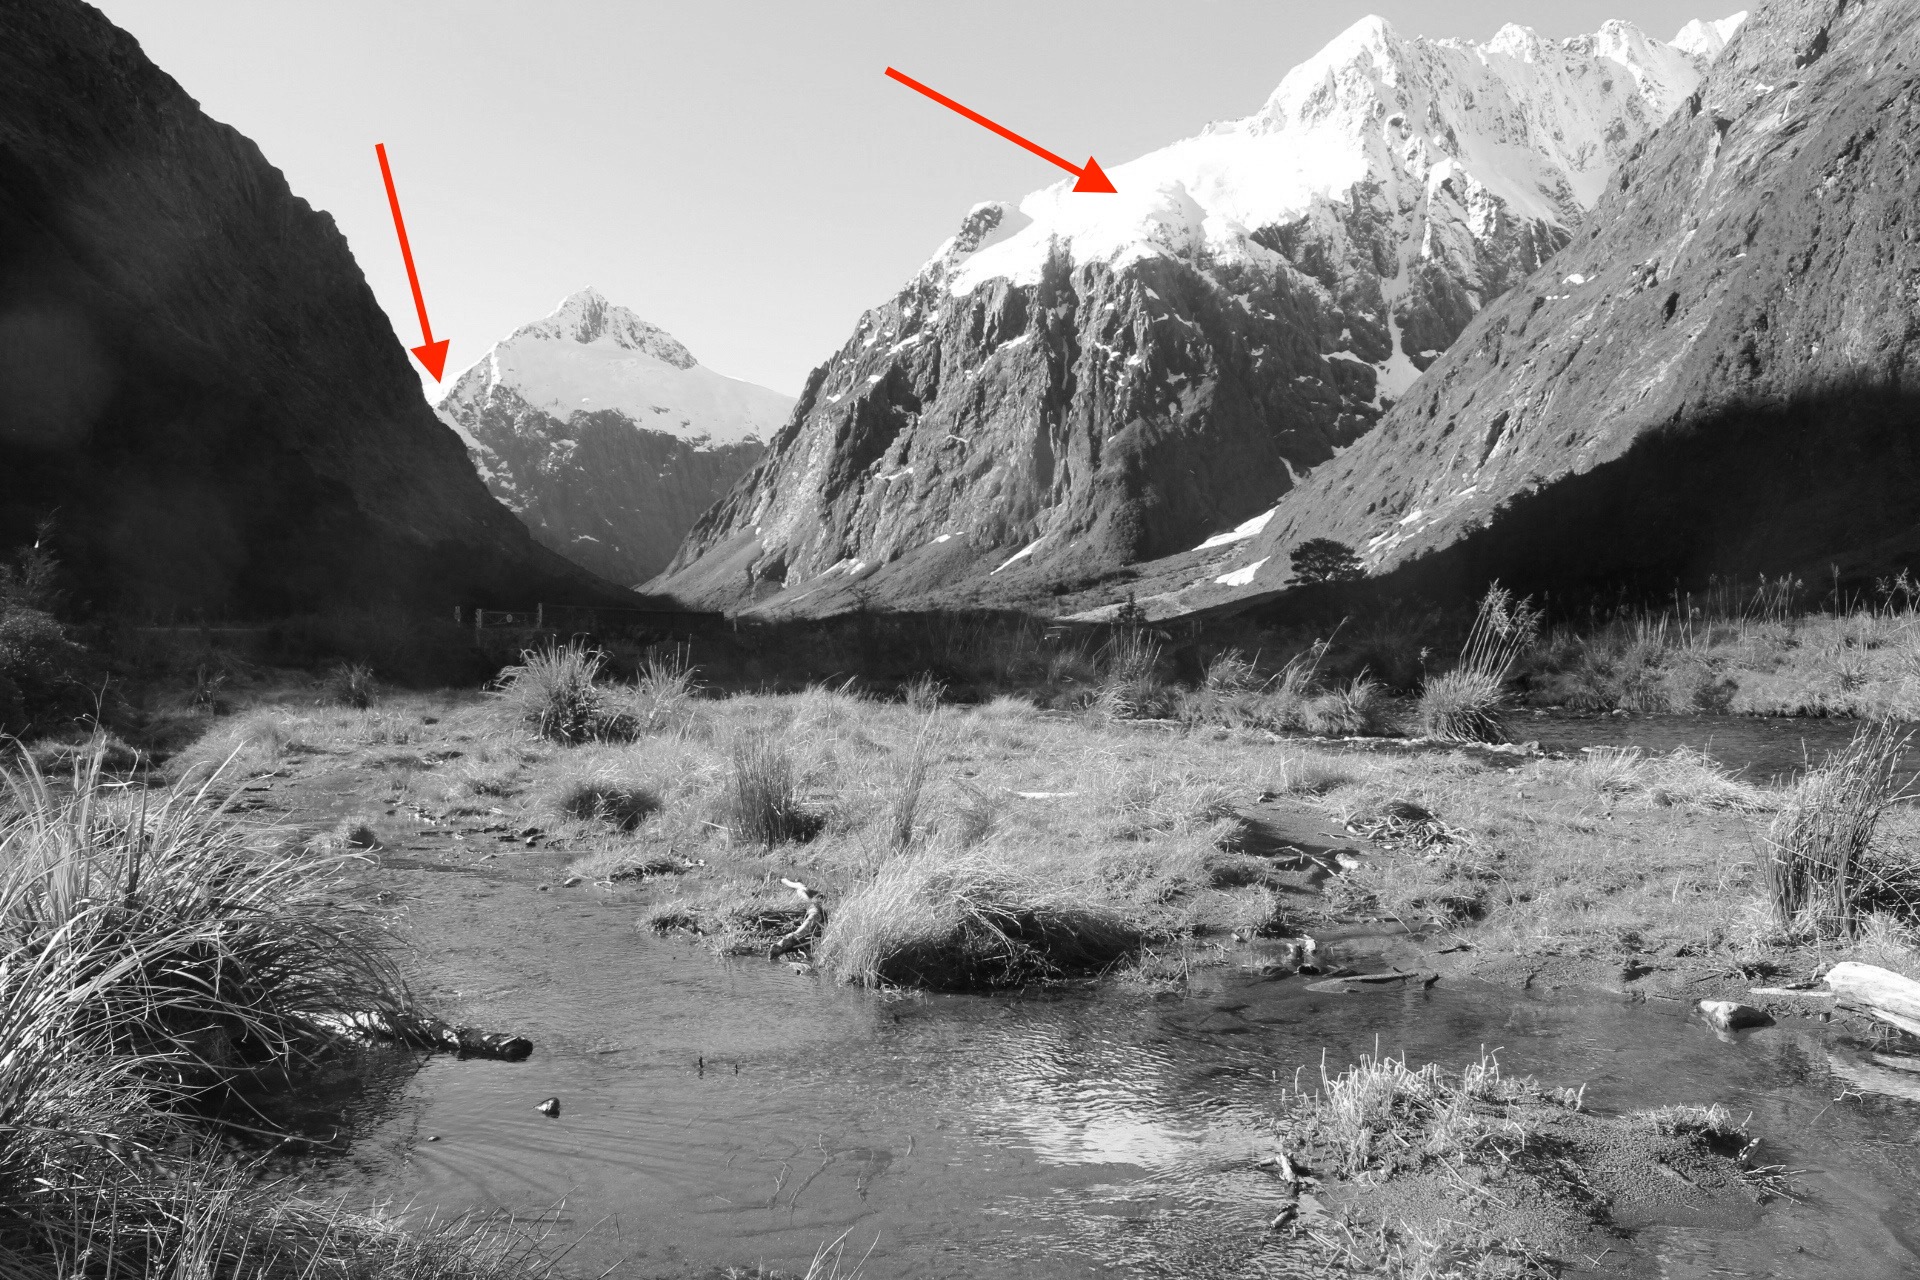
If we look at the snow on Mt Talbot it’s tonally slightly darker than the snow on Mt Crosscut which is lighter and this is because Mt Crosscut is closer to the viewer than Mt Talbot.
If we can apply this principle in our painting then we can achieve a much better sense of depth and perspective.
I mix the shadow of the mountain using ultramarine blue, burnt umber to reduce the saturation of the blue, quinacridone magenta which gives it a violet tint and a liberal amount of titanium white. These are the same colours I used in the clouds which helps to create colour harmony in the painting.
I use the same colour combination for the shadow of Mt Crosscut, the mountain in the mid-ground as I used for Mt Talbot but with a little less titanium white as the shadow becomes darker.
I block in the snow which where in the shadow I use ultramarine blue, cobalt blue and titanium white. If it’s too saturated I can knock it back with a little burnt umber.
The sunlit areas of the snow at this stage of the painting is not quite white as I want to save my lightest tones until the end of the painting, so I mix in a little of my cloud mix colours to darken the tone a little.
The sunlit face of Mt Crosscut was painted using burnt umber mixed with ultramarine blue and titanium white.
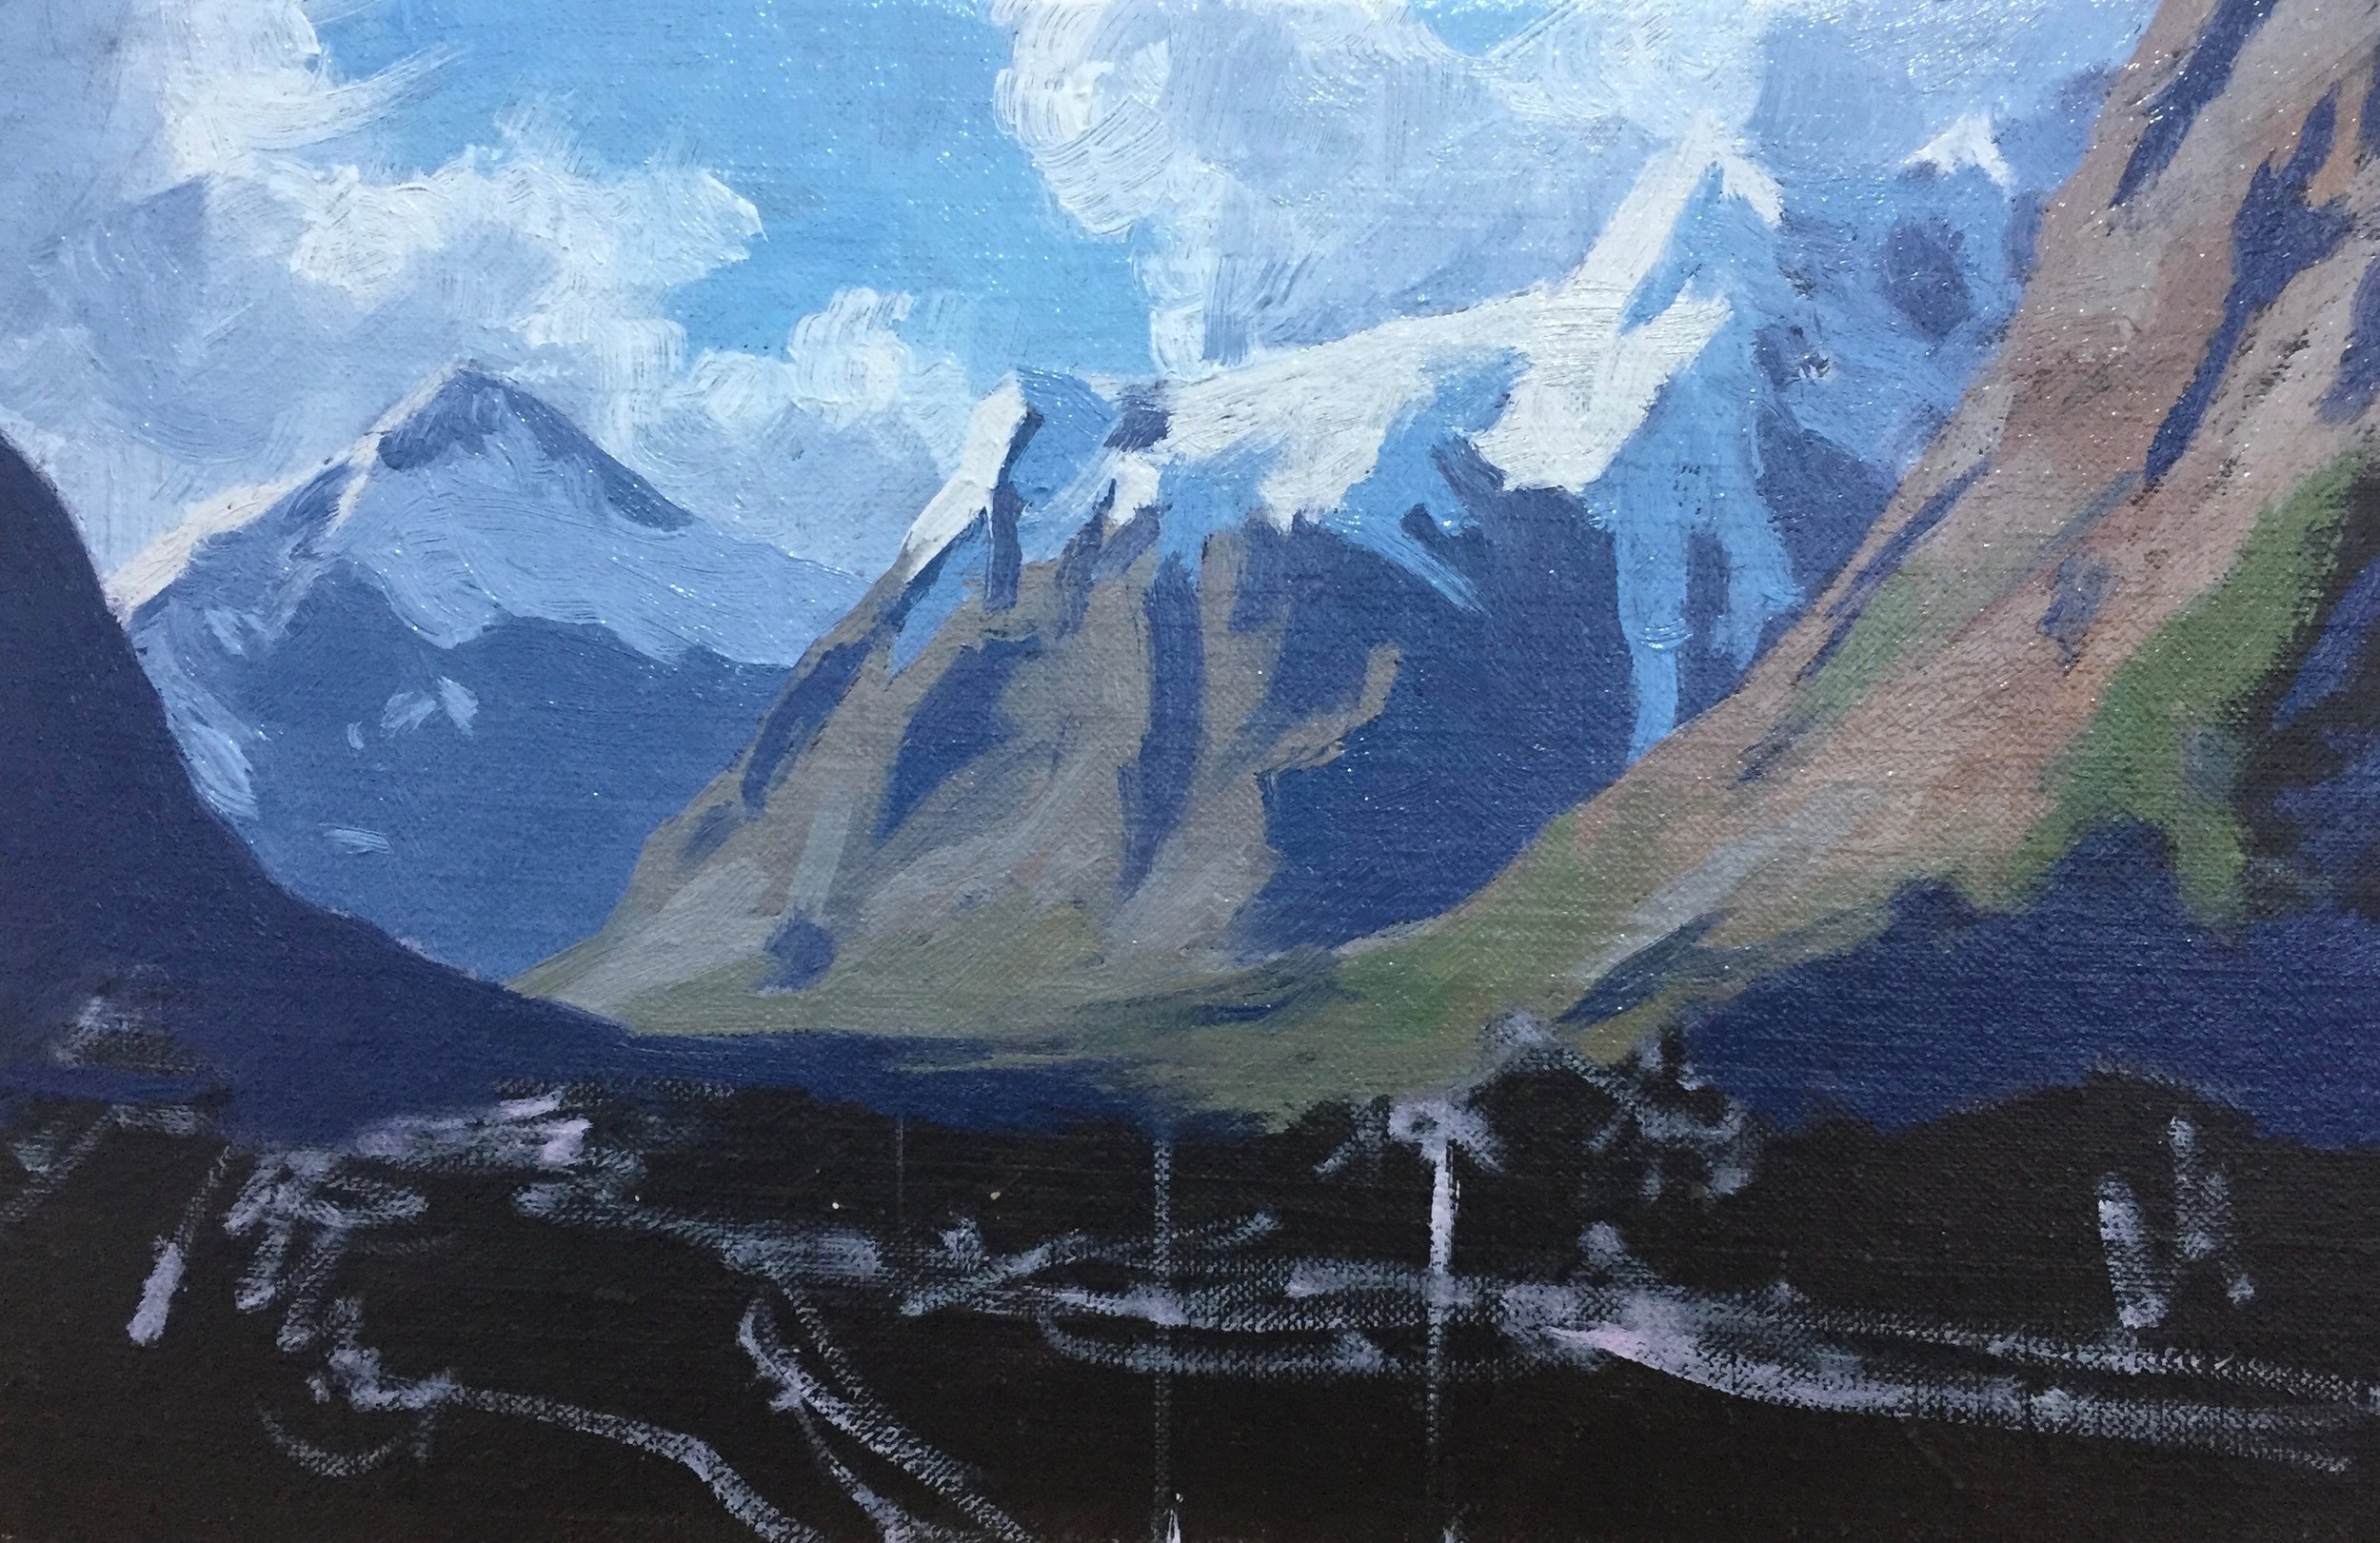
Next I start working on the distant foliage. Greens don’t travel well over long distances so the colour becomes more desaturated the further into the distance it becomes.
Think of the saturation of colour like turning up the volume on your stereo, the further forward in the painting you come the more saturated the colour with be, like turning up the colour intensity!
I mix the distant greens using yellow oxide, ultramarine blue, titanium white and burnt sienna.
To complete the blocking-in stage of the painting I paint the foreground. Here I will use my most saturated colour.
I paint the mountain stream using the same colours as I used in the mountains as the water is running quite still it’s reflecting the mountain colours.
I block in the shadows of the foliage using pthalo green mixed with quinacridone magenta which creates a very dark tone.
The colours I mixed for the grasses include varying amounts of cadmium yellow deep, ultramarine blue, pthalo green, titanium white and burnt sienna. This creates a much more saturated green.
STAGE 3: BUILDING UP THE DETAIL
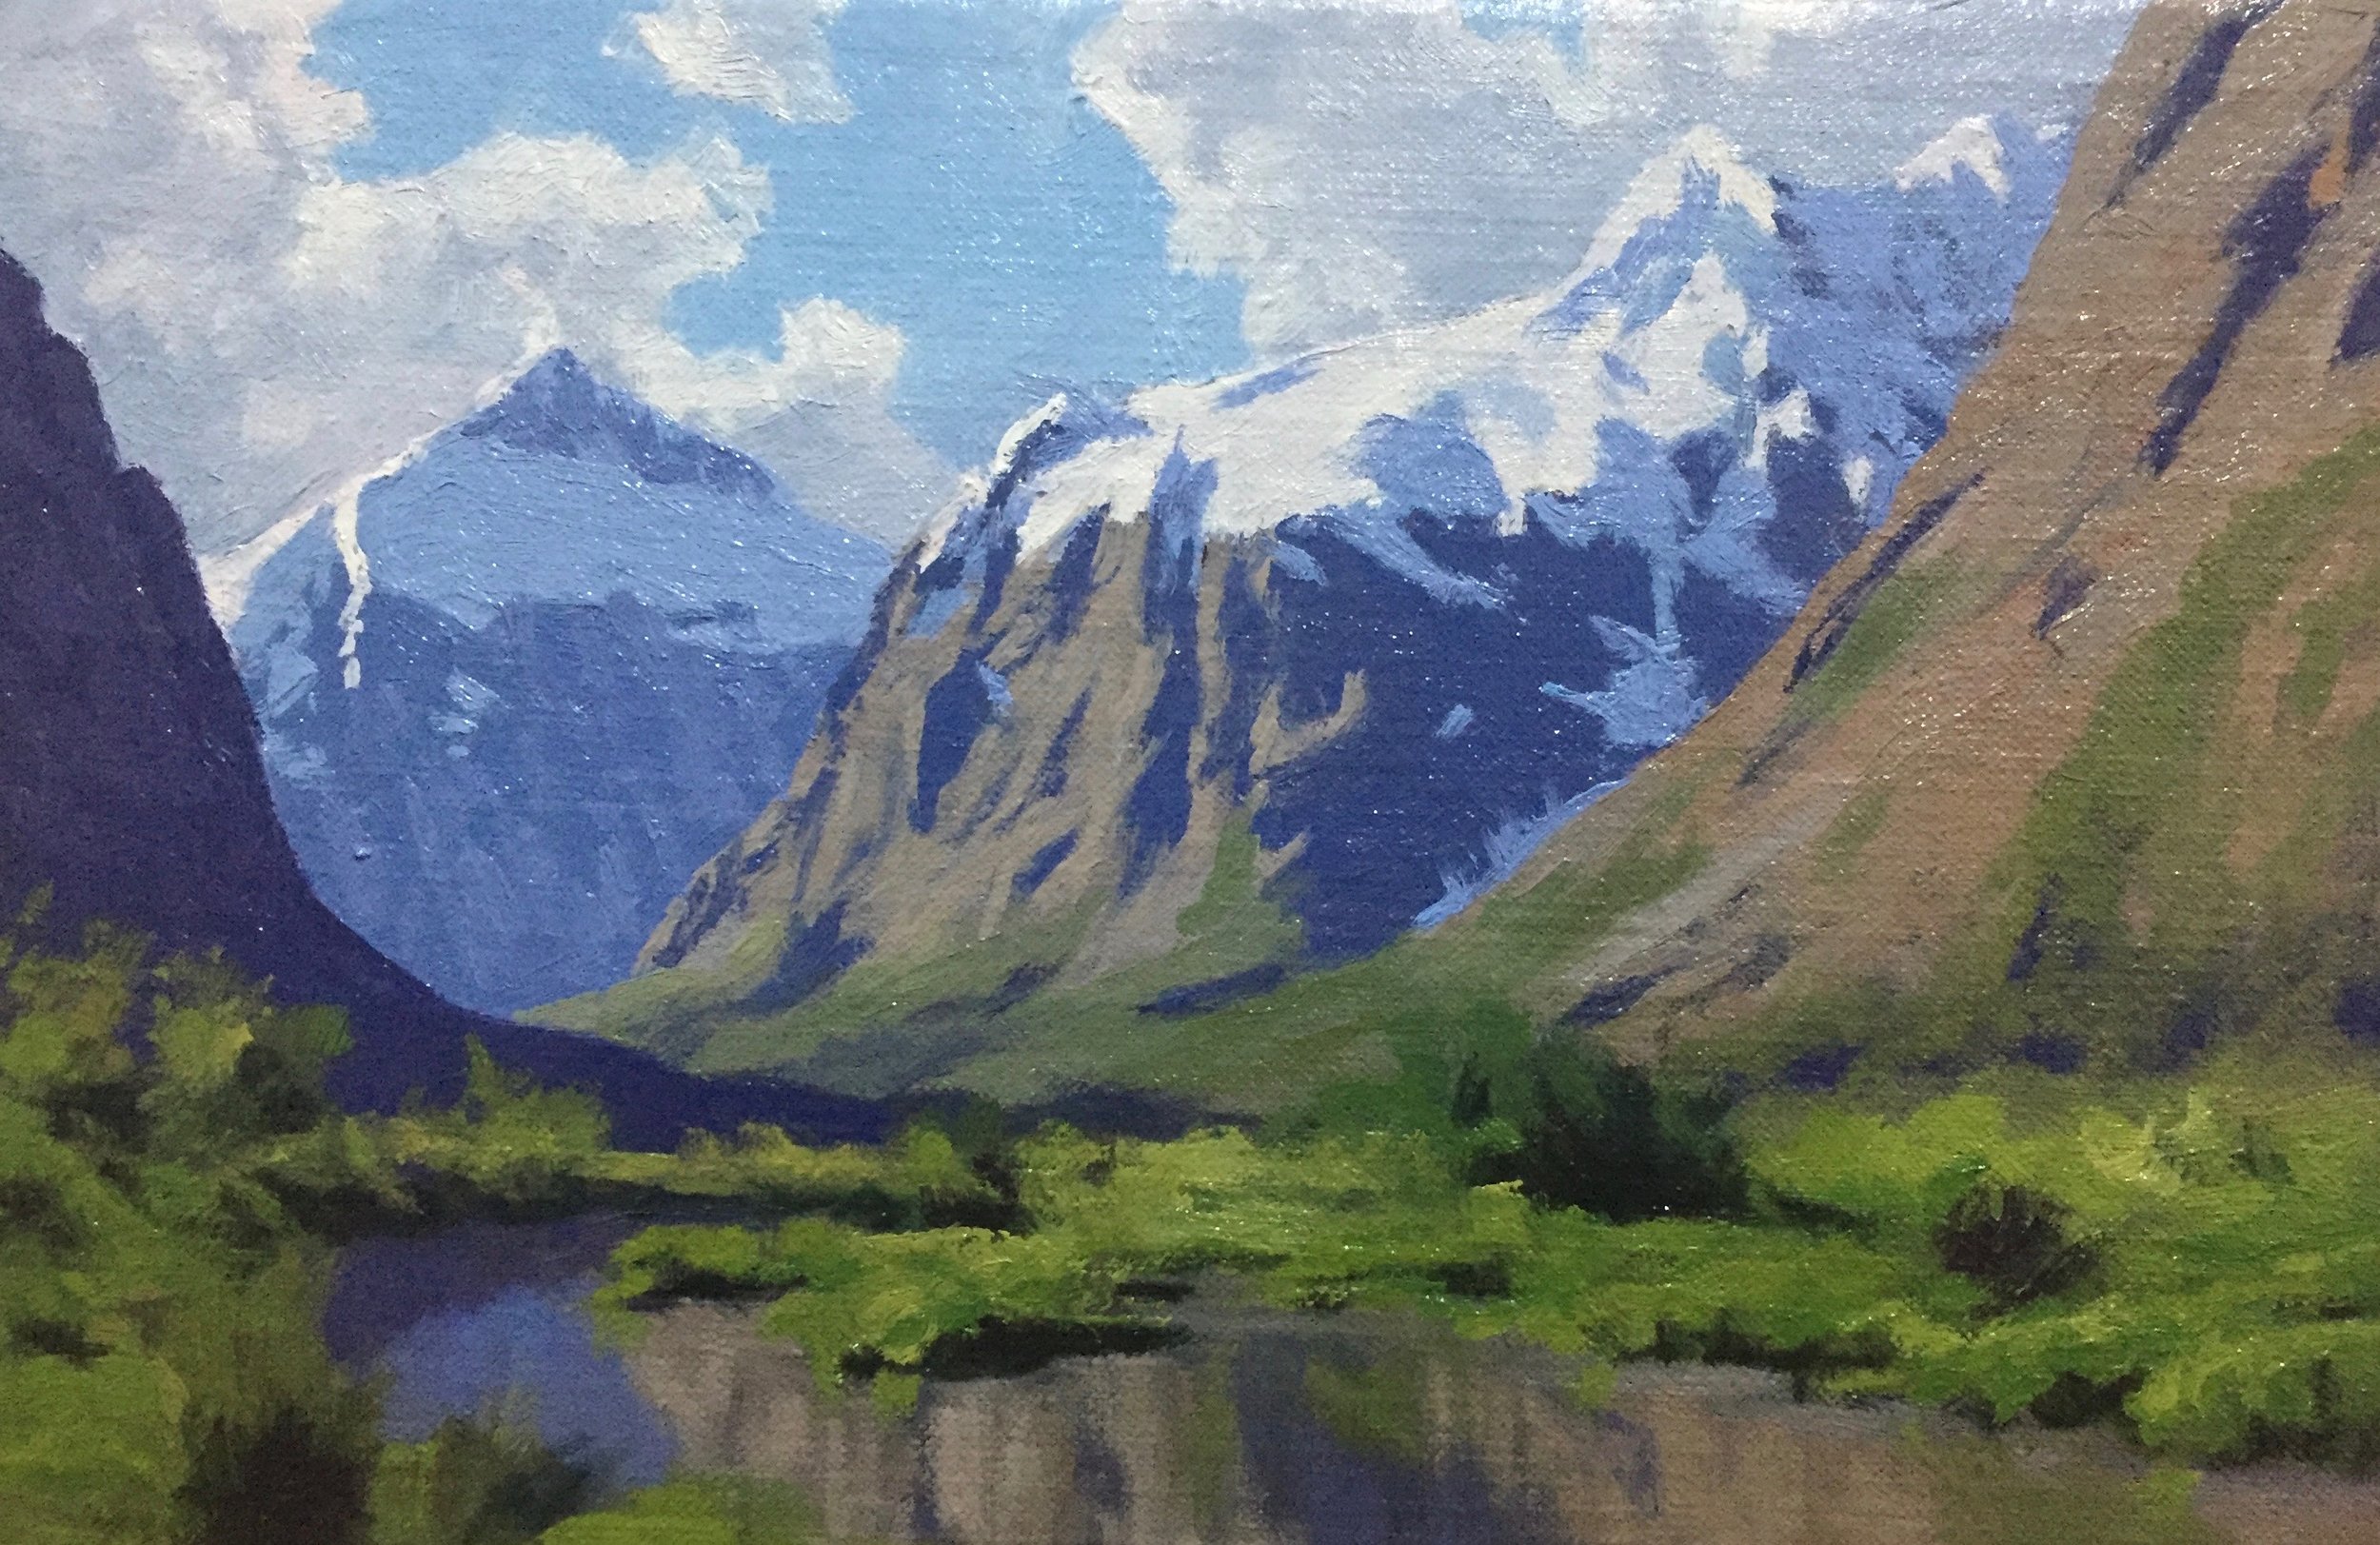
So now that I have allowed the painting to dry I start working on the detail. I start back with the sky and begin defining the clouds. I reestablish the cloud highlights using titanium white mixed with a tiny amount of ultramarine blue, burnt umber and quinacridone magenta. These are also the same colours I use for the shadows of the clouds.
With careful brushwork using flat bristle brushes I model the paint and refine the clouds. I’m still saving my highlights for the end of the painting.
Focusing on Mt Crosscut the mountain on the right in the mid-ground I refine the sunlit mountain face as well as redefining the shadows in the mountains. I paint reflected light in the mountain shadows by using the same original colour combination but adding a little more quinacridone magenta and titanium white to lift the tone a little.
I refine the snow on the mountain top, lifting the tone but still not using pure titanium white, this will come at the end of the painting.
I add more detail onto the mountain face for the mountain on the right of the painting. Whilst this is still technically in the mid ground its still closer than Mt Crosscut so I increase the saturation of the colour and darken the shadows a little more. Remember as objects get closer to us darks get darker and lights get lighter and the saturation of colour increases too.
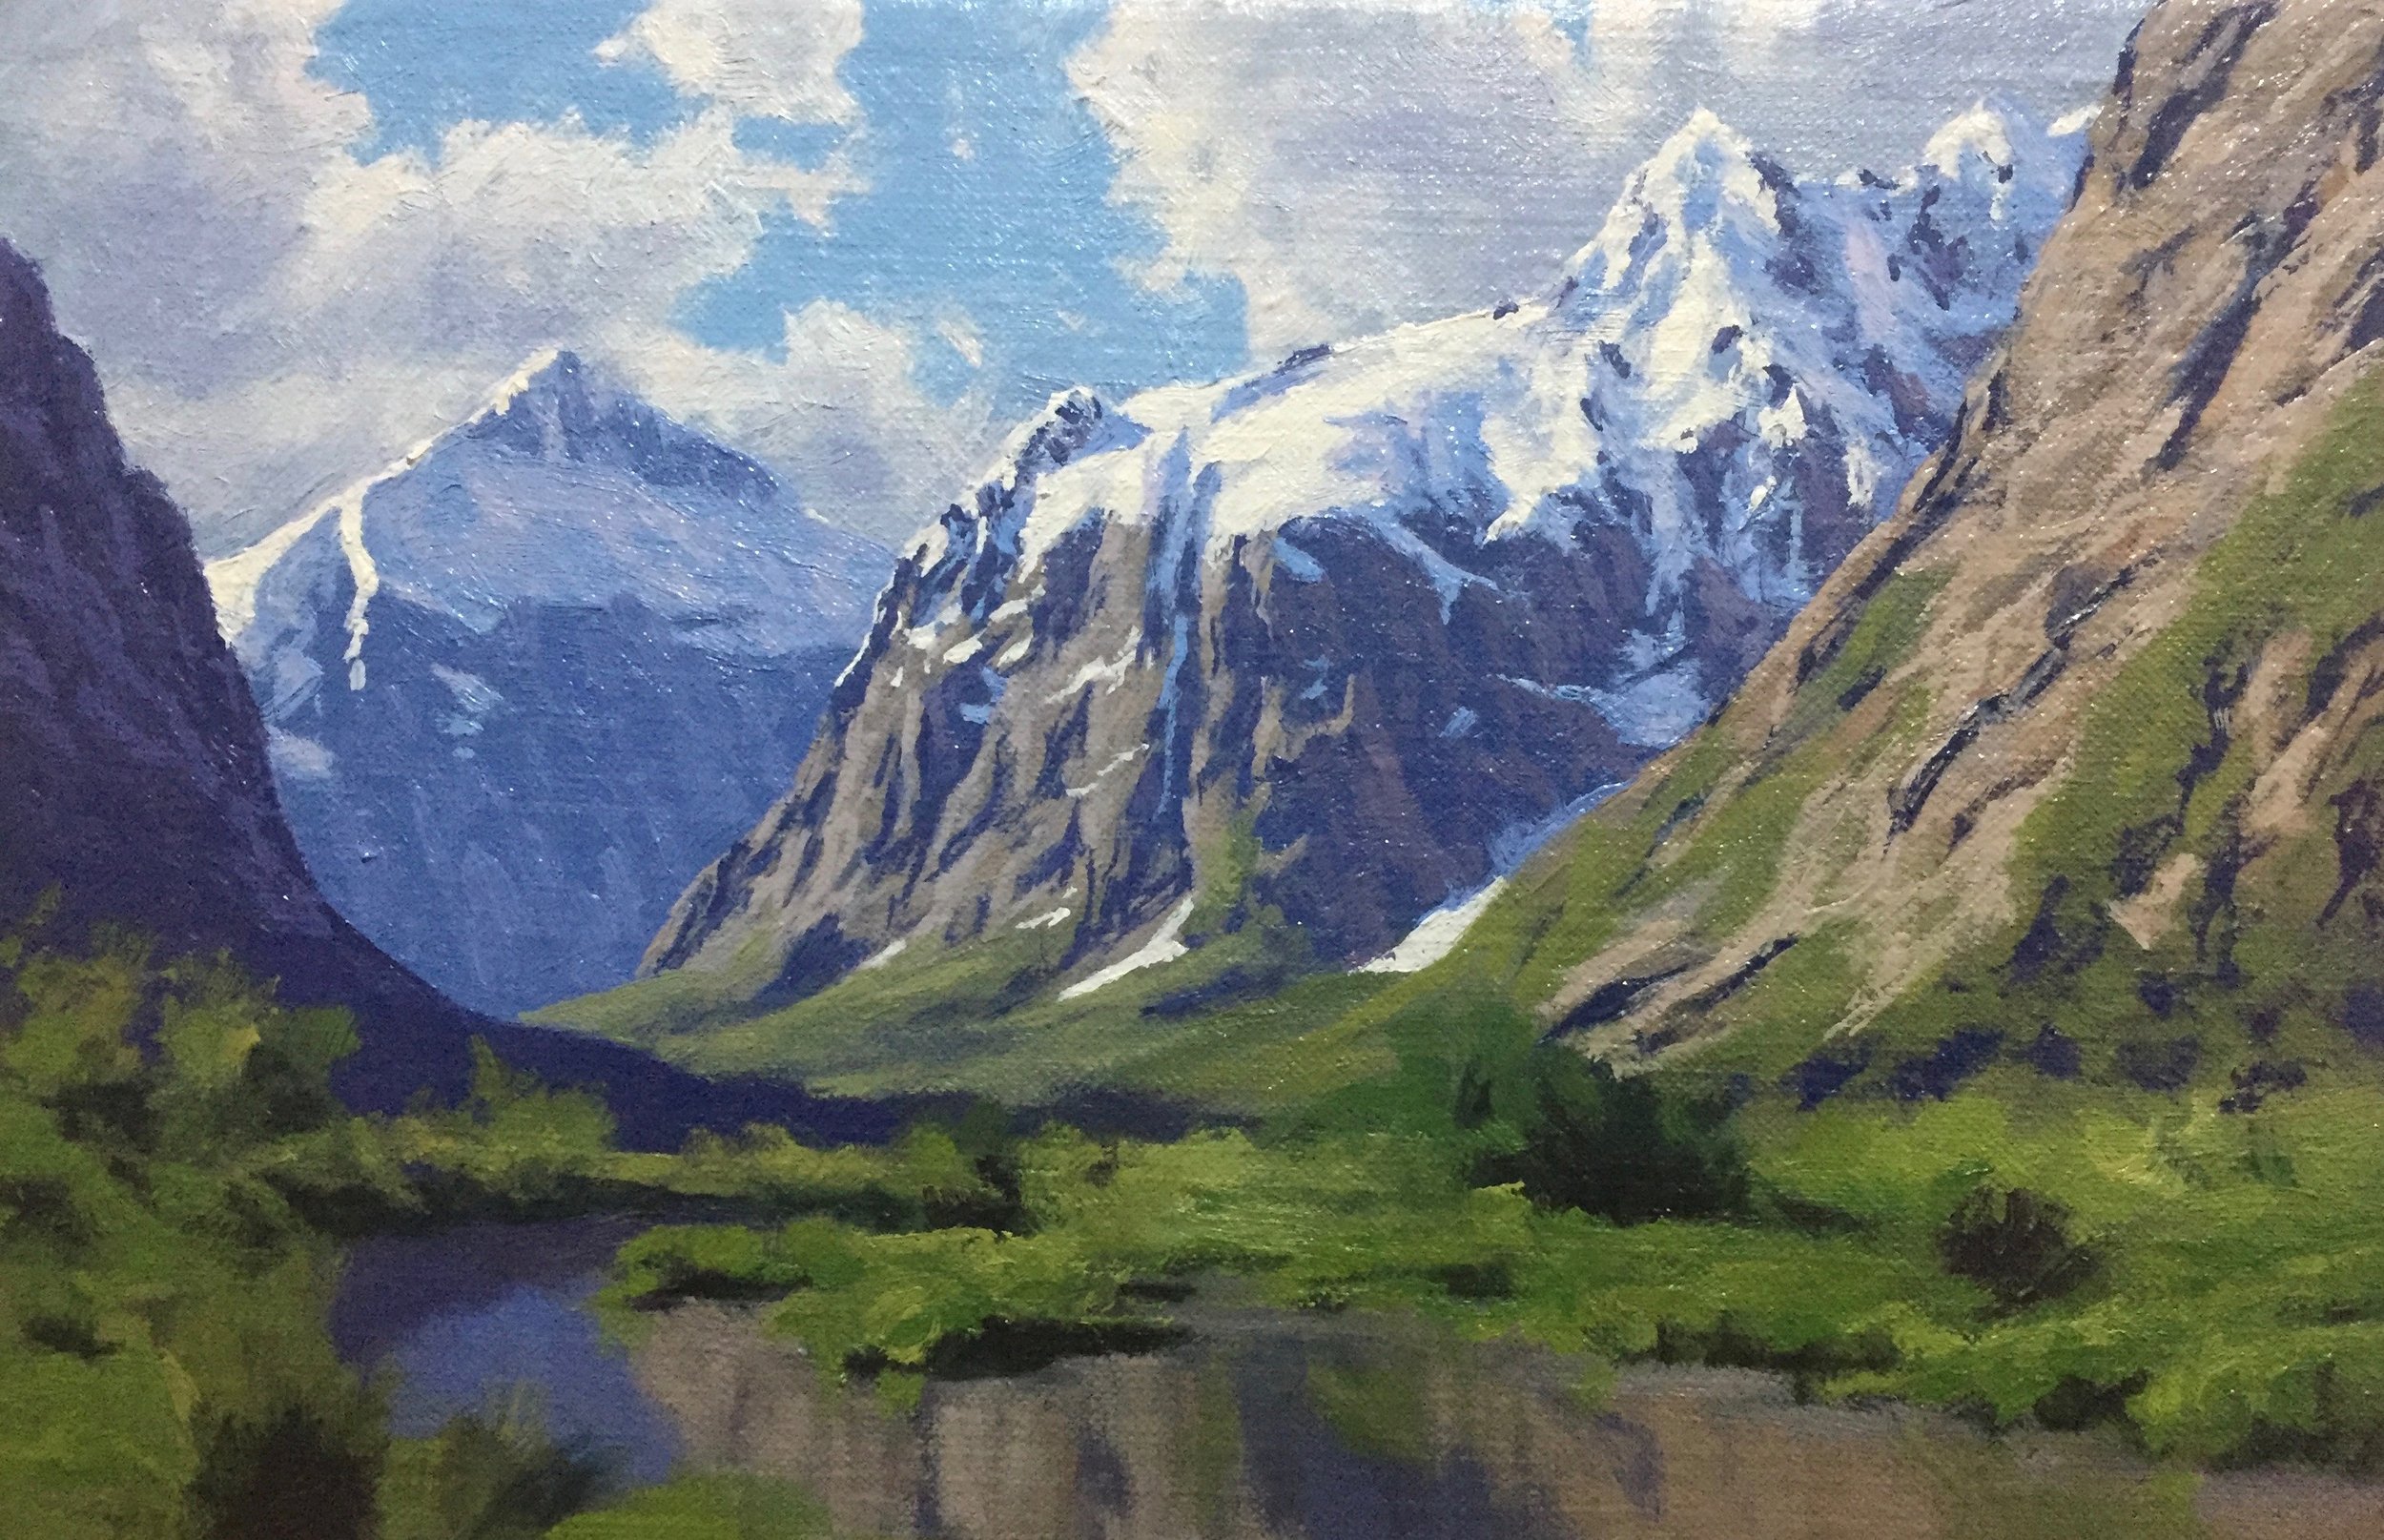
STAGE 4: REFINING THE PAINTING
Next, I focus on the foliage in the foreground using a combination of cadmium yellow deep, ultramarine blue, pthalo green and titanium white. I also mix in a little burnt sienna, quinacridone magenta and cadmium red light to earth the greens.
I sharpen up the shadows by mixing quinacridone magenta and pthalo green and I bleed this into the lighter greens. Sharp shadows really give the grass and shrubs a more three-dimensional effect and so add a sense of atmosphere to the painting.
I start adding more elements to the painting to subtly lead the eye to Mt Talbot in the distance. This include the log that is in the water.
I am getting near to completing the painting and I am now adding highlights to the grass and other foliage. To create the illusion of the bright sun shining through leaves I mix cadmium yellow and pure titanium white.
I add the highlights to the snow on Mt Crosscut by mixing pure titanium white and a little yellow oxide.
I start introducing ripples onto the water by mixing a lighter tone on cobalt blue, cobalt teal and titanium white, the same colours I used in the sky.
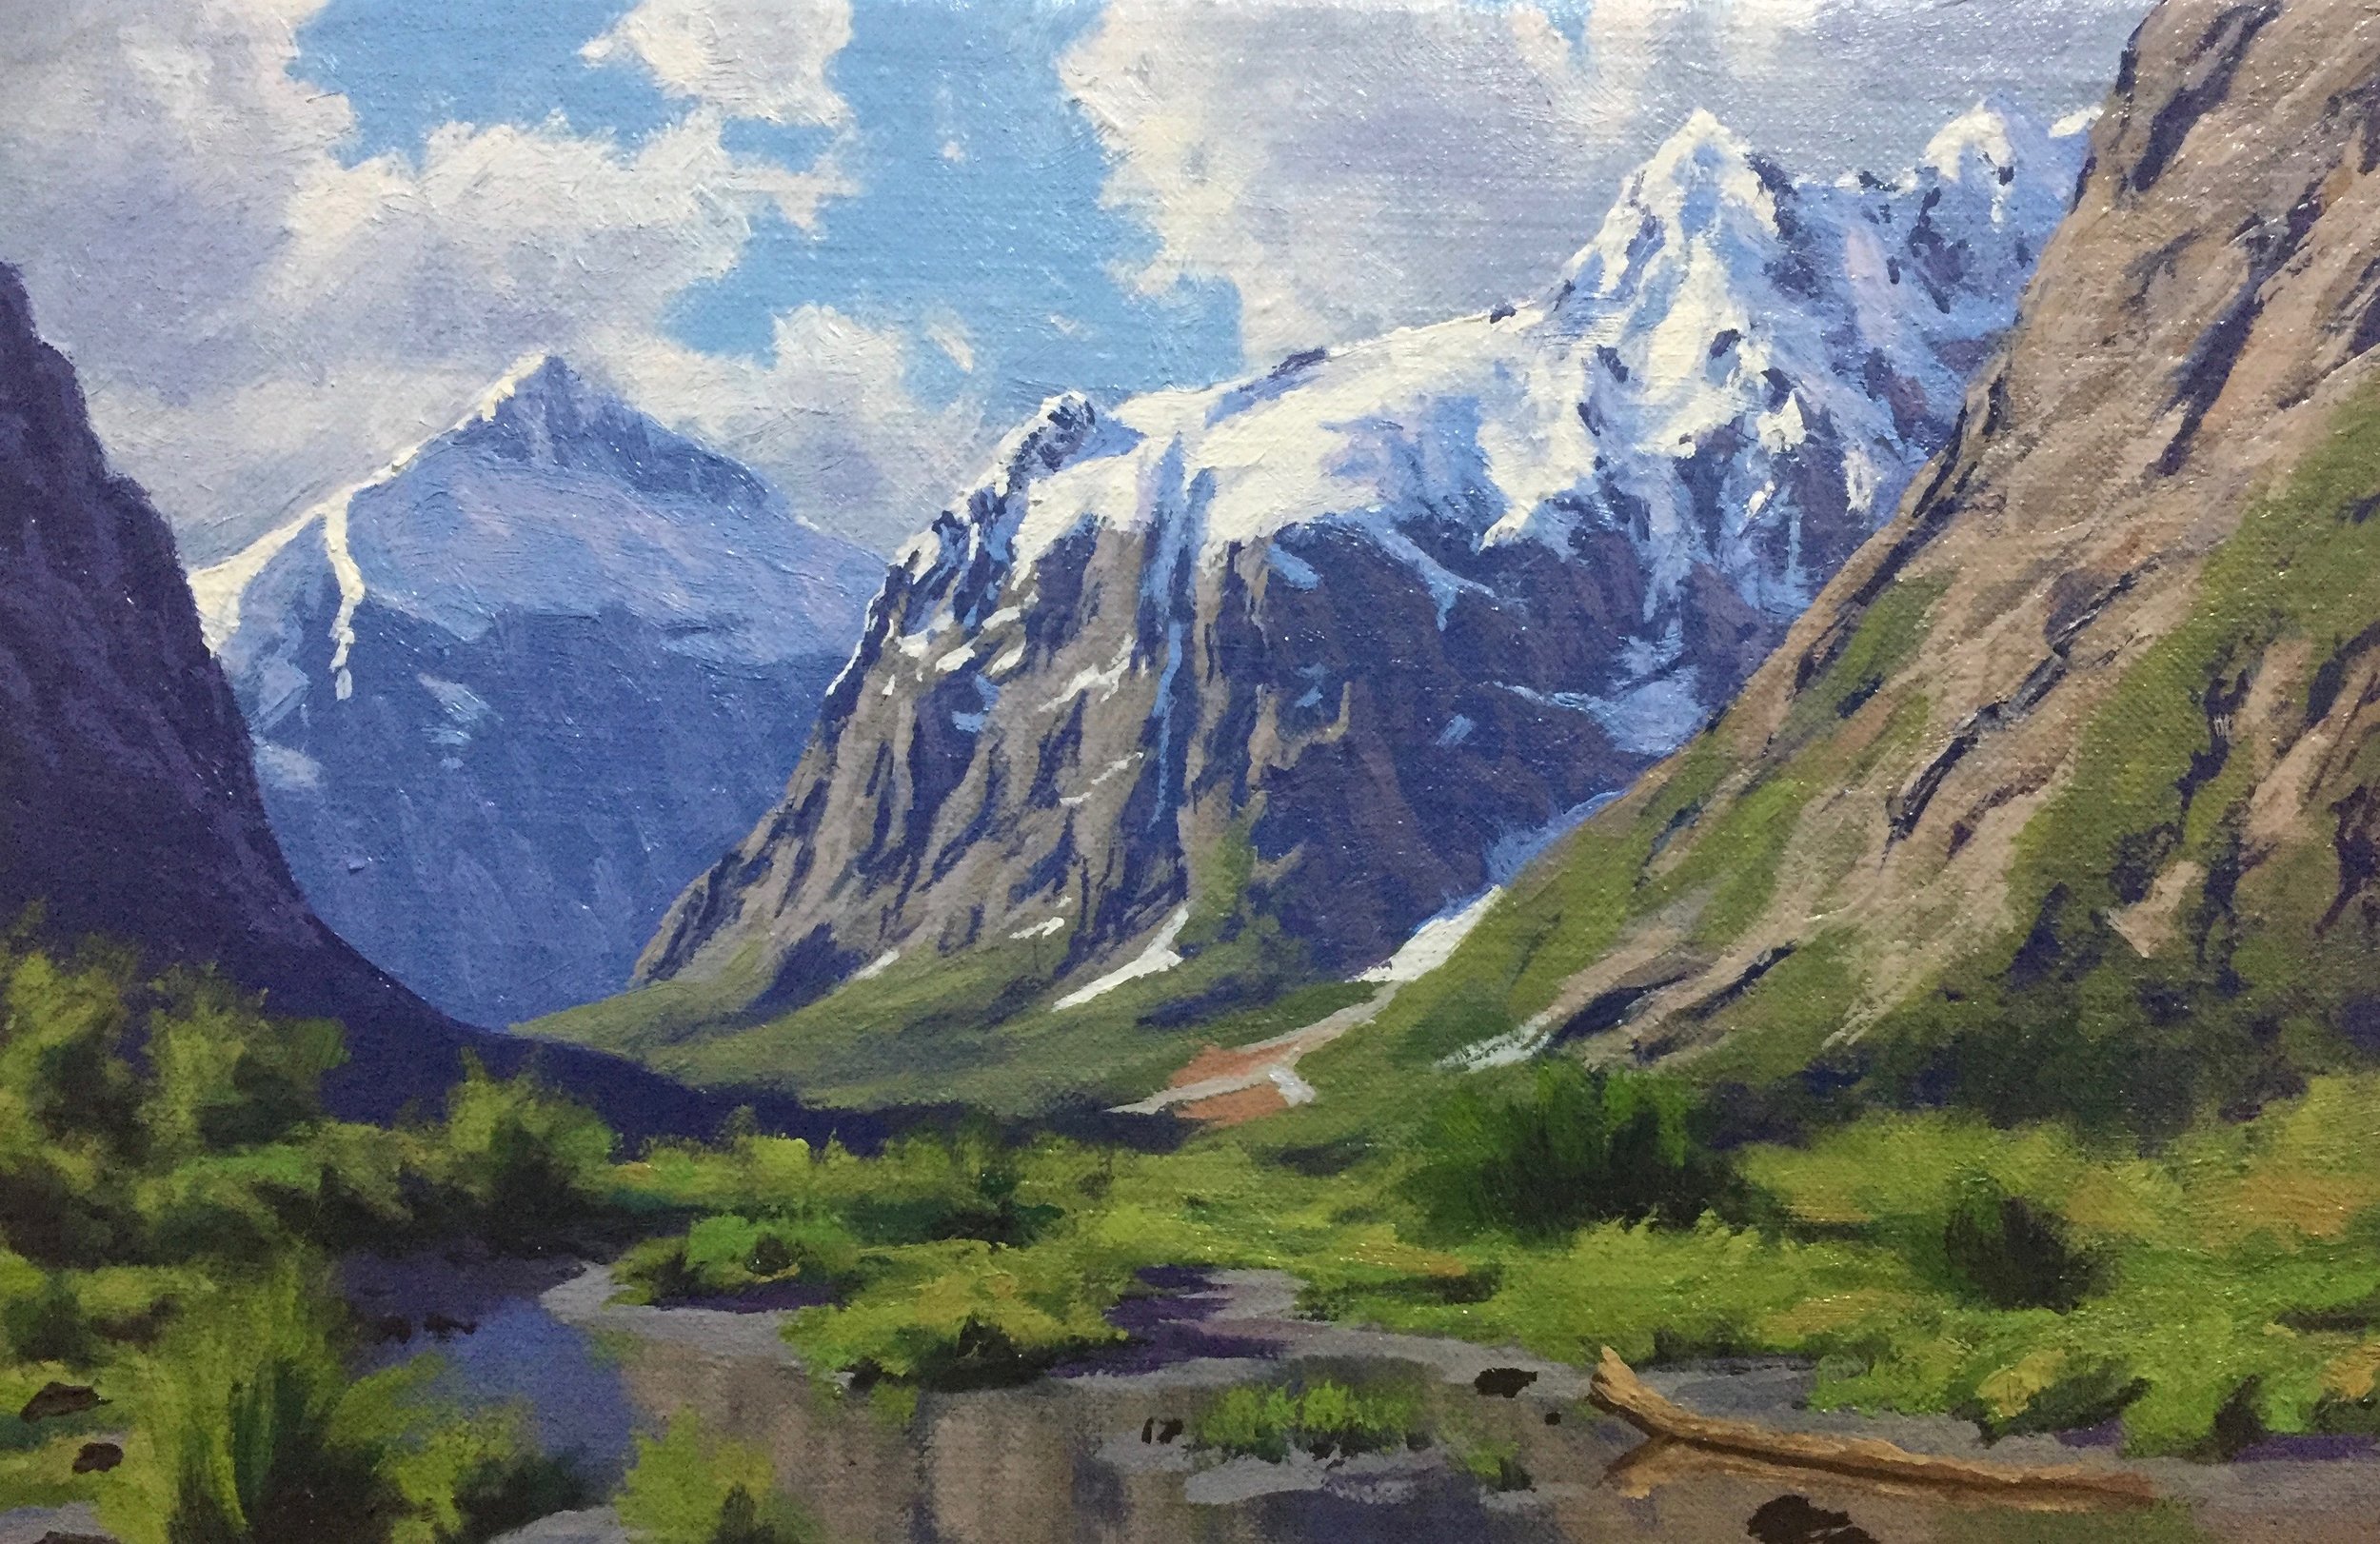
STAGE 5: FINAL DETAILS
As I complete the painting I paint and refine pebbles along the river bank and I add sparkles in the water and wet rocks using pure titanium white straight from the tube.
After that, the painting is finished.
