This article may contain affiliate links, please read my affiliate disclosure for more information
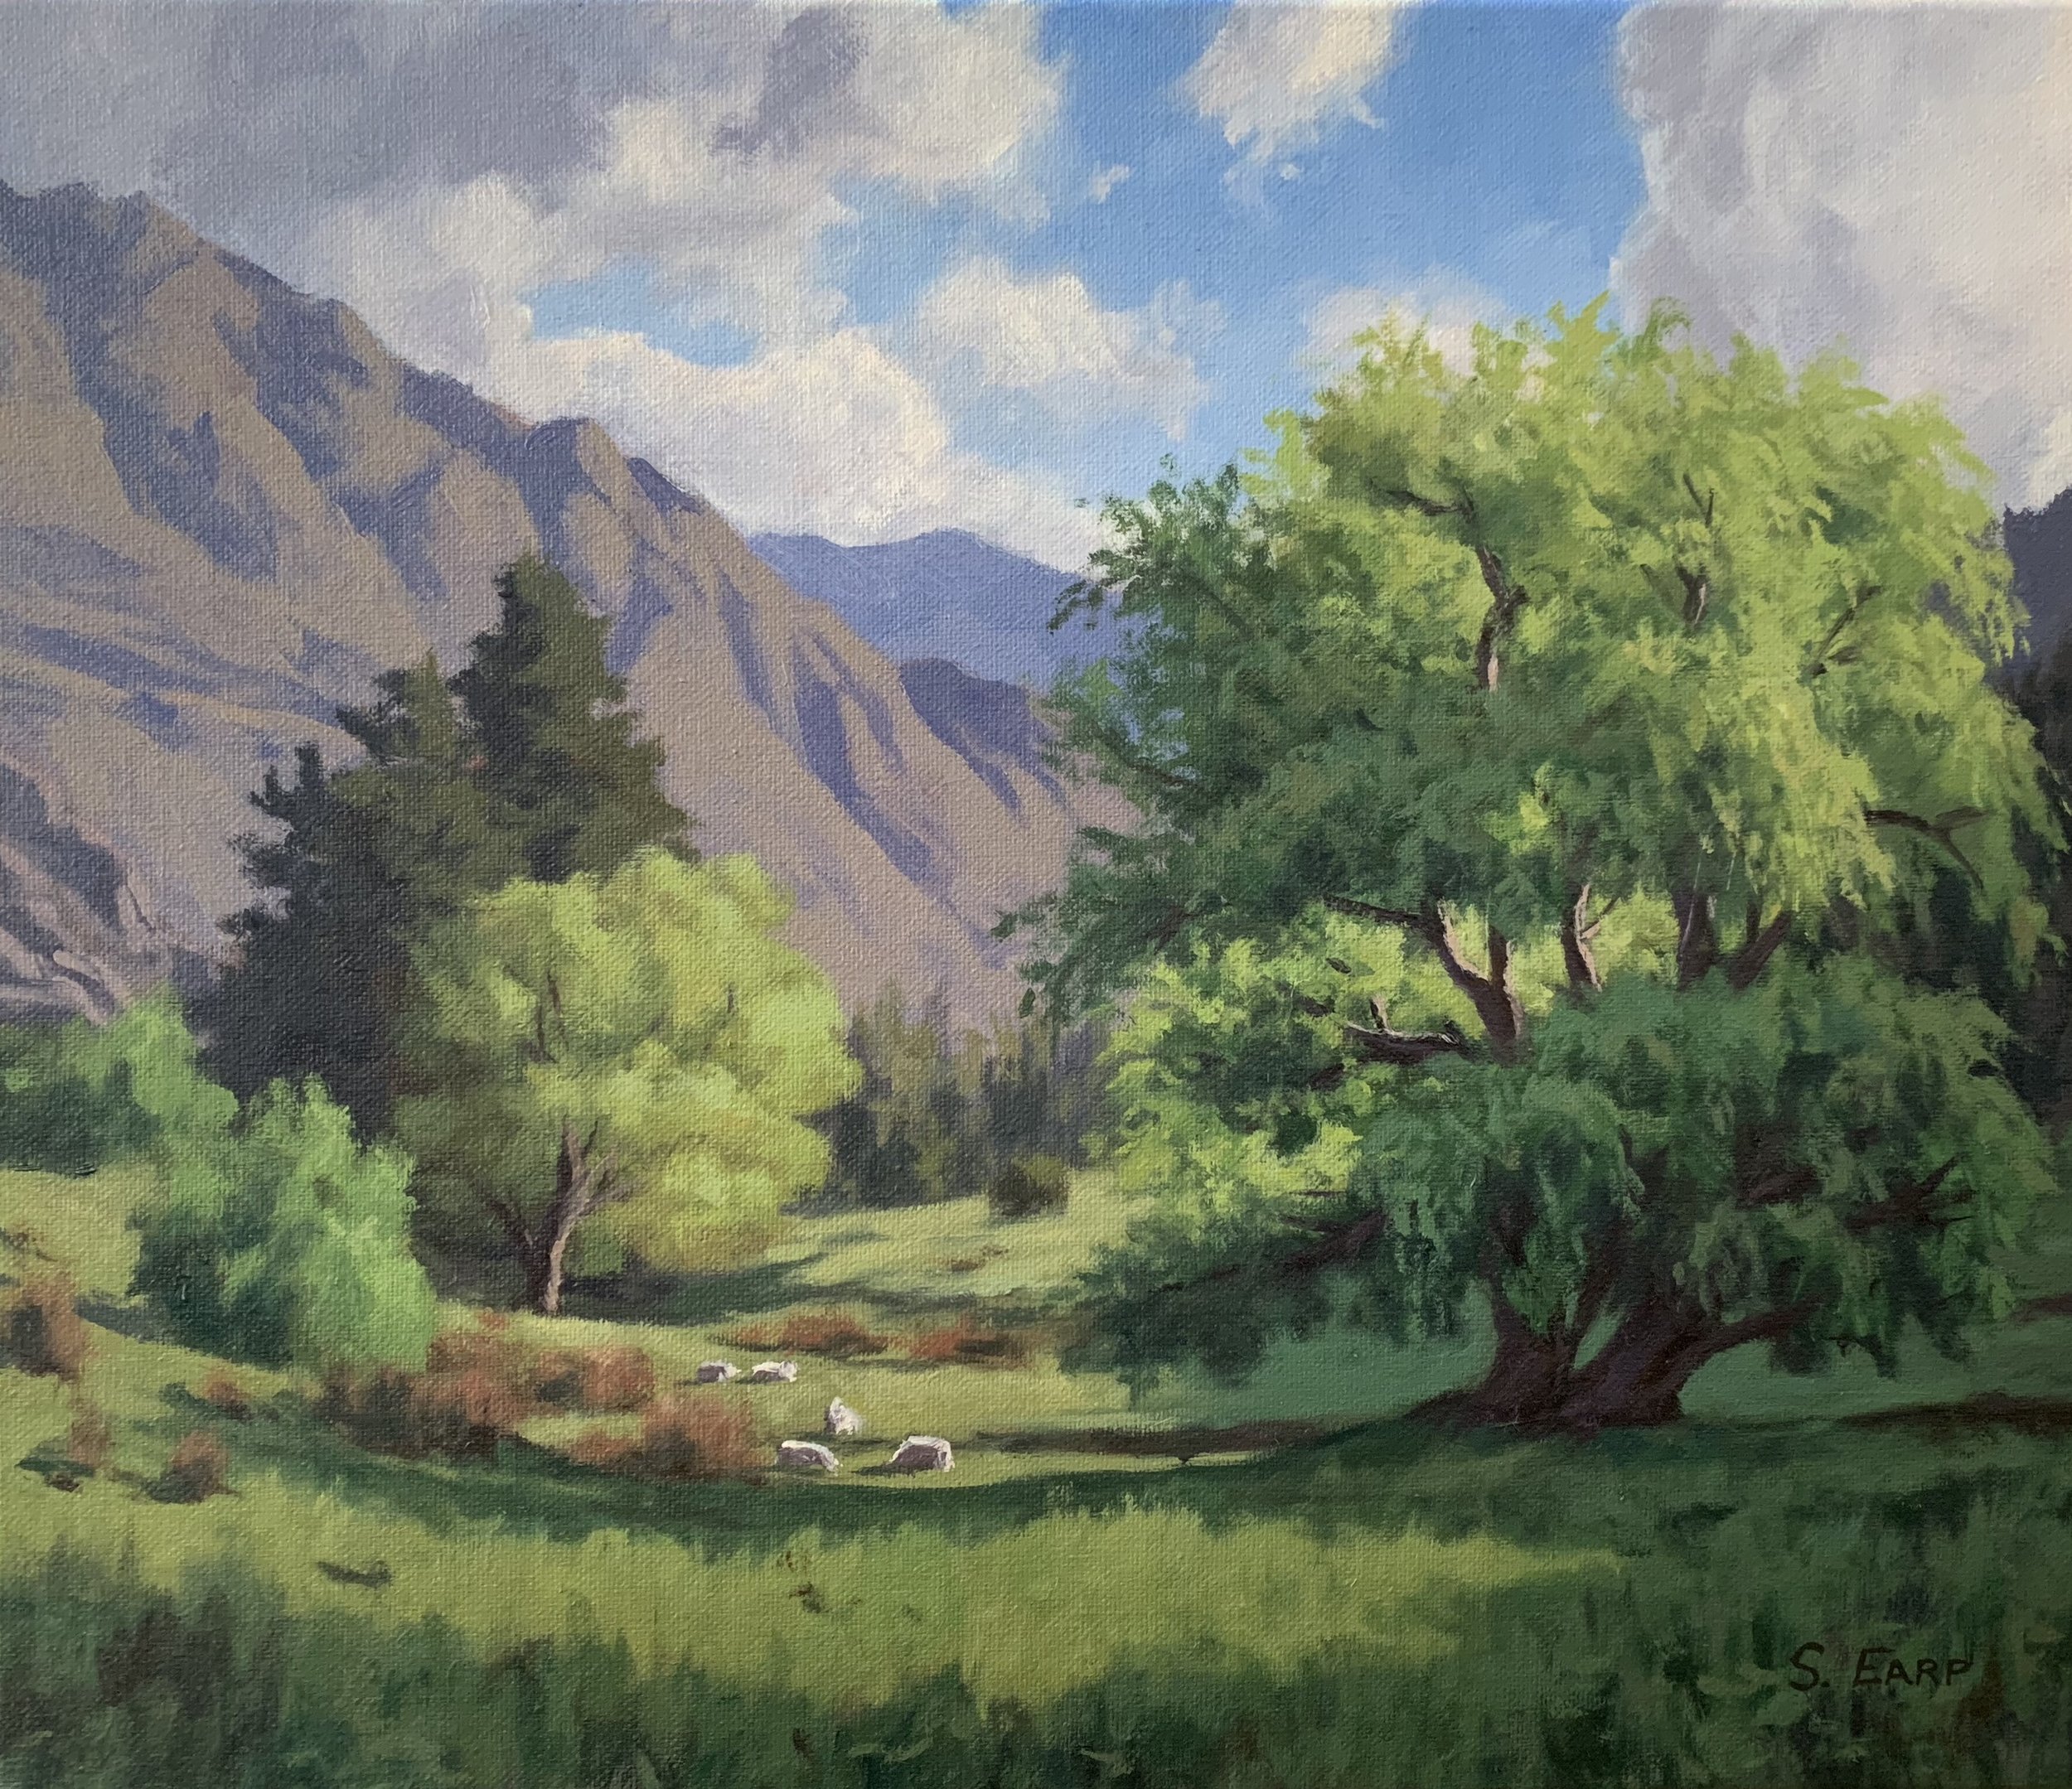
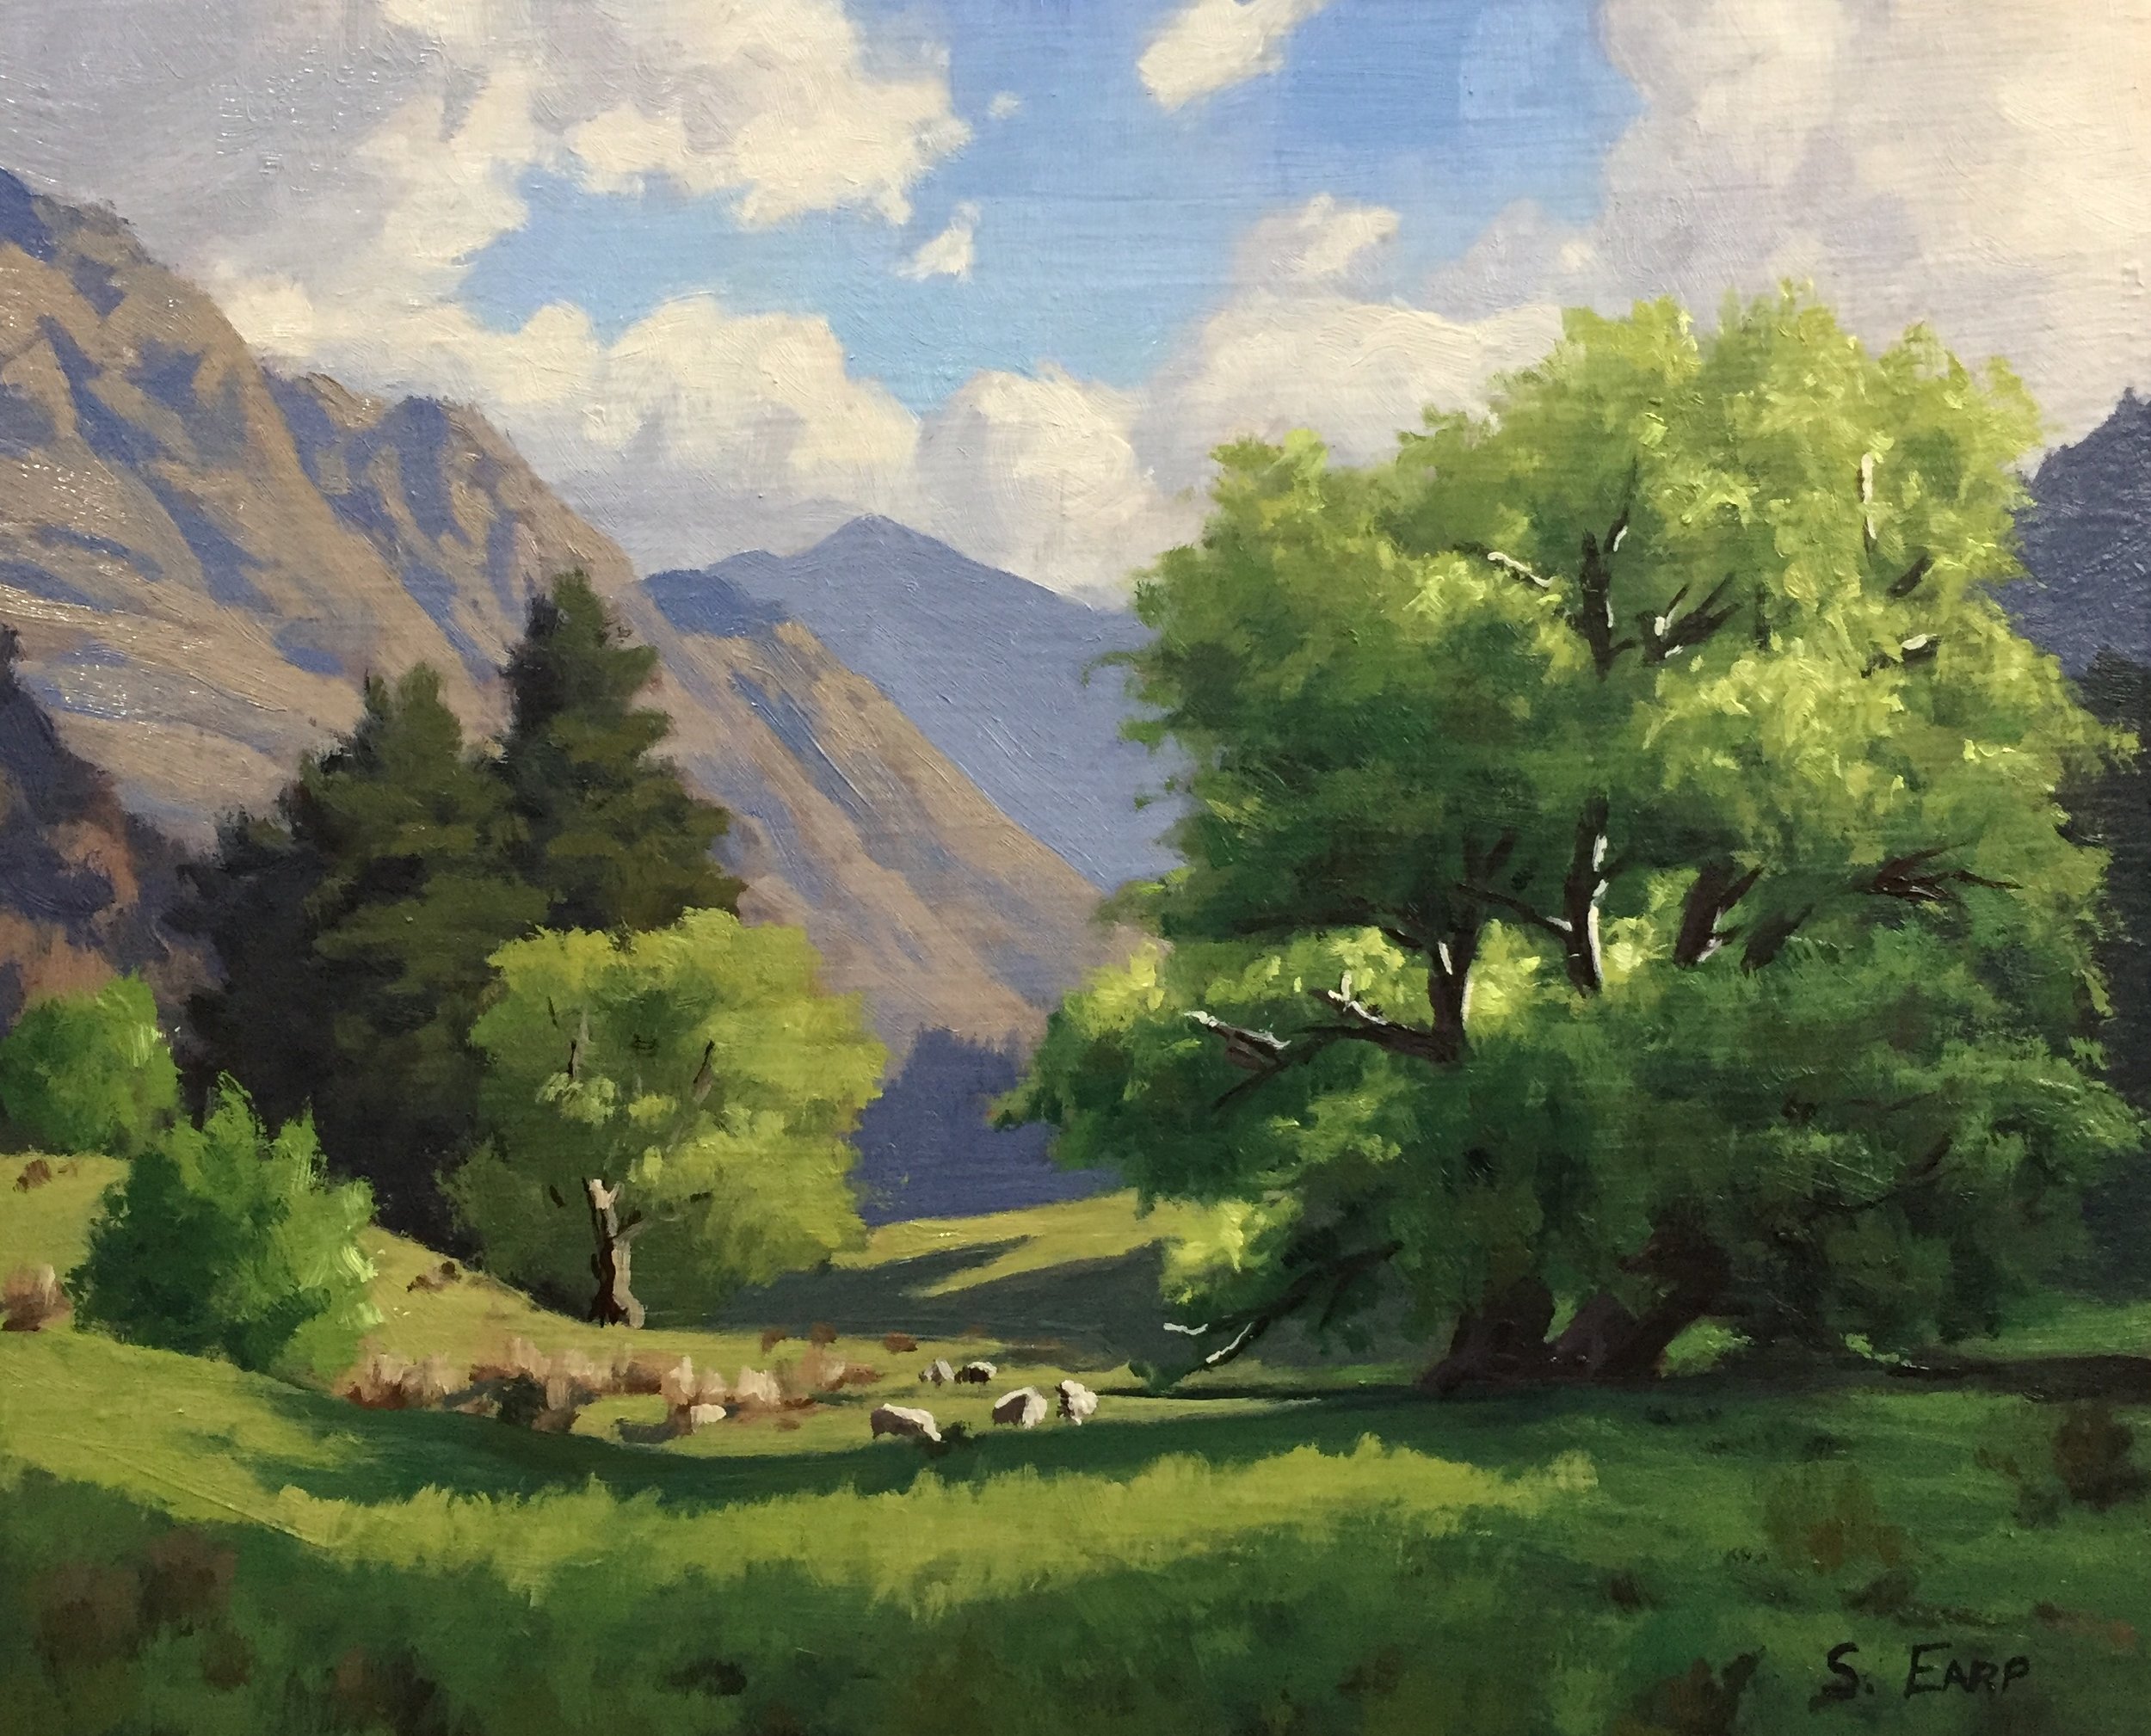
In this blog post, I show you how to paint a landscape that features trees and spotlighting effects. This step-by-step painting tutorial is suitable for oils and acrylics.
Inspiration For This Painting
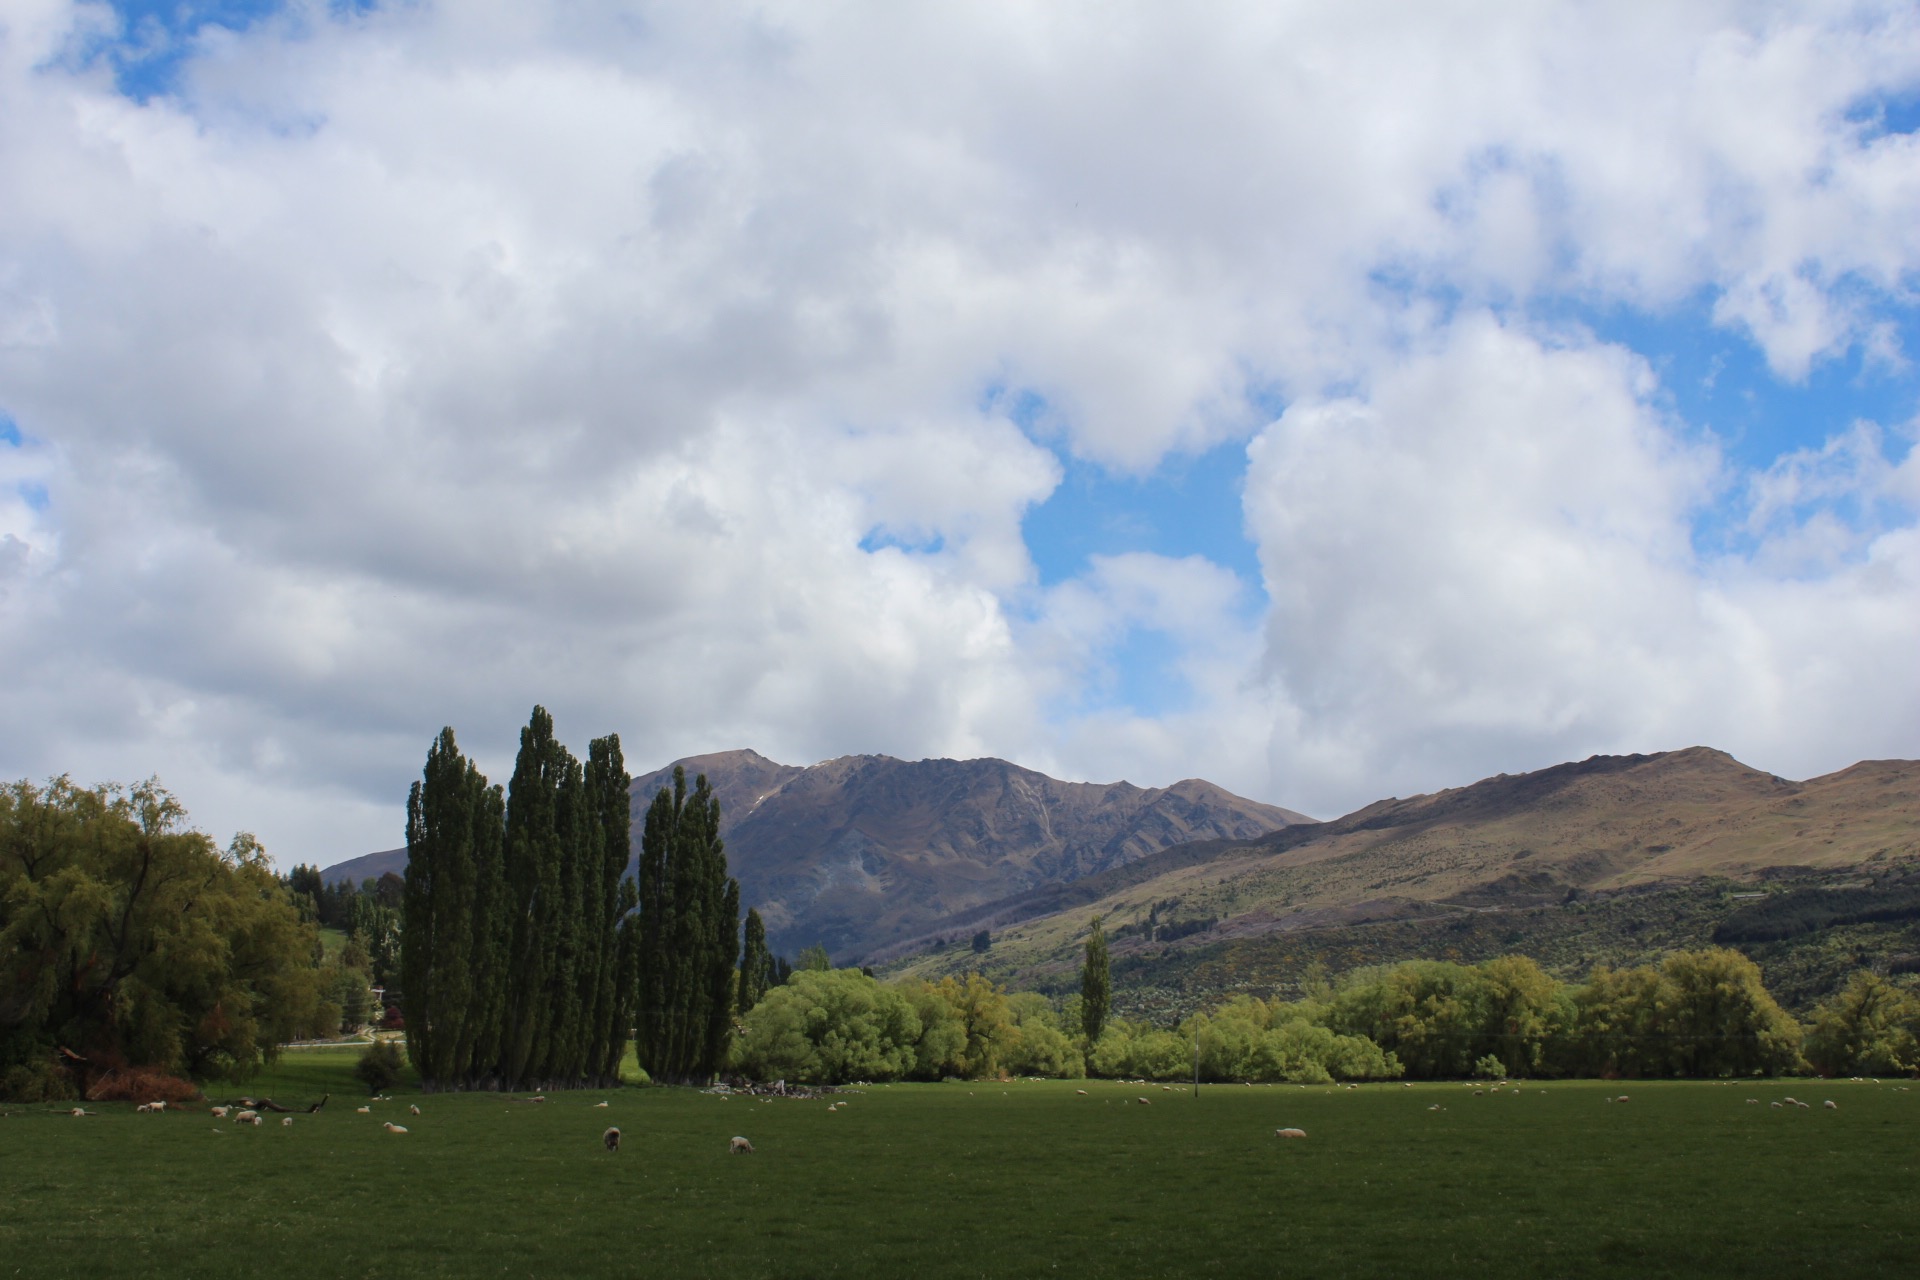
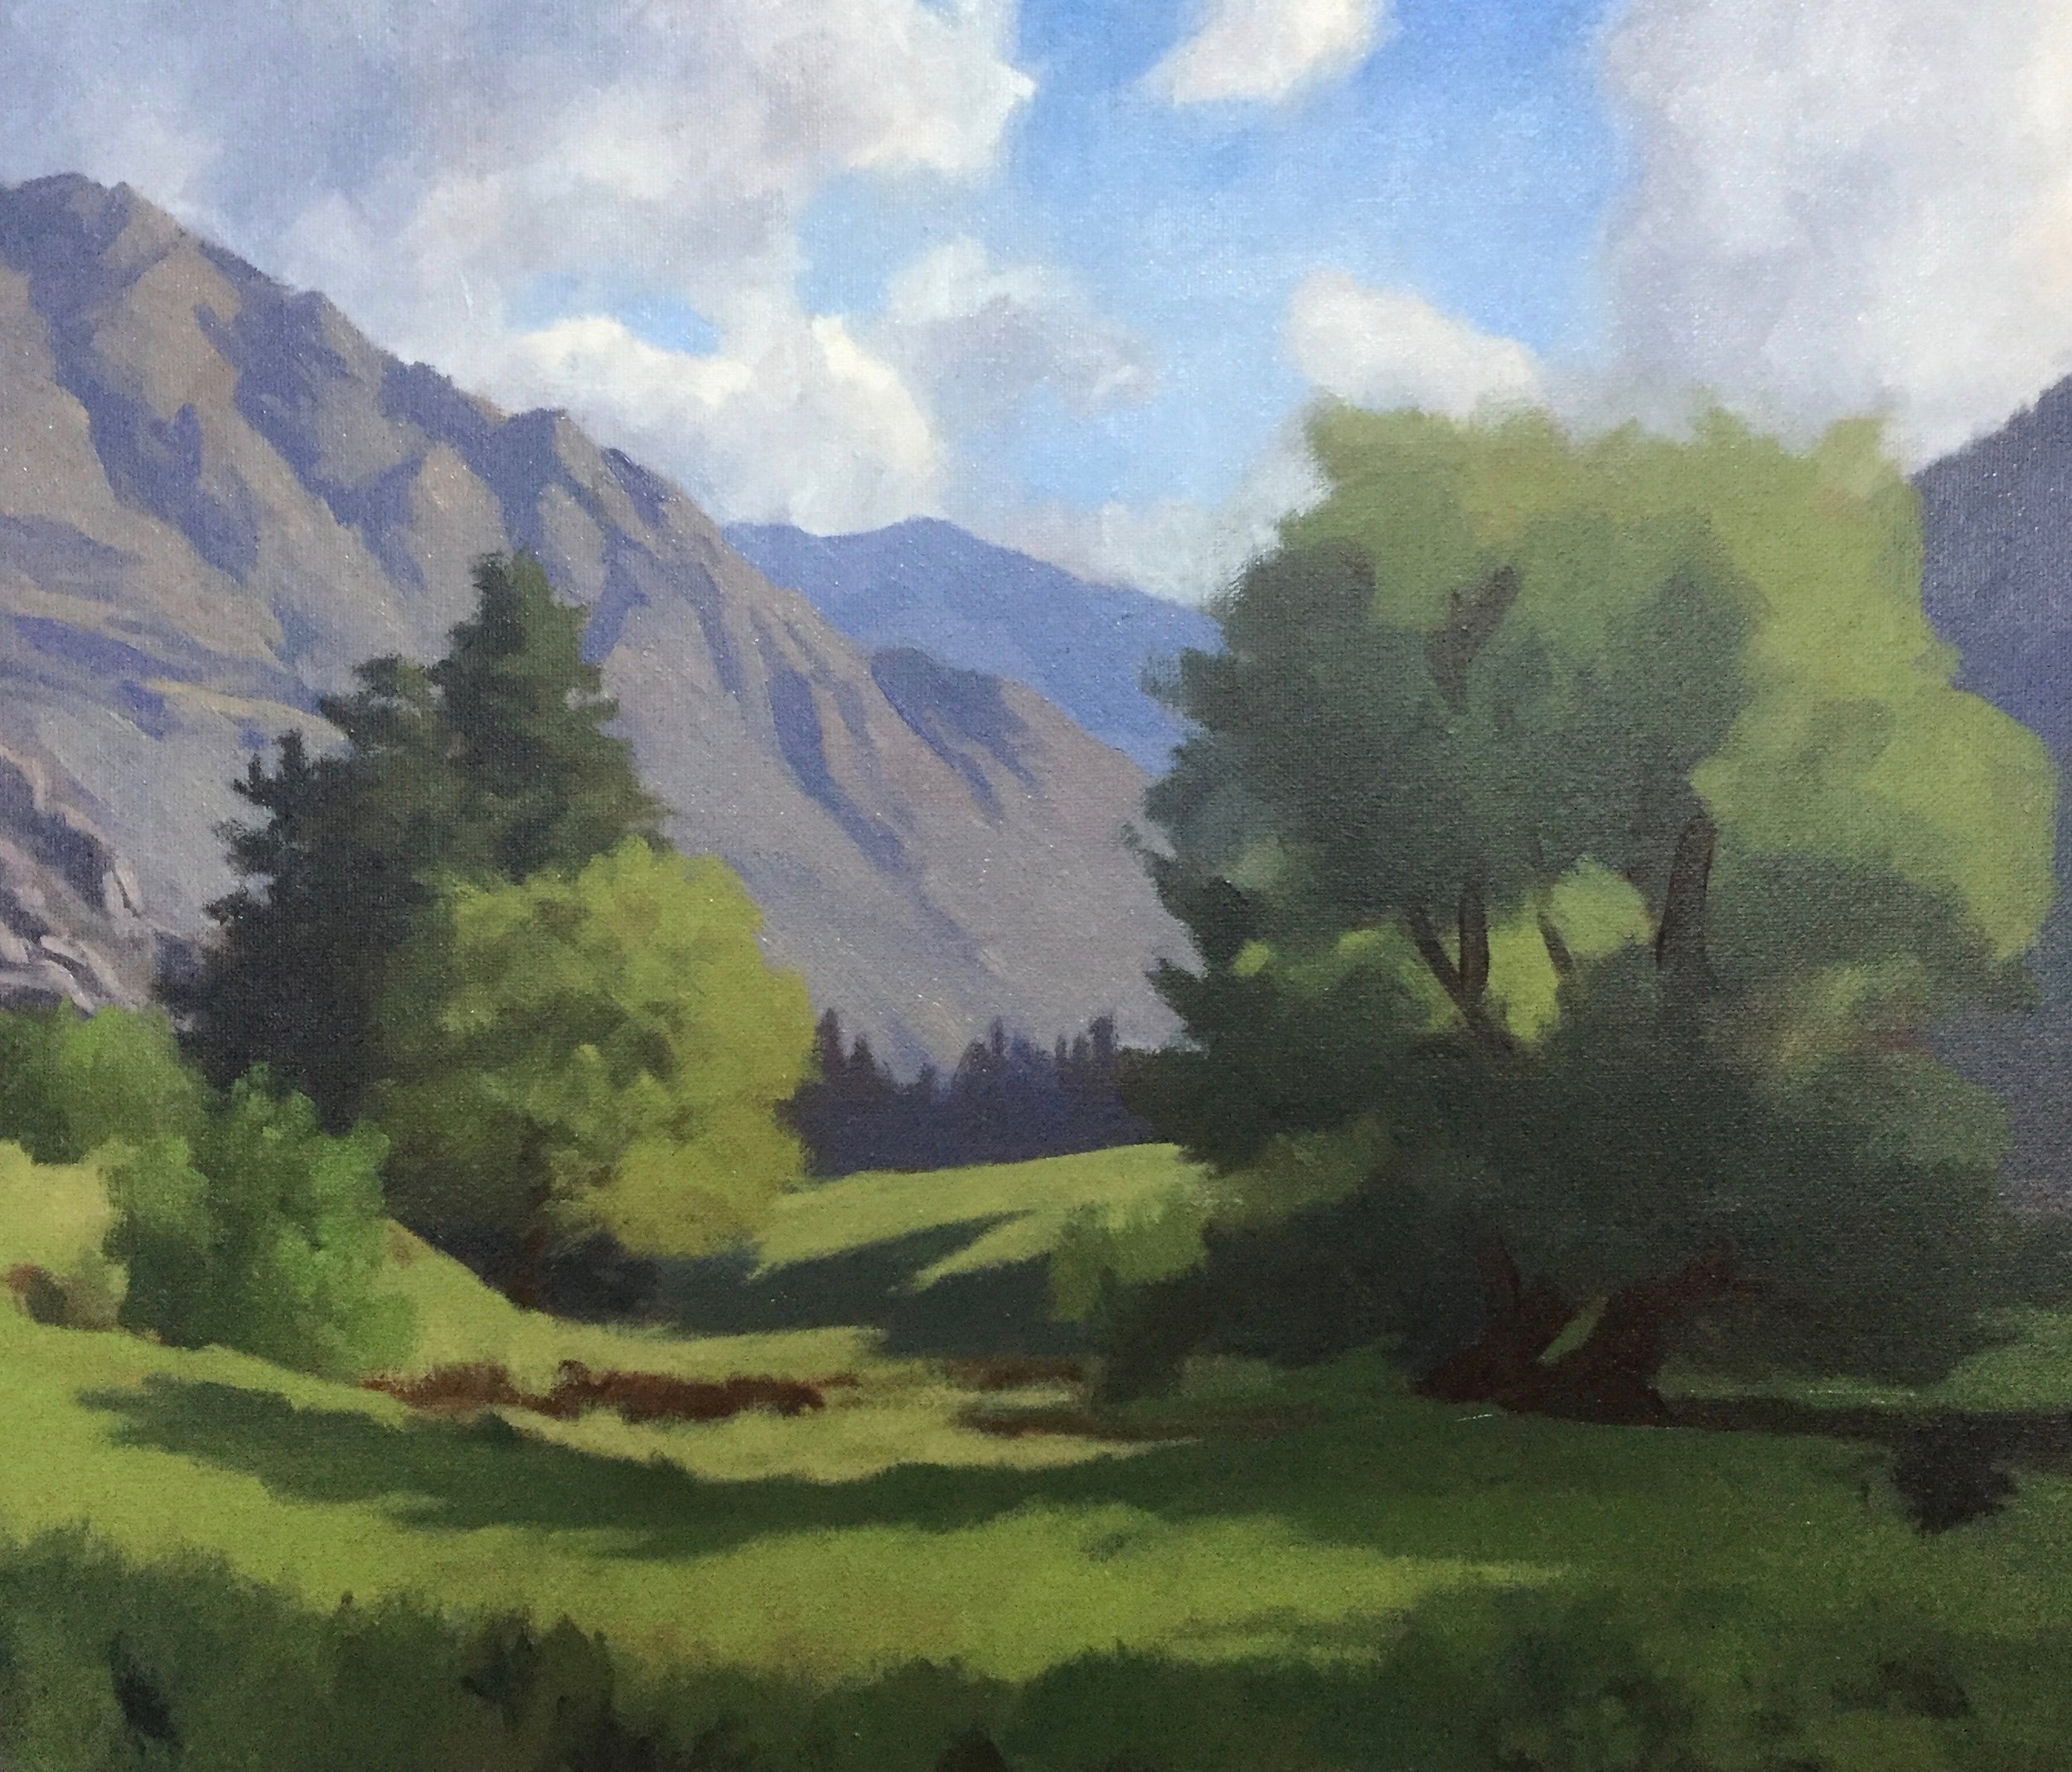
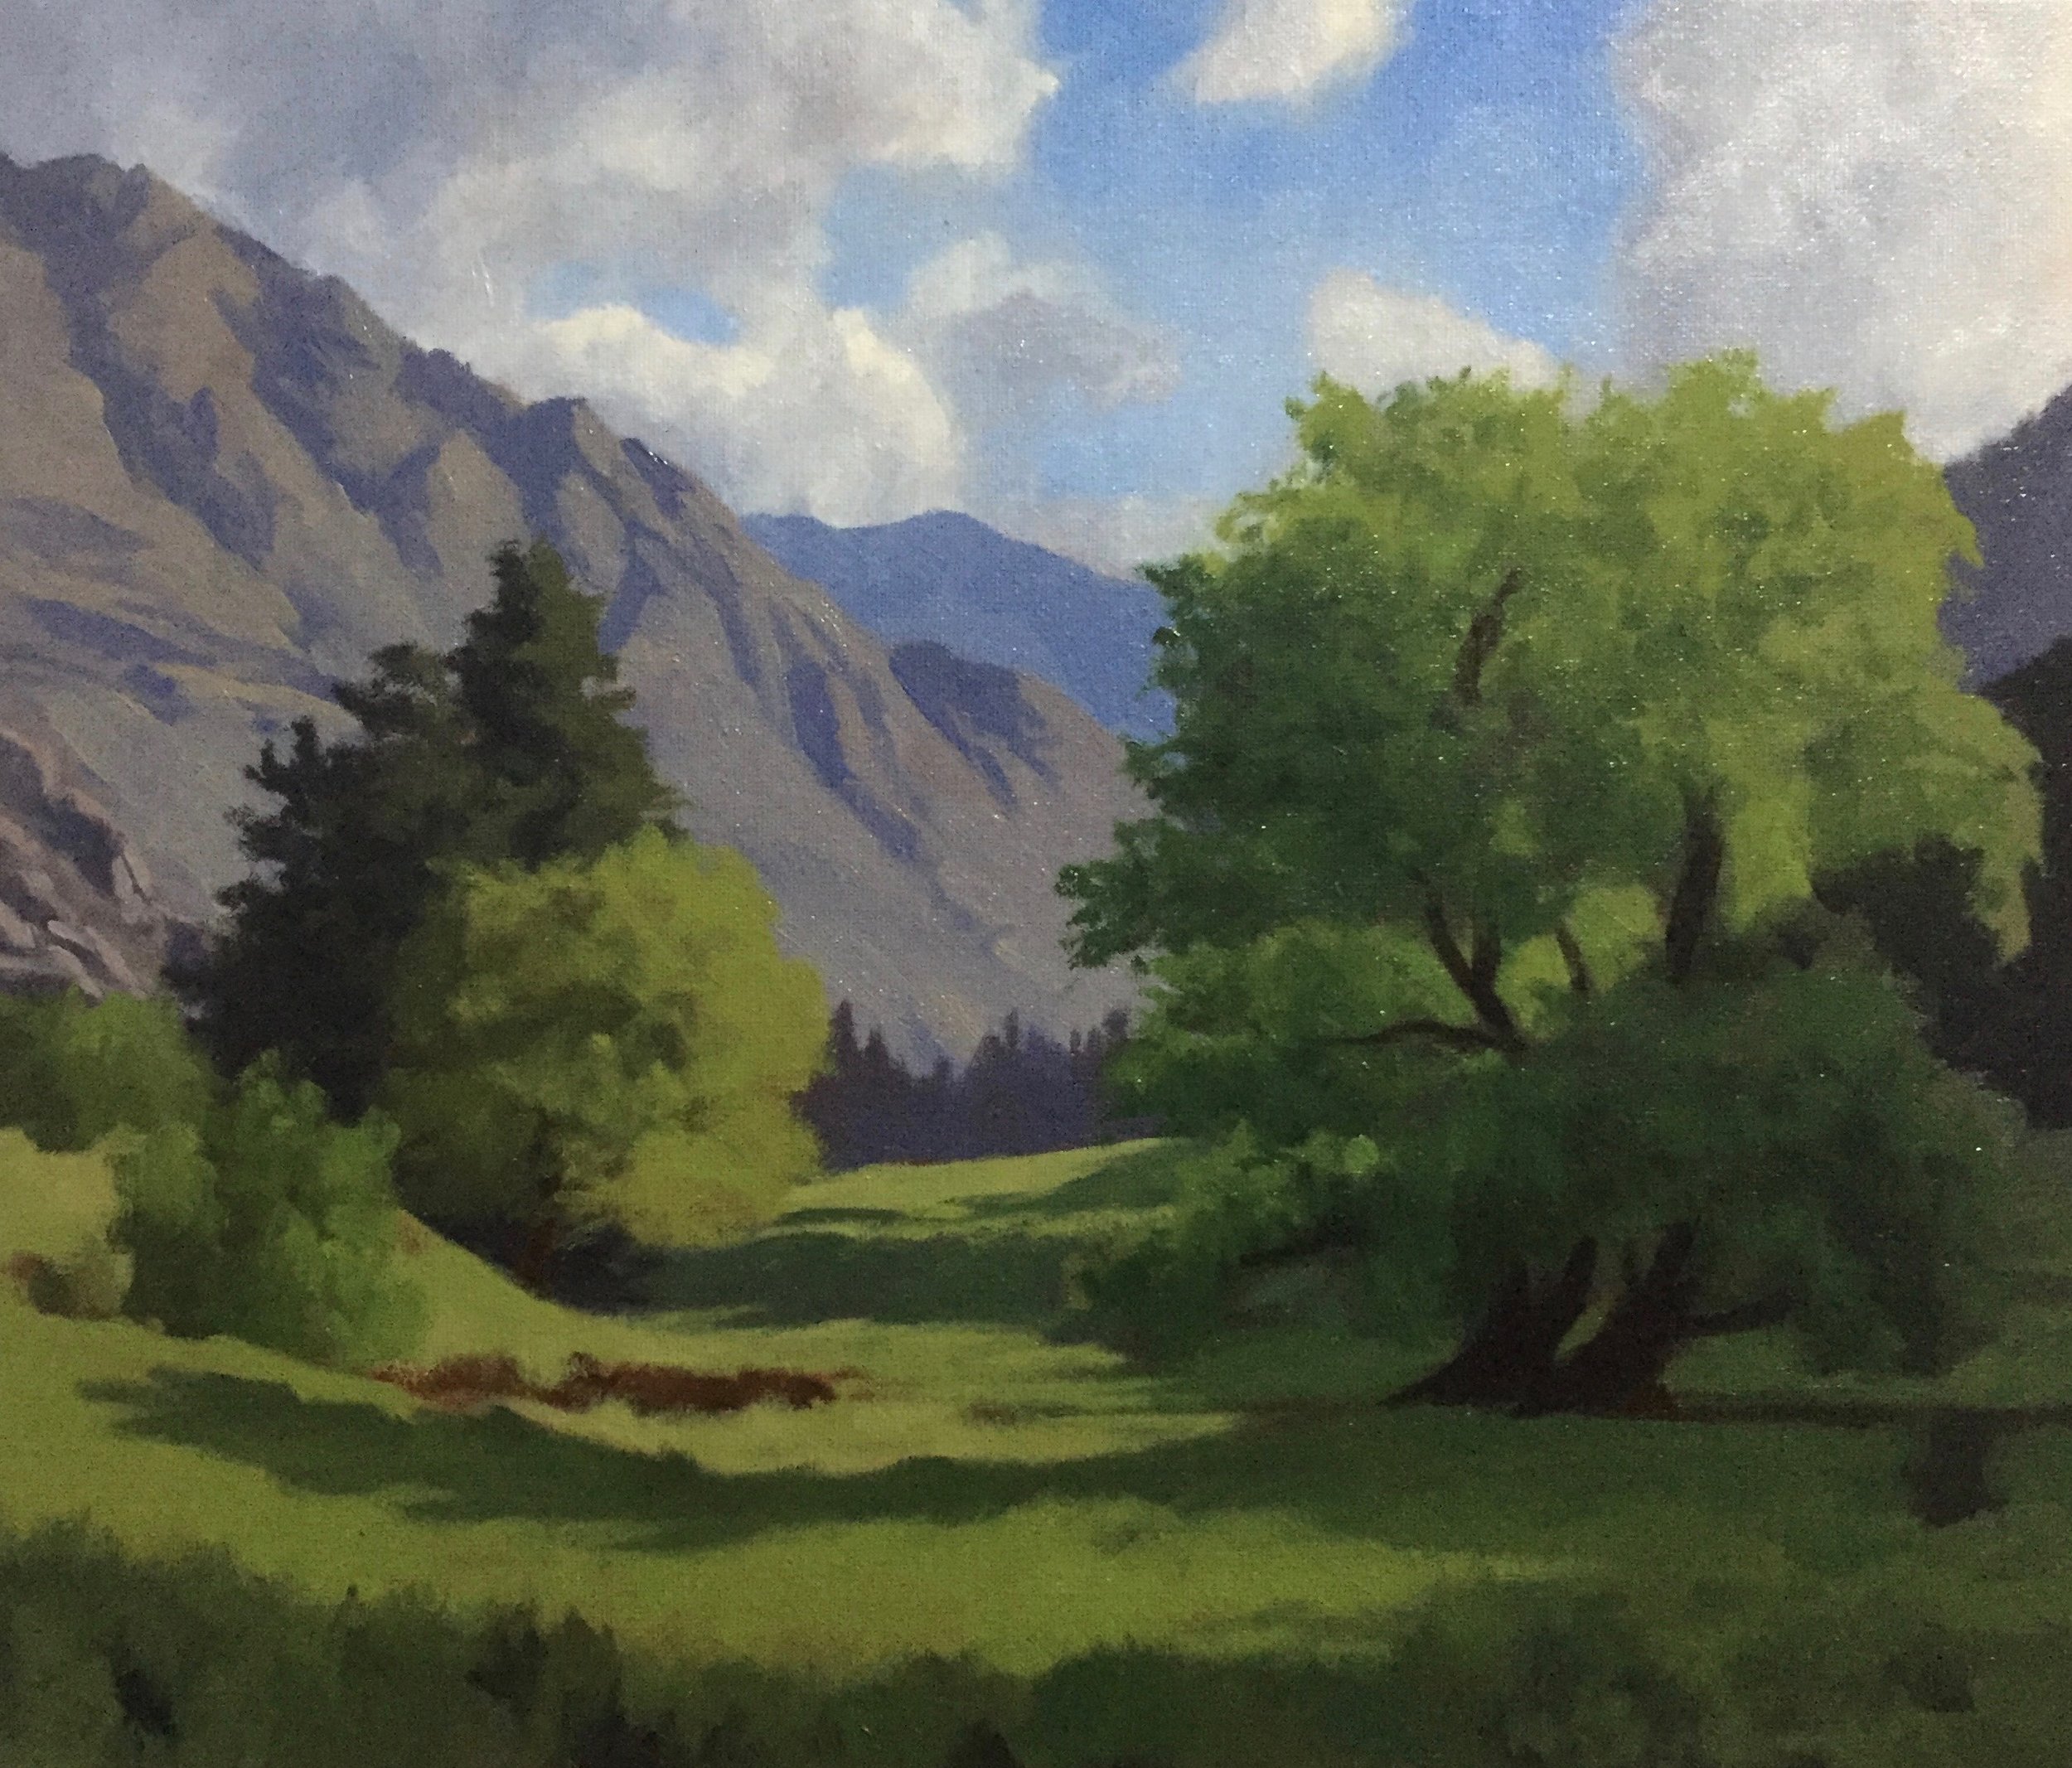
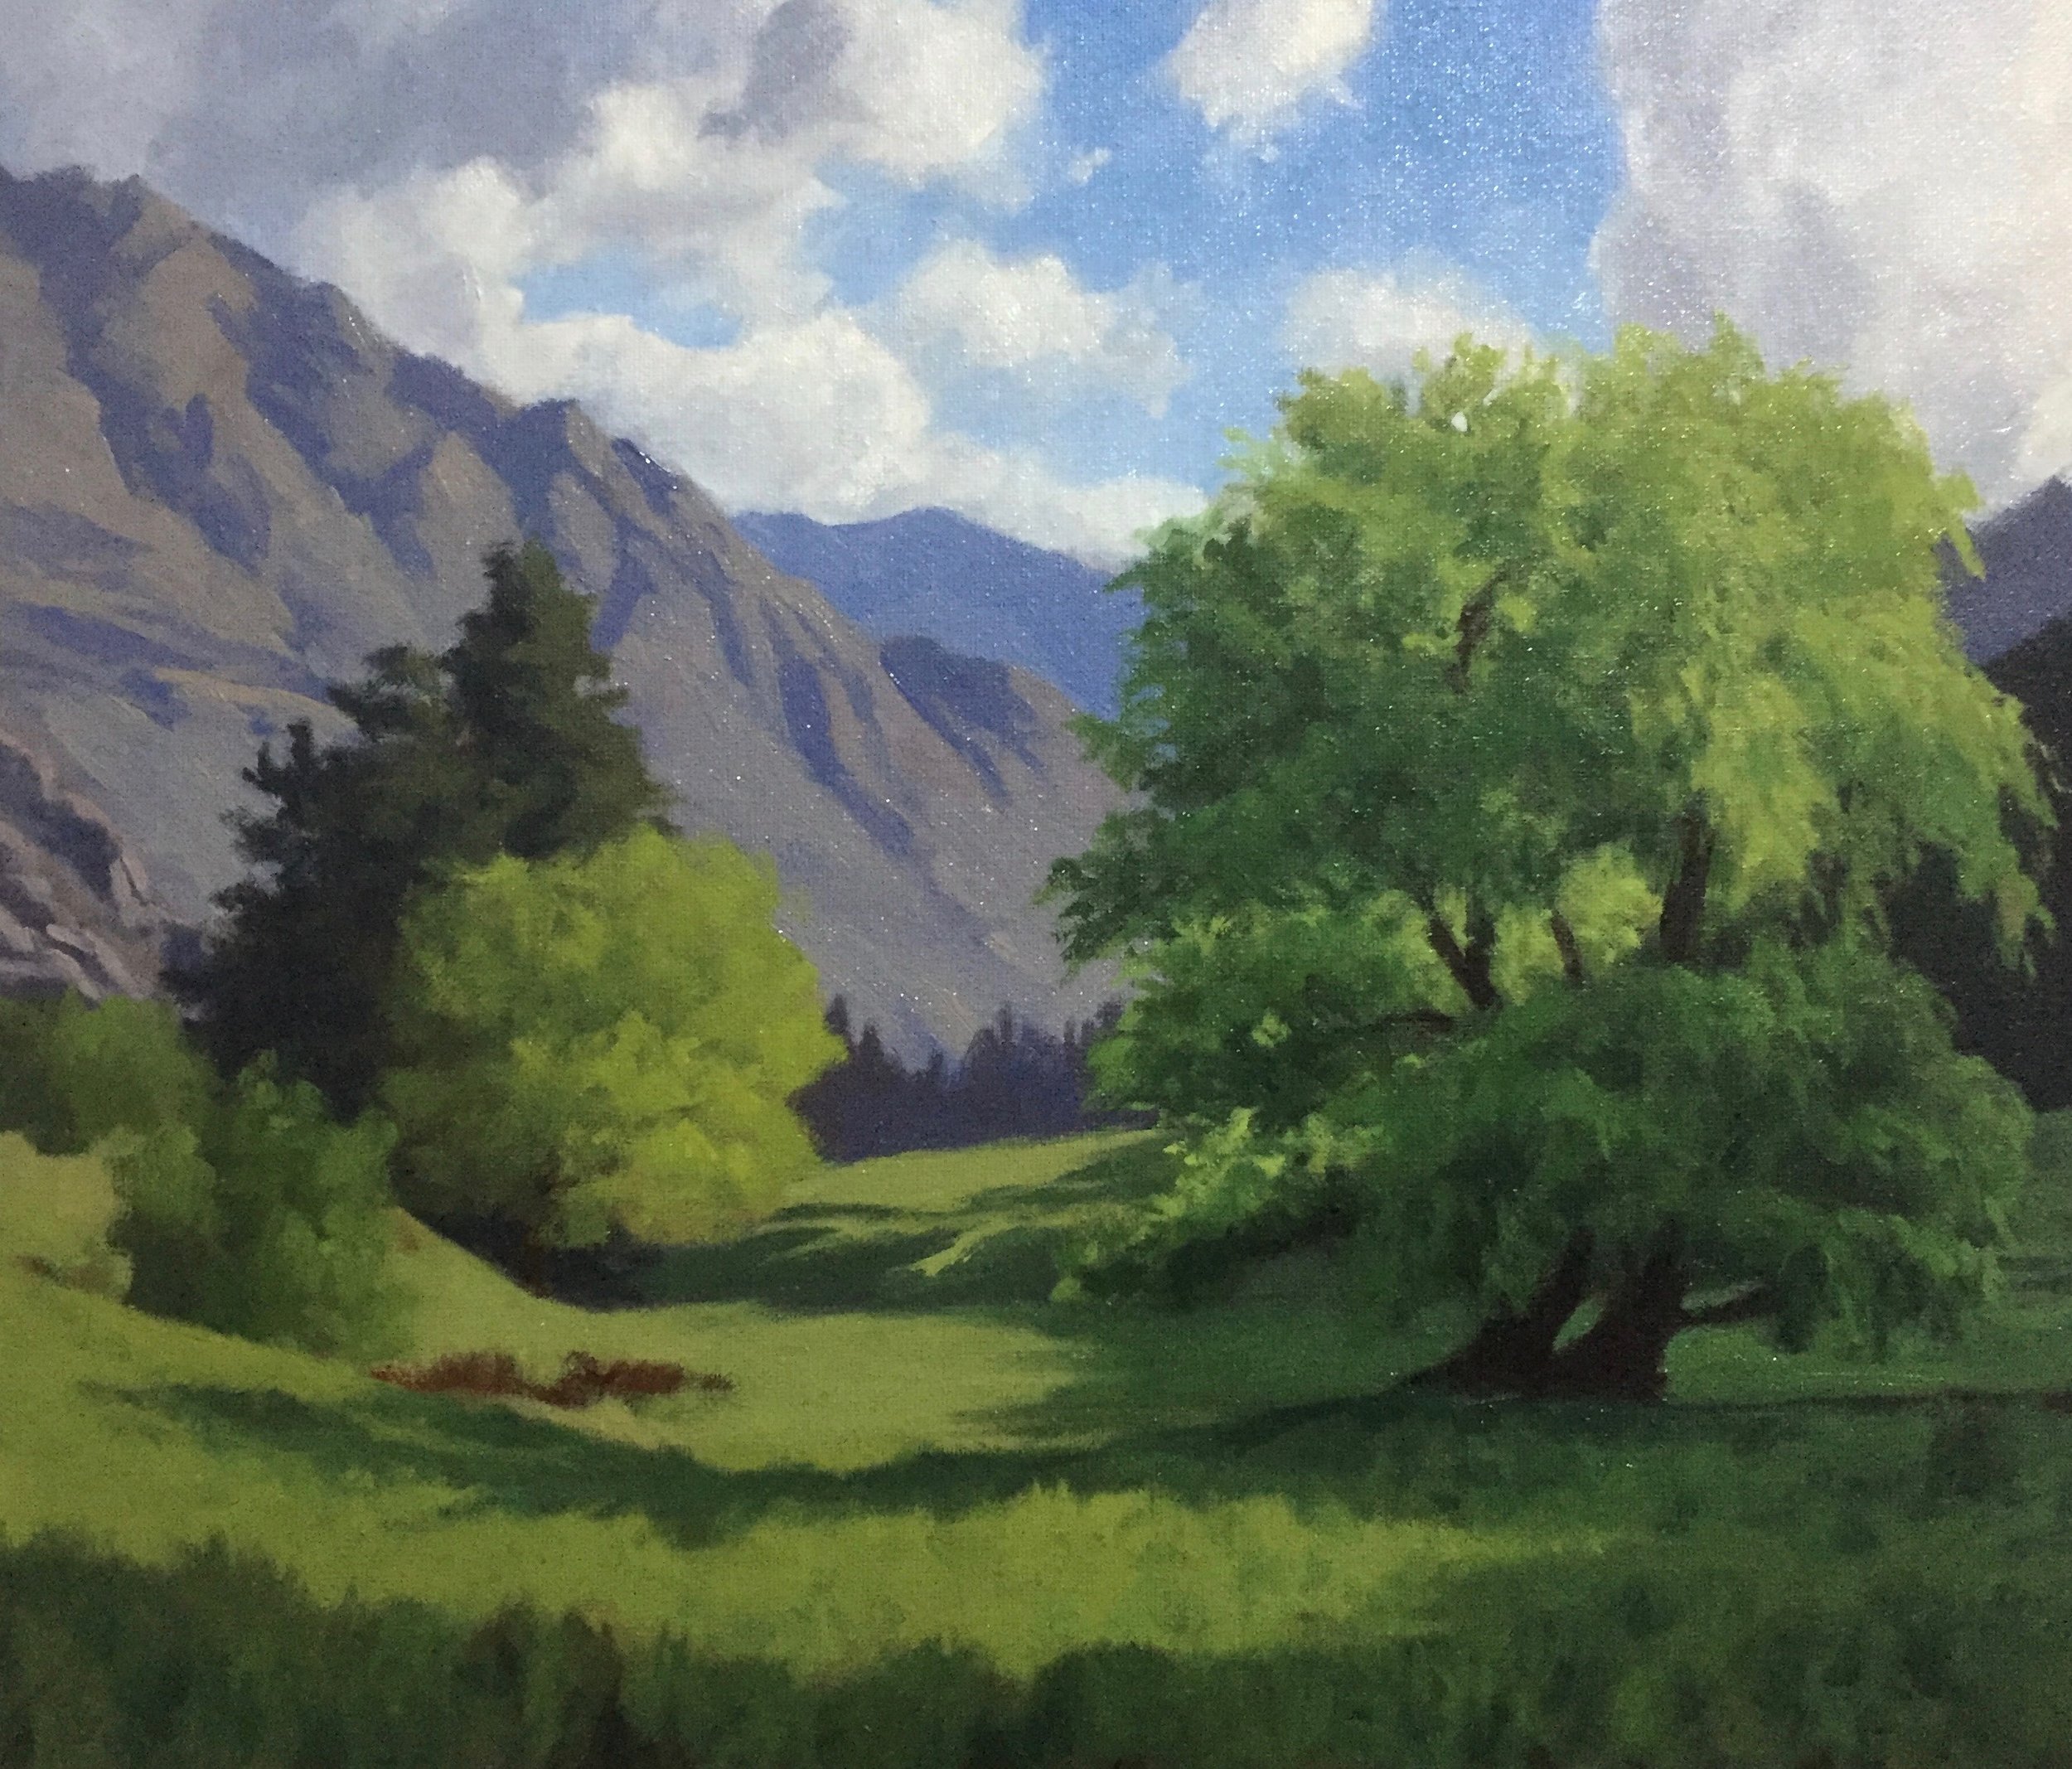
The inspiration for this painting came from a location just a five-minute drive from my art studio in Queenstown, New Zealand where I live.
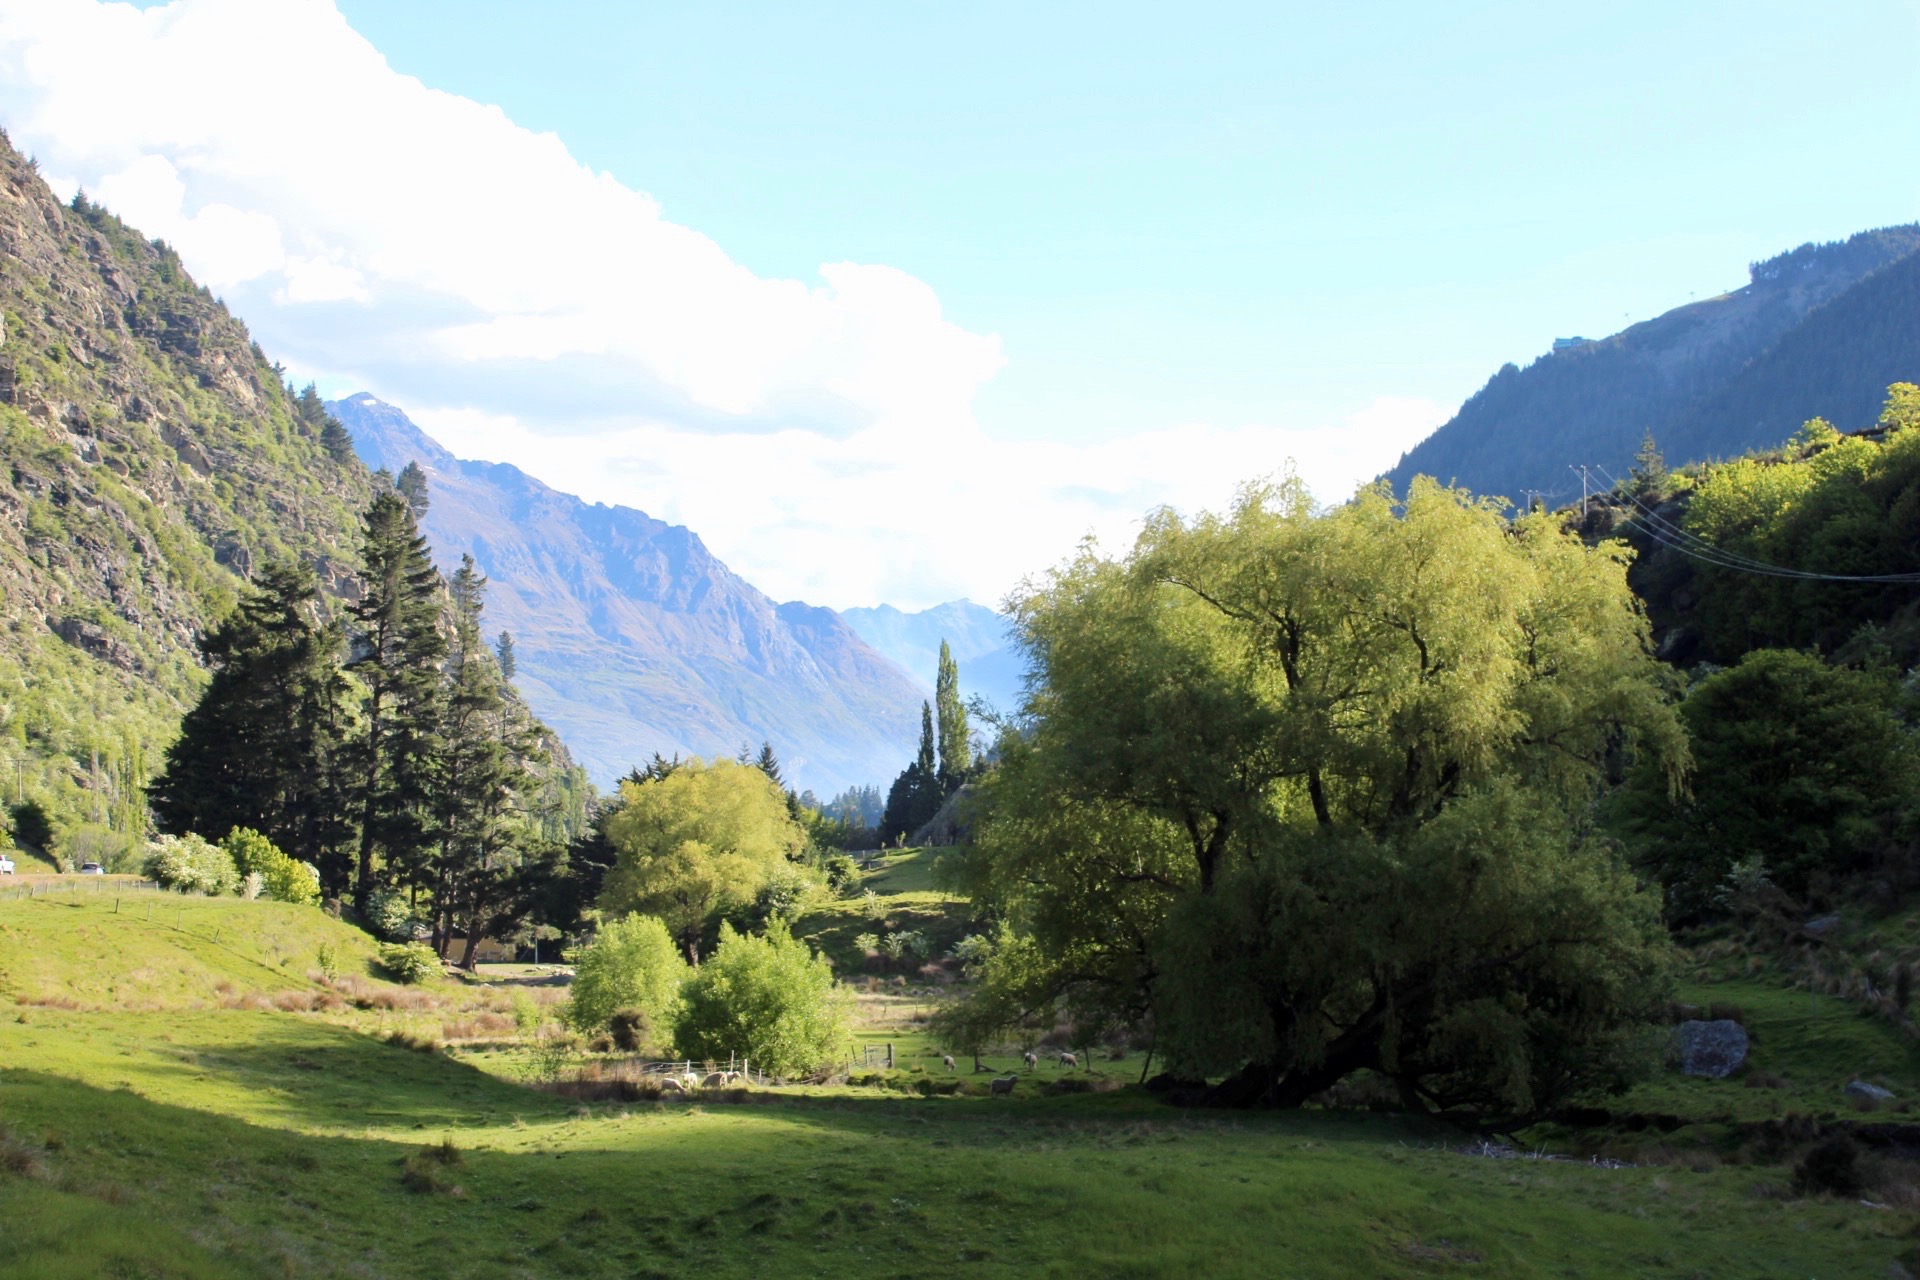
I happened to be driving through the valley one evening when I noticed the evening sun shining through the willow trees. Given it was spring and there was fresh foliage on the trees, the different hues of greens were really vibrant. I pulled over at the side of the road and took some photos. The idea for a painting was born!
Suitable for oils and acrylics
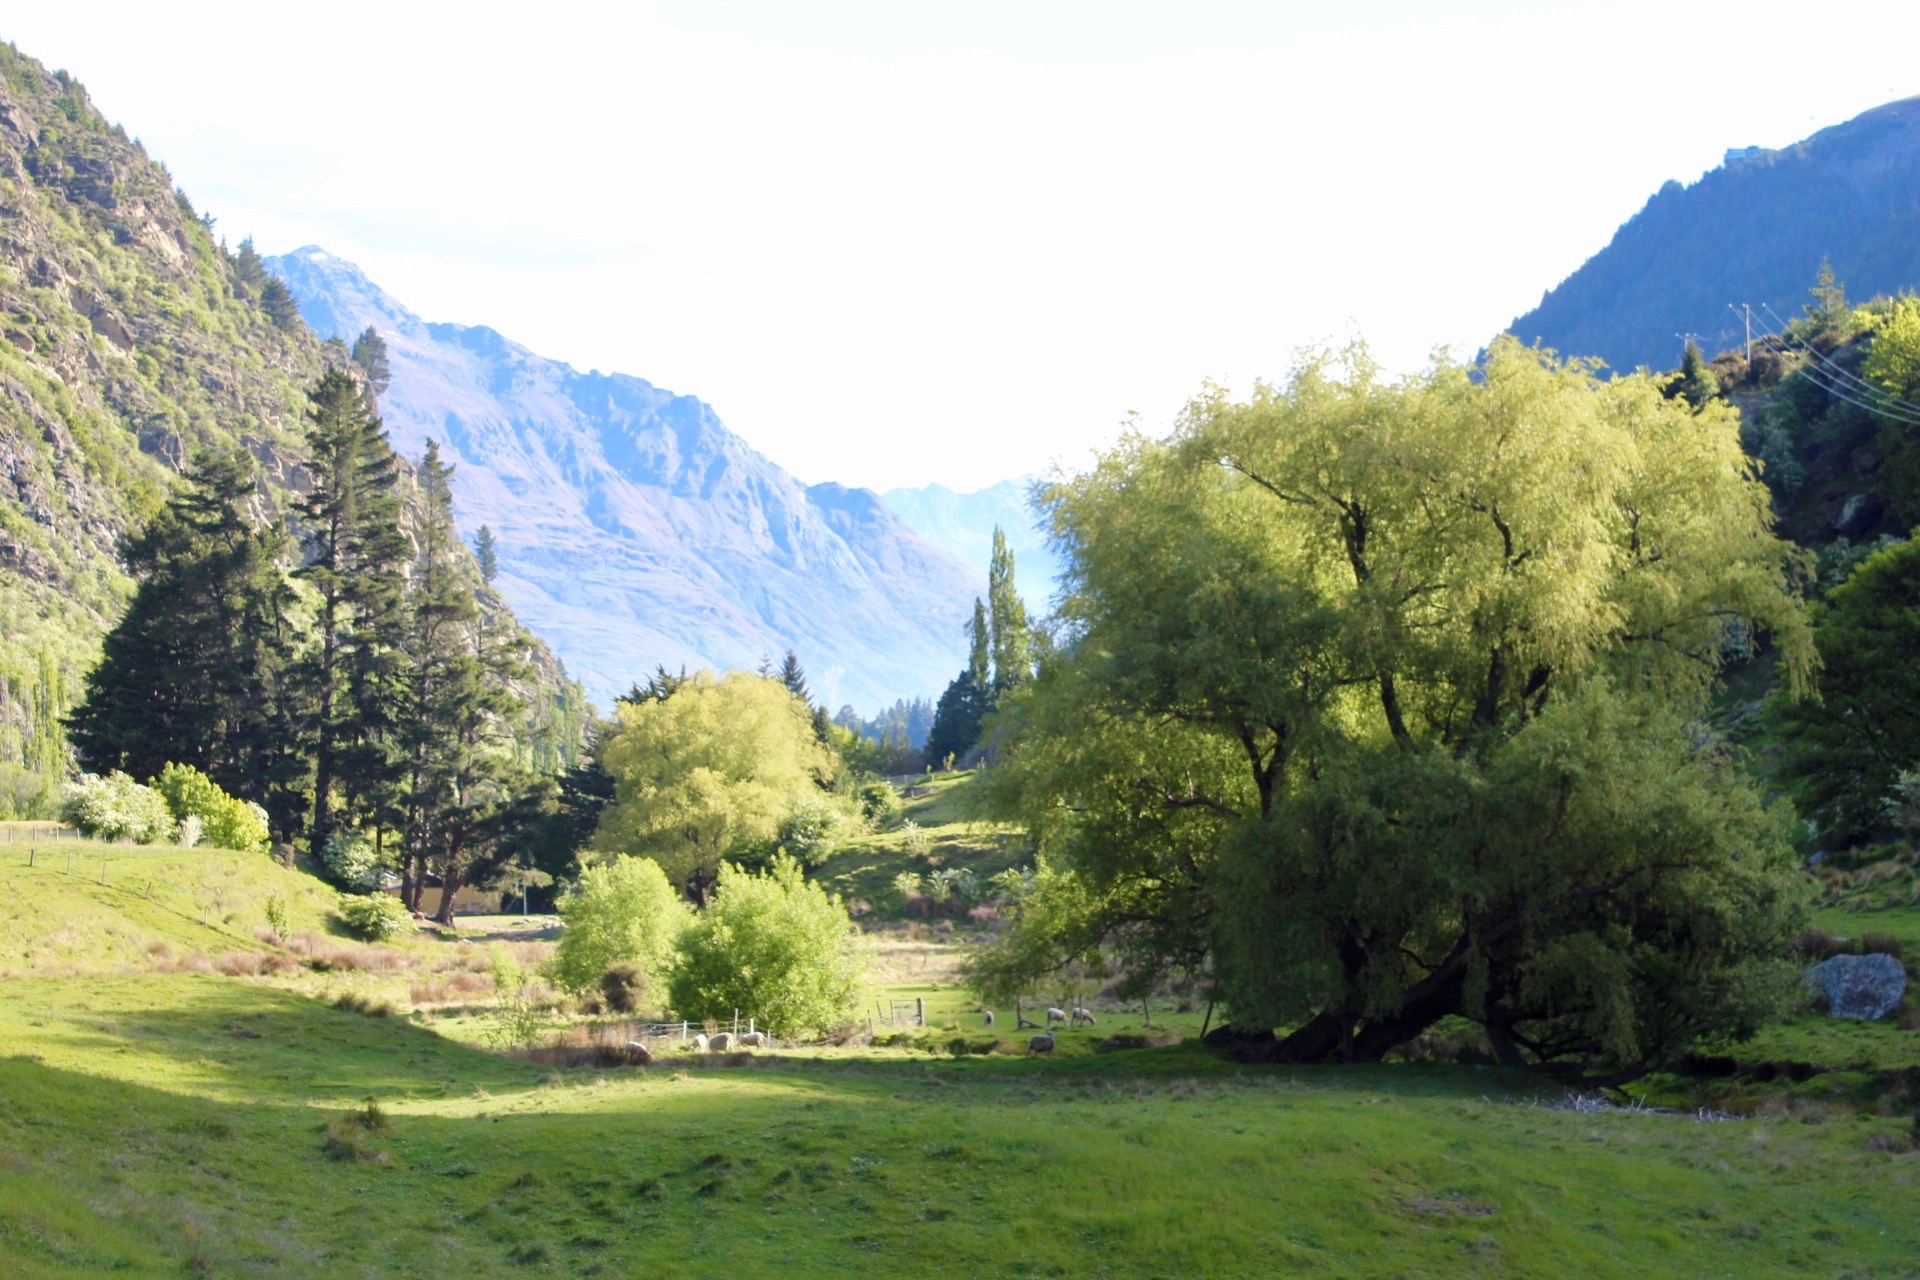
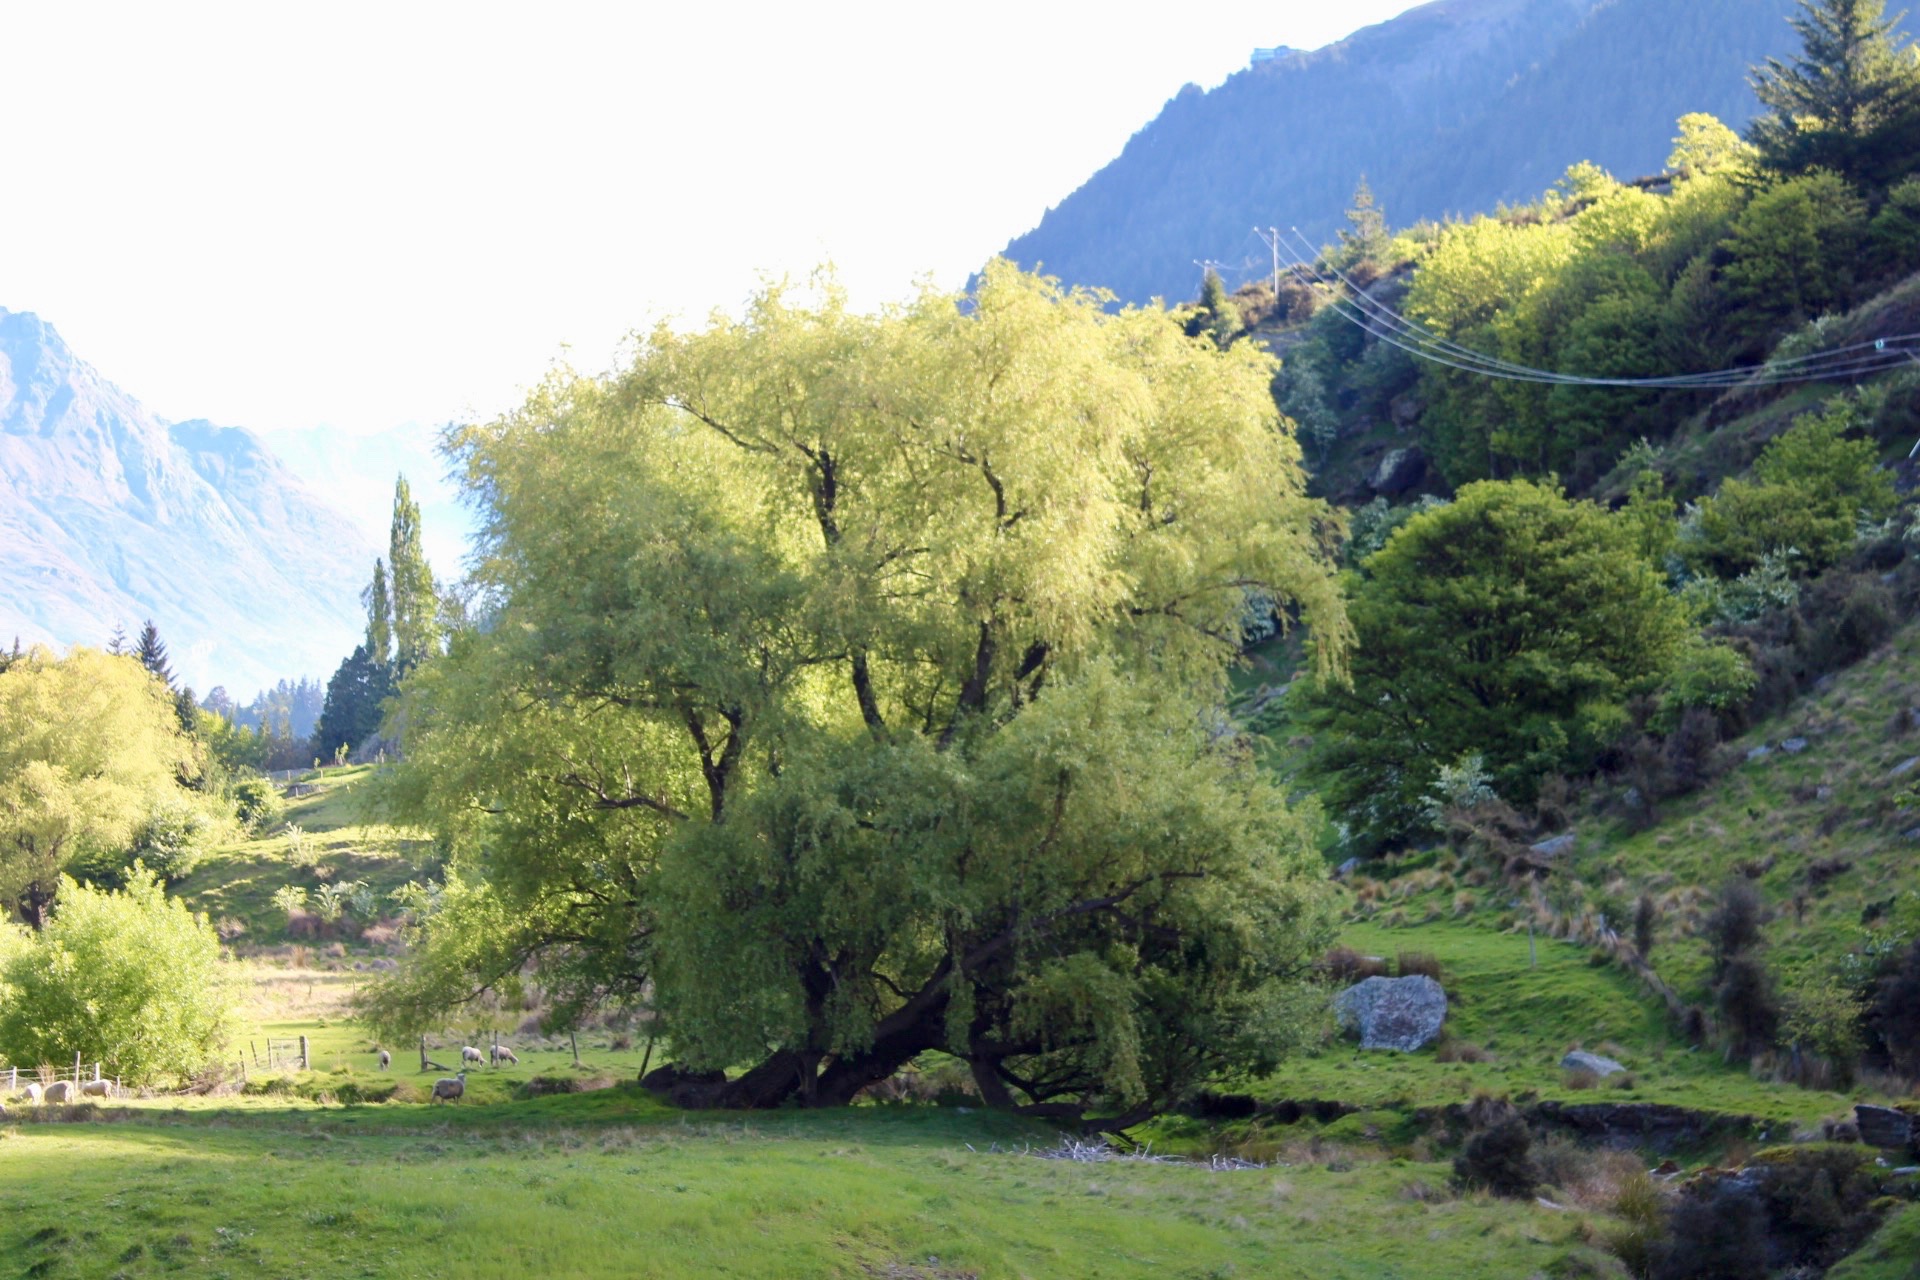
Reference Photos
Here are some of the reference photos I took. Please feel free to use them or copy them if you would like to have a go at painting this artwork.
In this tutorial, I will cover the following:
- Colours
- Brushes
- Composition
- Blocking in the painting
- Adding detail
- Final details


Colours
I painted this artwork in oils but you could also paint this in acrylics. The colours I used in this painting are as follows:
- Titanium white
- Burnt sienna
- Yellow oxide
- Cadmium yellow
- Cadmium orange
- Quinacridone magenta
- Ultramarine blue
- Phthalo green
Brushes
Here is a list of the brushes I used in this painting:
- No.6 flat
- No.2 flat
- No.2 filbert
- No.1 round
Composition
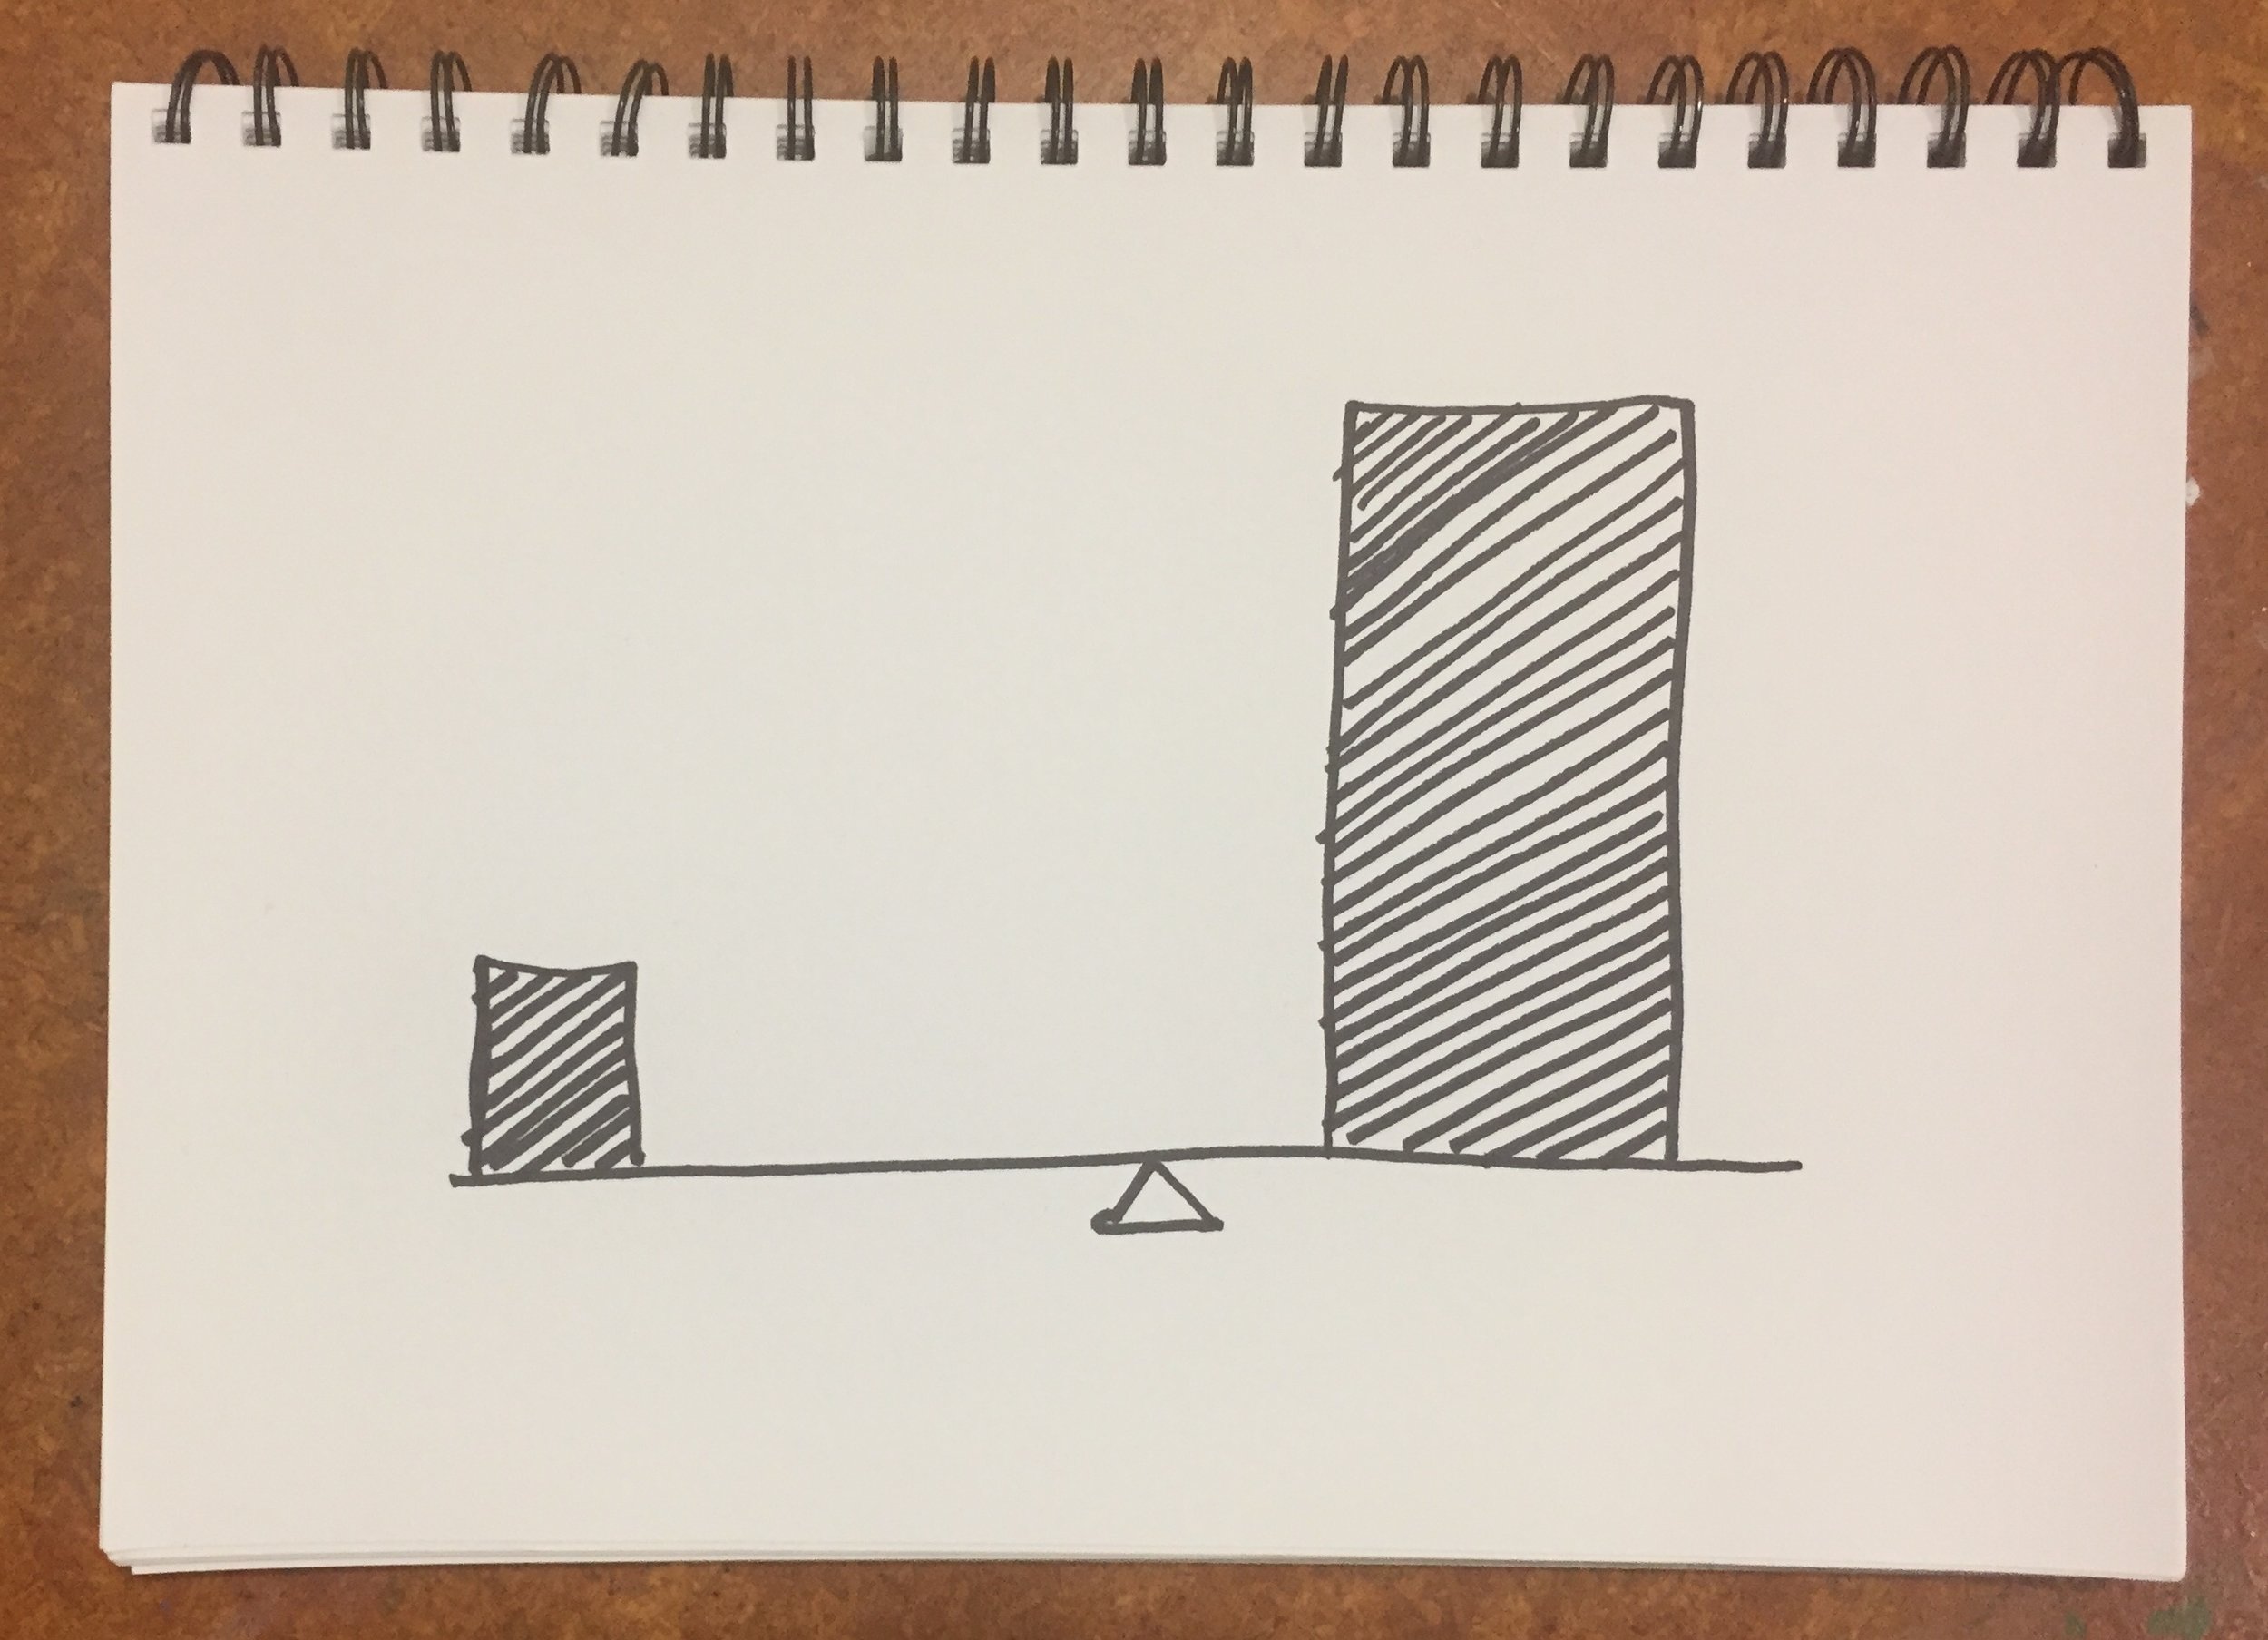
The design of this painting is based on a composition known as a ‘steelyard’ composition, it’s one of the simplest compositions and is particularly good if you are painting outdoors en plein air. One of my favourite artists Edgar Payne frequently used this style of composition in his paintings.
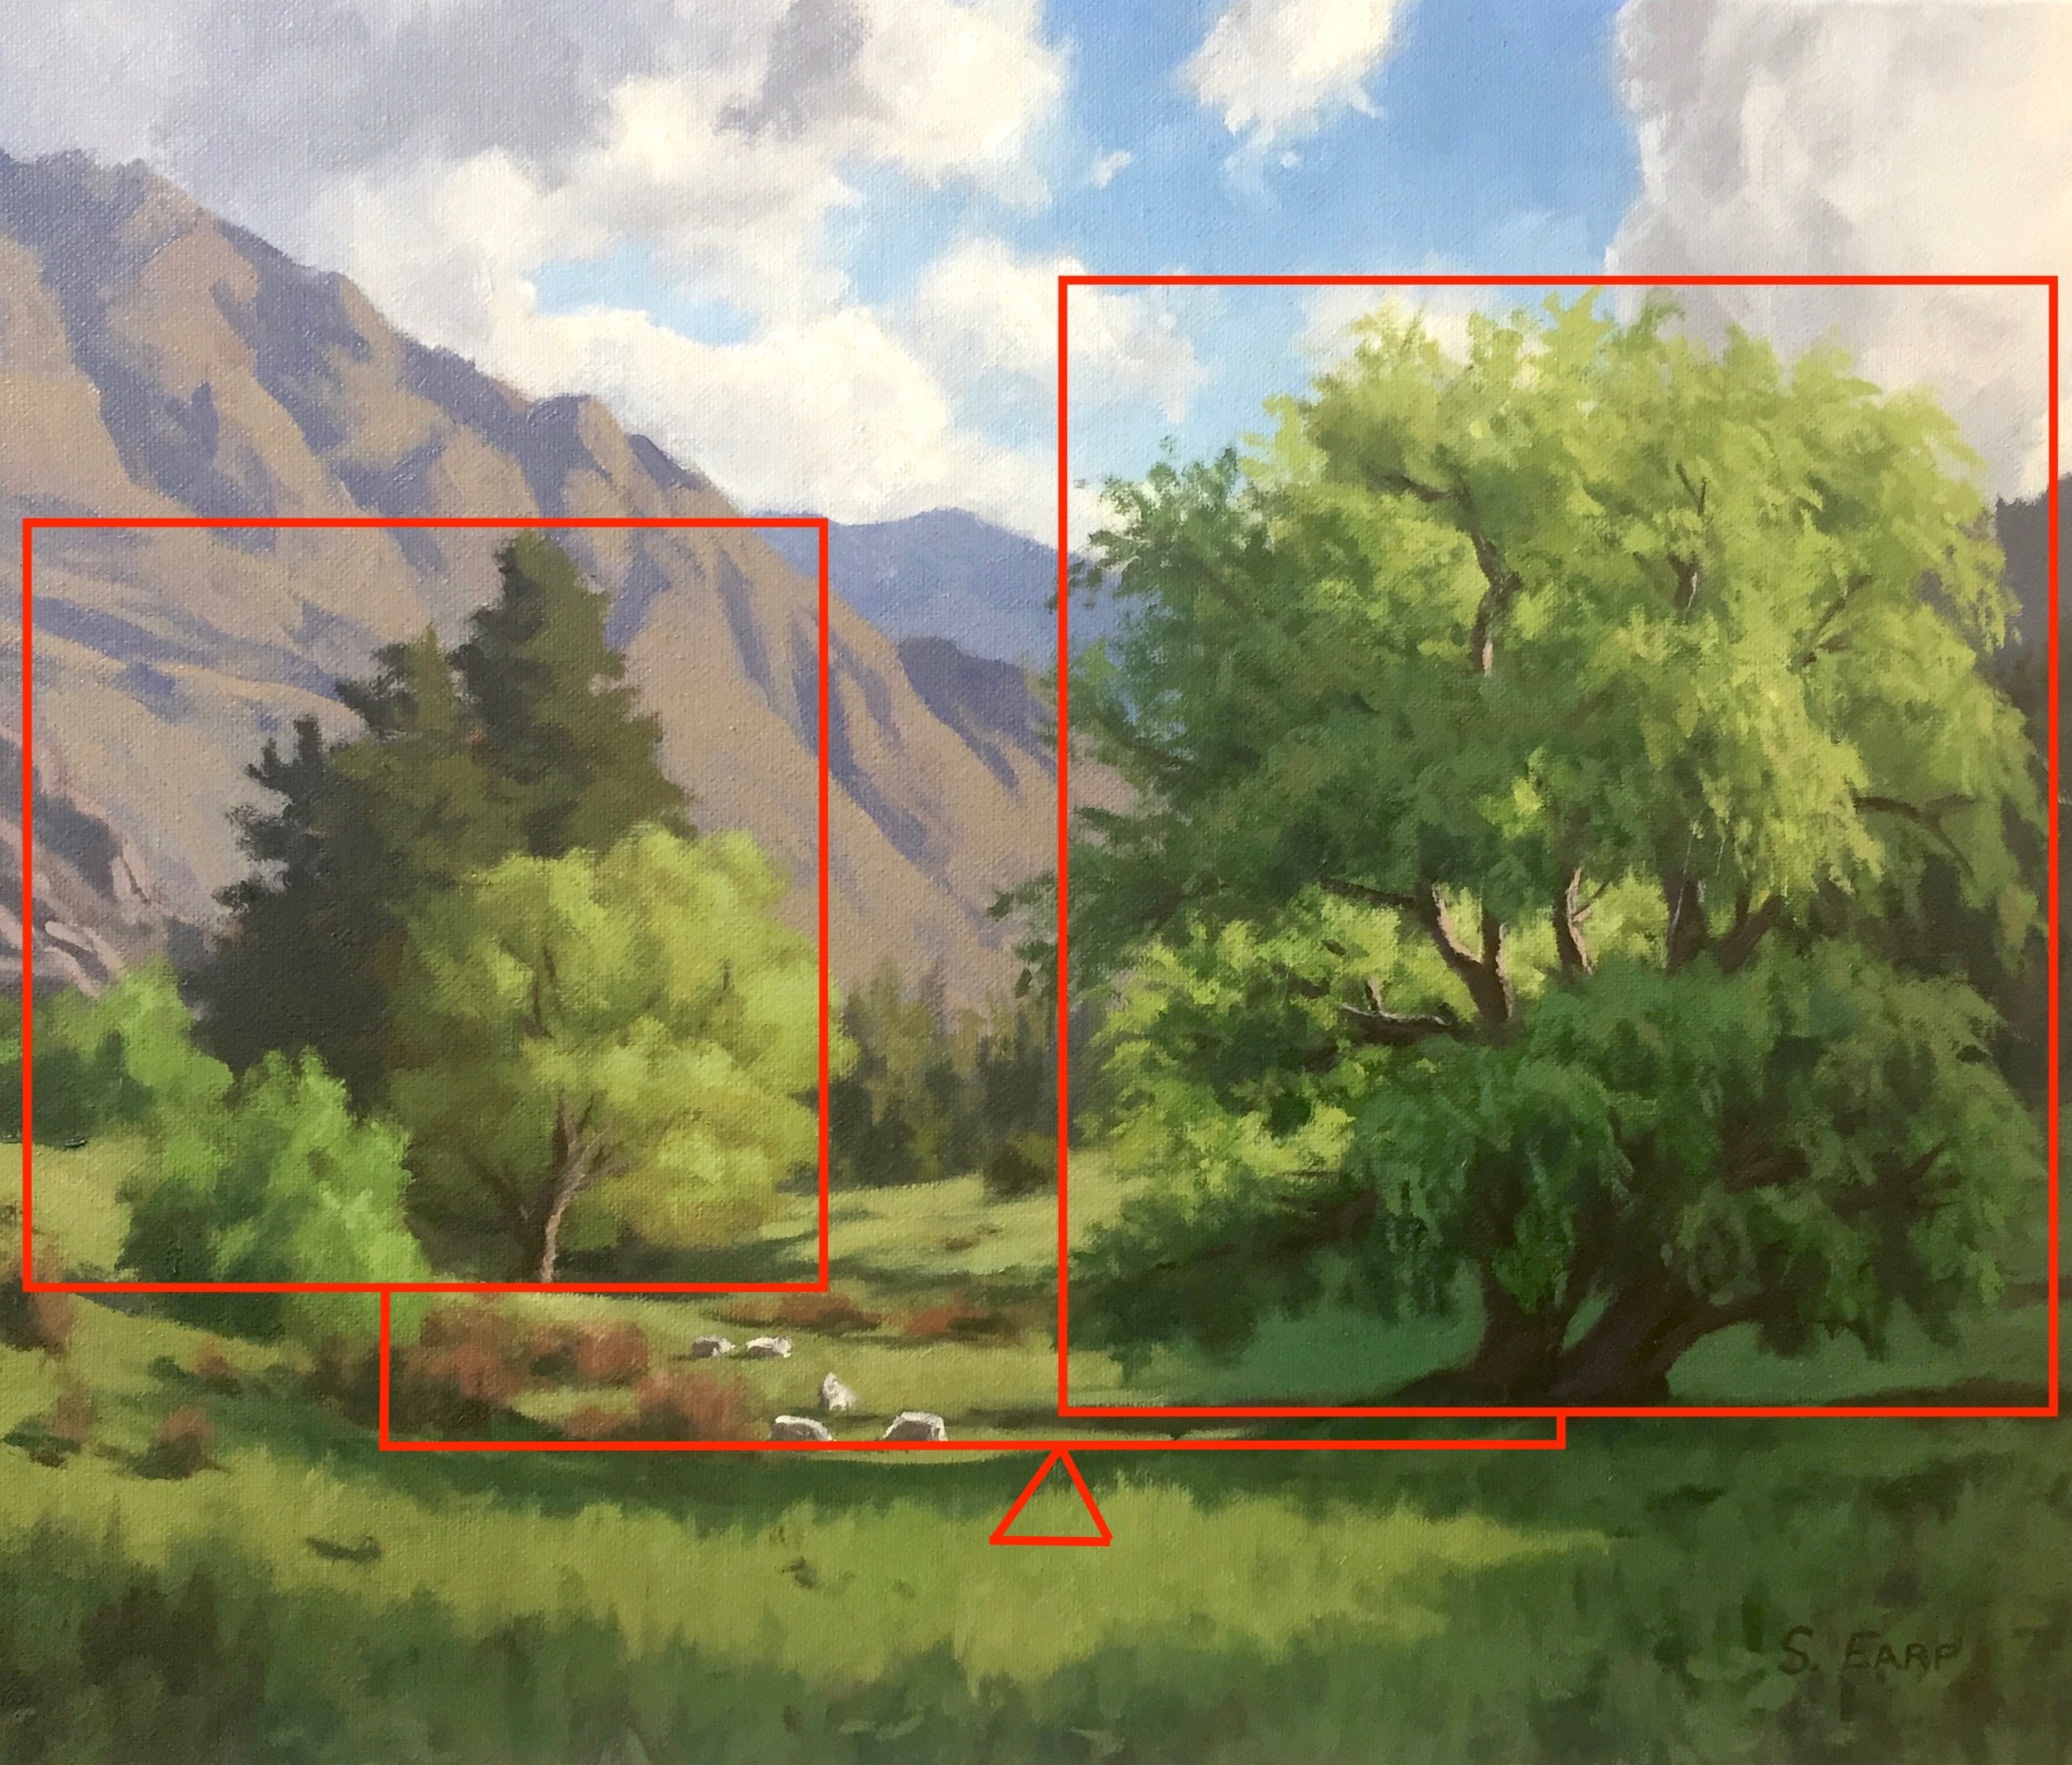
The steelyard composition is formed of a large mass that is counterbalanced on a theoretical fulcrum by a smaller mass further away from the centre.
In applying the steelyard composition to my painting I have made the willow tree on the right the largest mass which is then counterbalanced by willow and conifer trees in the mid-ground on the left side of the painting.
Before I began the painting I sketched out the composition and then a final sketch. I’d always recommend sketching before you begin a painting so you can create a good composition before you start.

Following the sketch, I then did a small colour study to make sure the painting would work before starting the final painting.
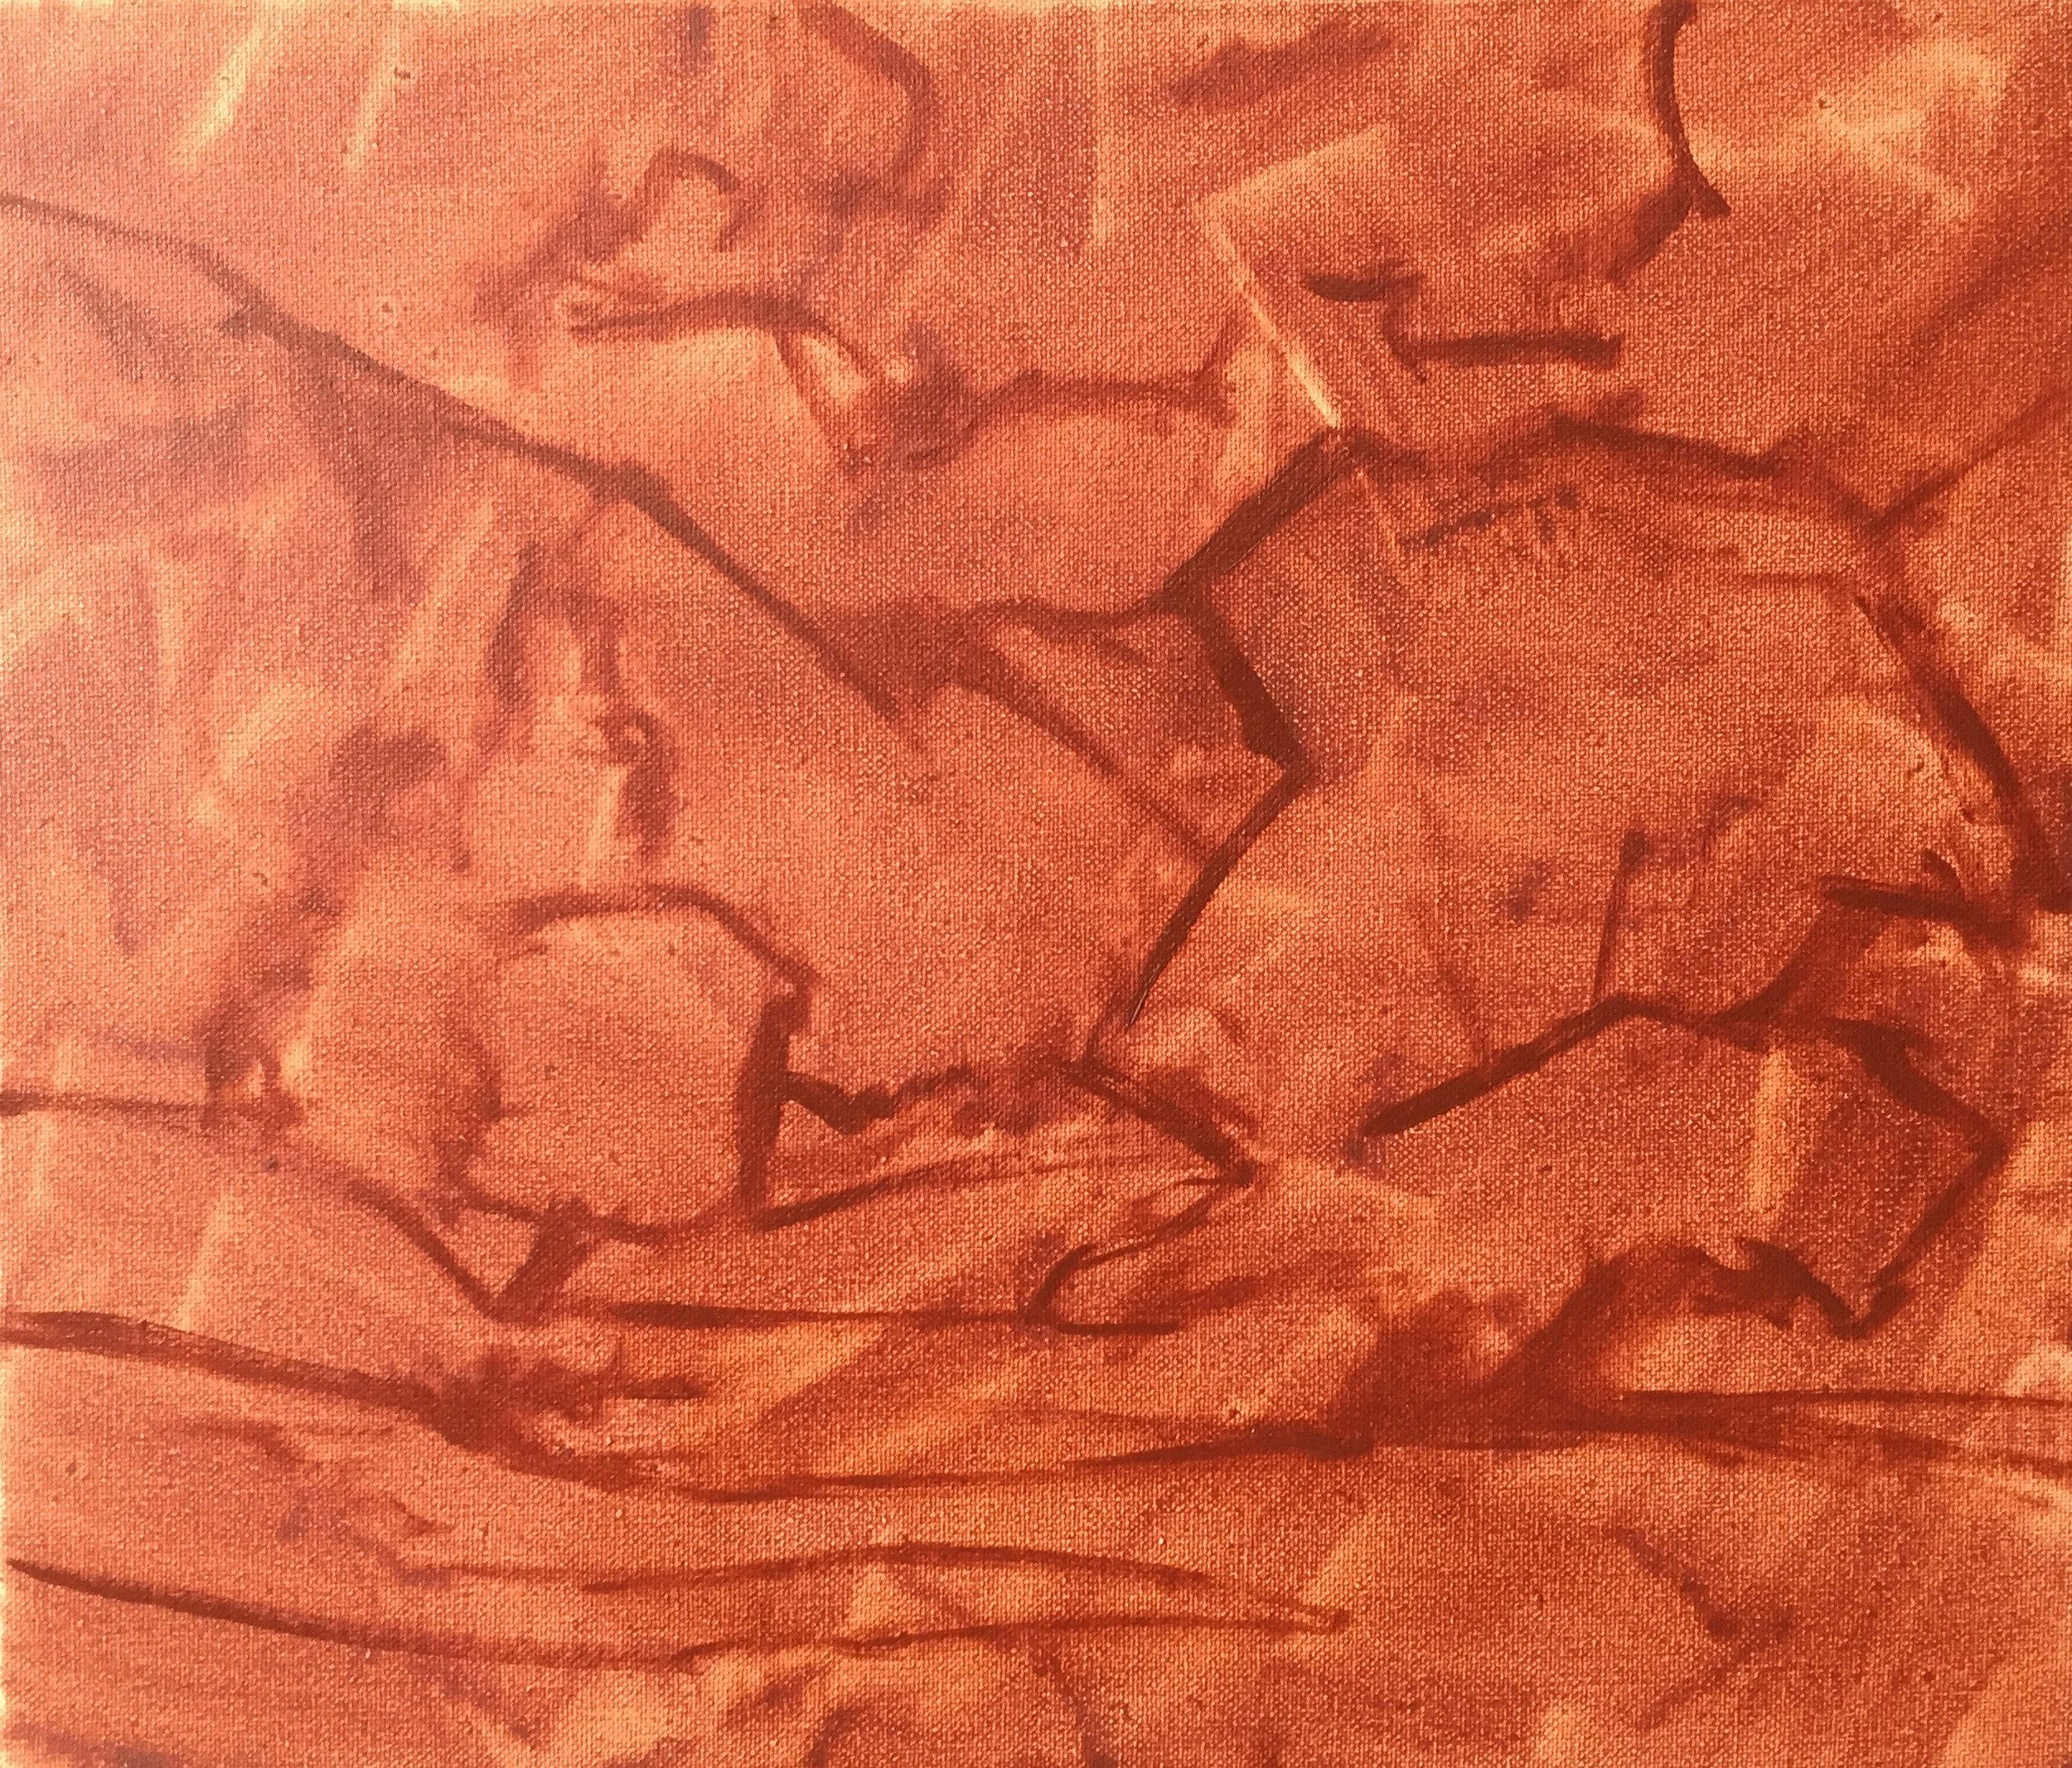
Blocking in the Painting
I’m using a 40cm x 50cm canvas. I prepared it with a layer of burnt sienna which helps with tone and colour.
I sketch out the composition with a No.1 round brush using burnt sienna mixed with Liquin Original . As I am using oil paint the Liquin helps to thin the paint and speed up the drying time.
In order to create a looser feel with the painting I carried out the entire blocking-in process with a No.6 flat brush. I prefer using bigger brushes as I can cover more ground quickly and have a more vibrant feel to the painting.
I start this painting by blocking in the sky first and as it’s one of the zones in the painting that is lightest in value I will use it to gauge the tonality of the rest of the painting. What is value? Value is basically how light or dark a colour is. The foreground of a landscape painting will likely have the darkest and lightest values but as the painting recedes into the distances the values are likely to become more mid-tones.
Using a No.6 flat brush I paint the cloud highlights with titanium white. I then paint the cloud shadows using ultramarine blue, burnt sienna, quinacridone magenta and titanium white.
I paint the sky with a combination of ultramarine blue, a very small amount of phthalo green and titanium white.
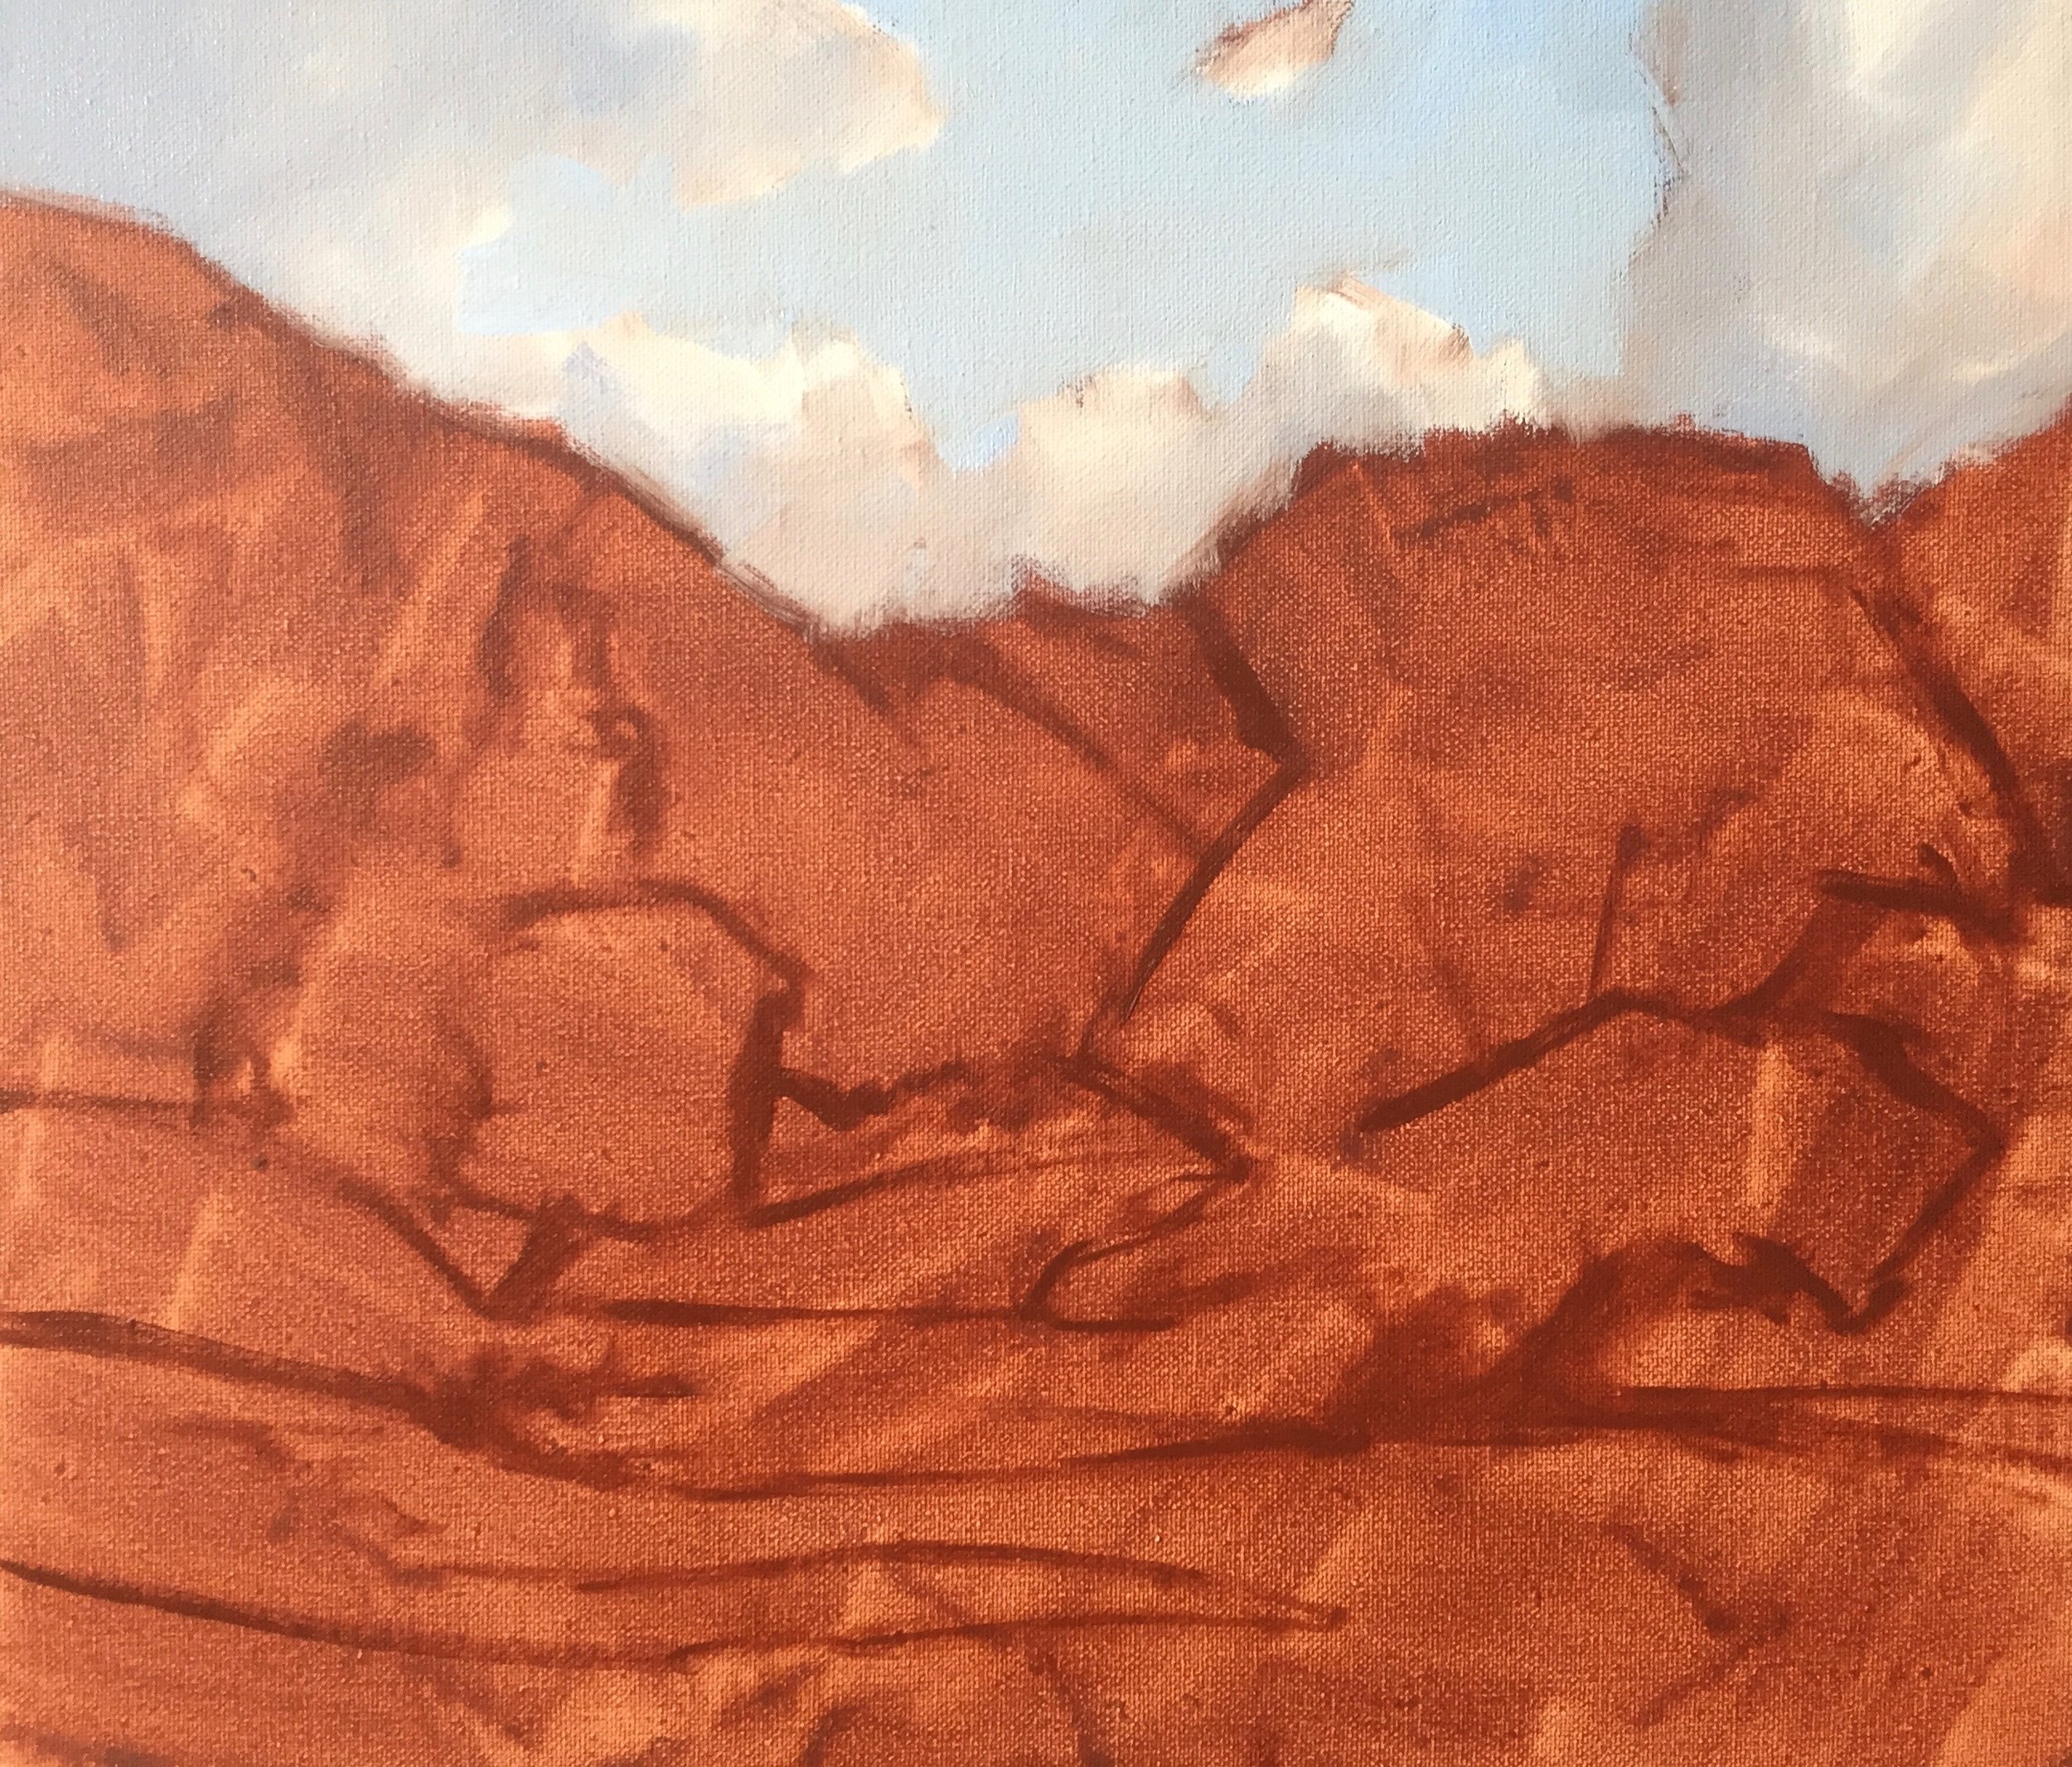
I start marking in the shadows in the mountains using a combination of burnt sienna, ultramarine blue, quinacridone magenta and titanium white, the same colours I used in the clouds however because it is darker in value I use less titanium white. Using the same colours makes the painting more cohesive as it contains common elements.
The mid-ground shadows are darker than the shadows in the mountains and I mix the shadows of the trees using, ultramarine blue, yellow oxide and a very small amount of burnt sienna as a base. I use this same colour combination for the shadows in the willow tree in the foreground to start with but later on in the painting, I’ll be adding more colours.
The grass in shadow was also mixed with the same colour as the willow tree shadow mix but with a little titanium white added to lighten the value.
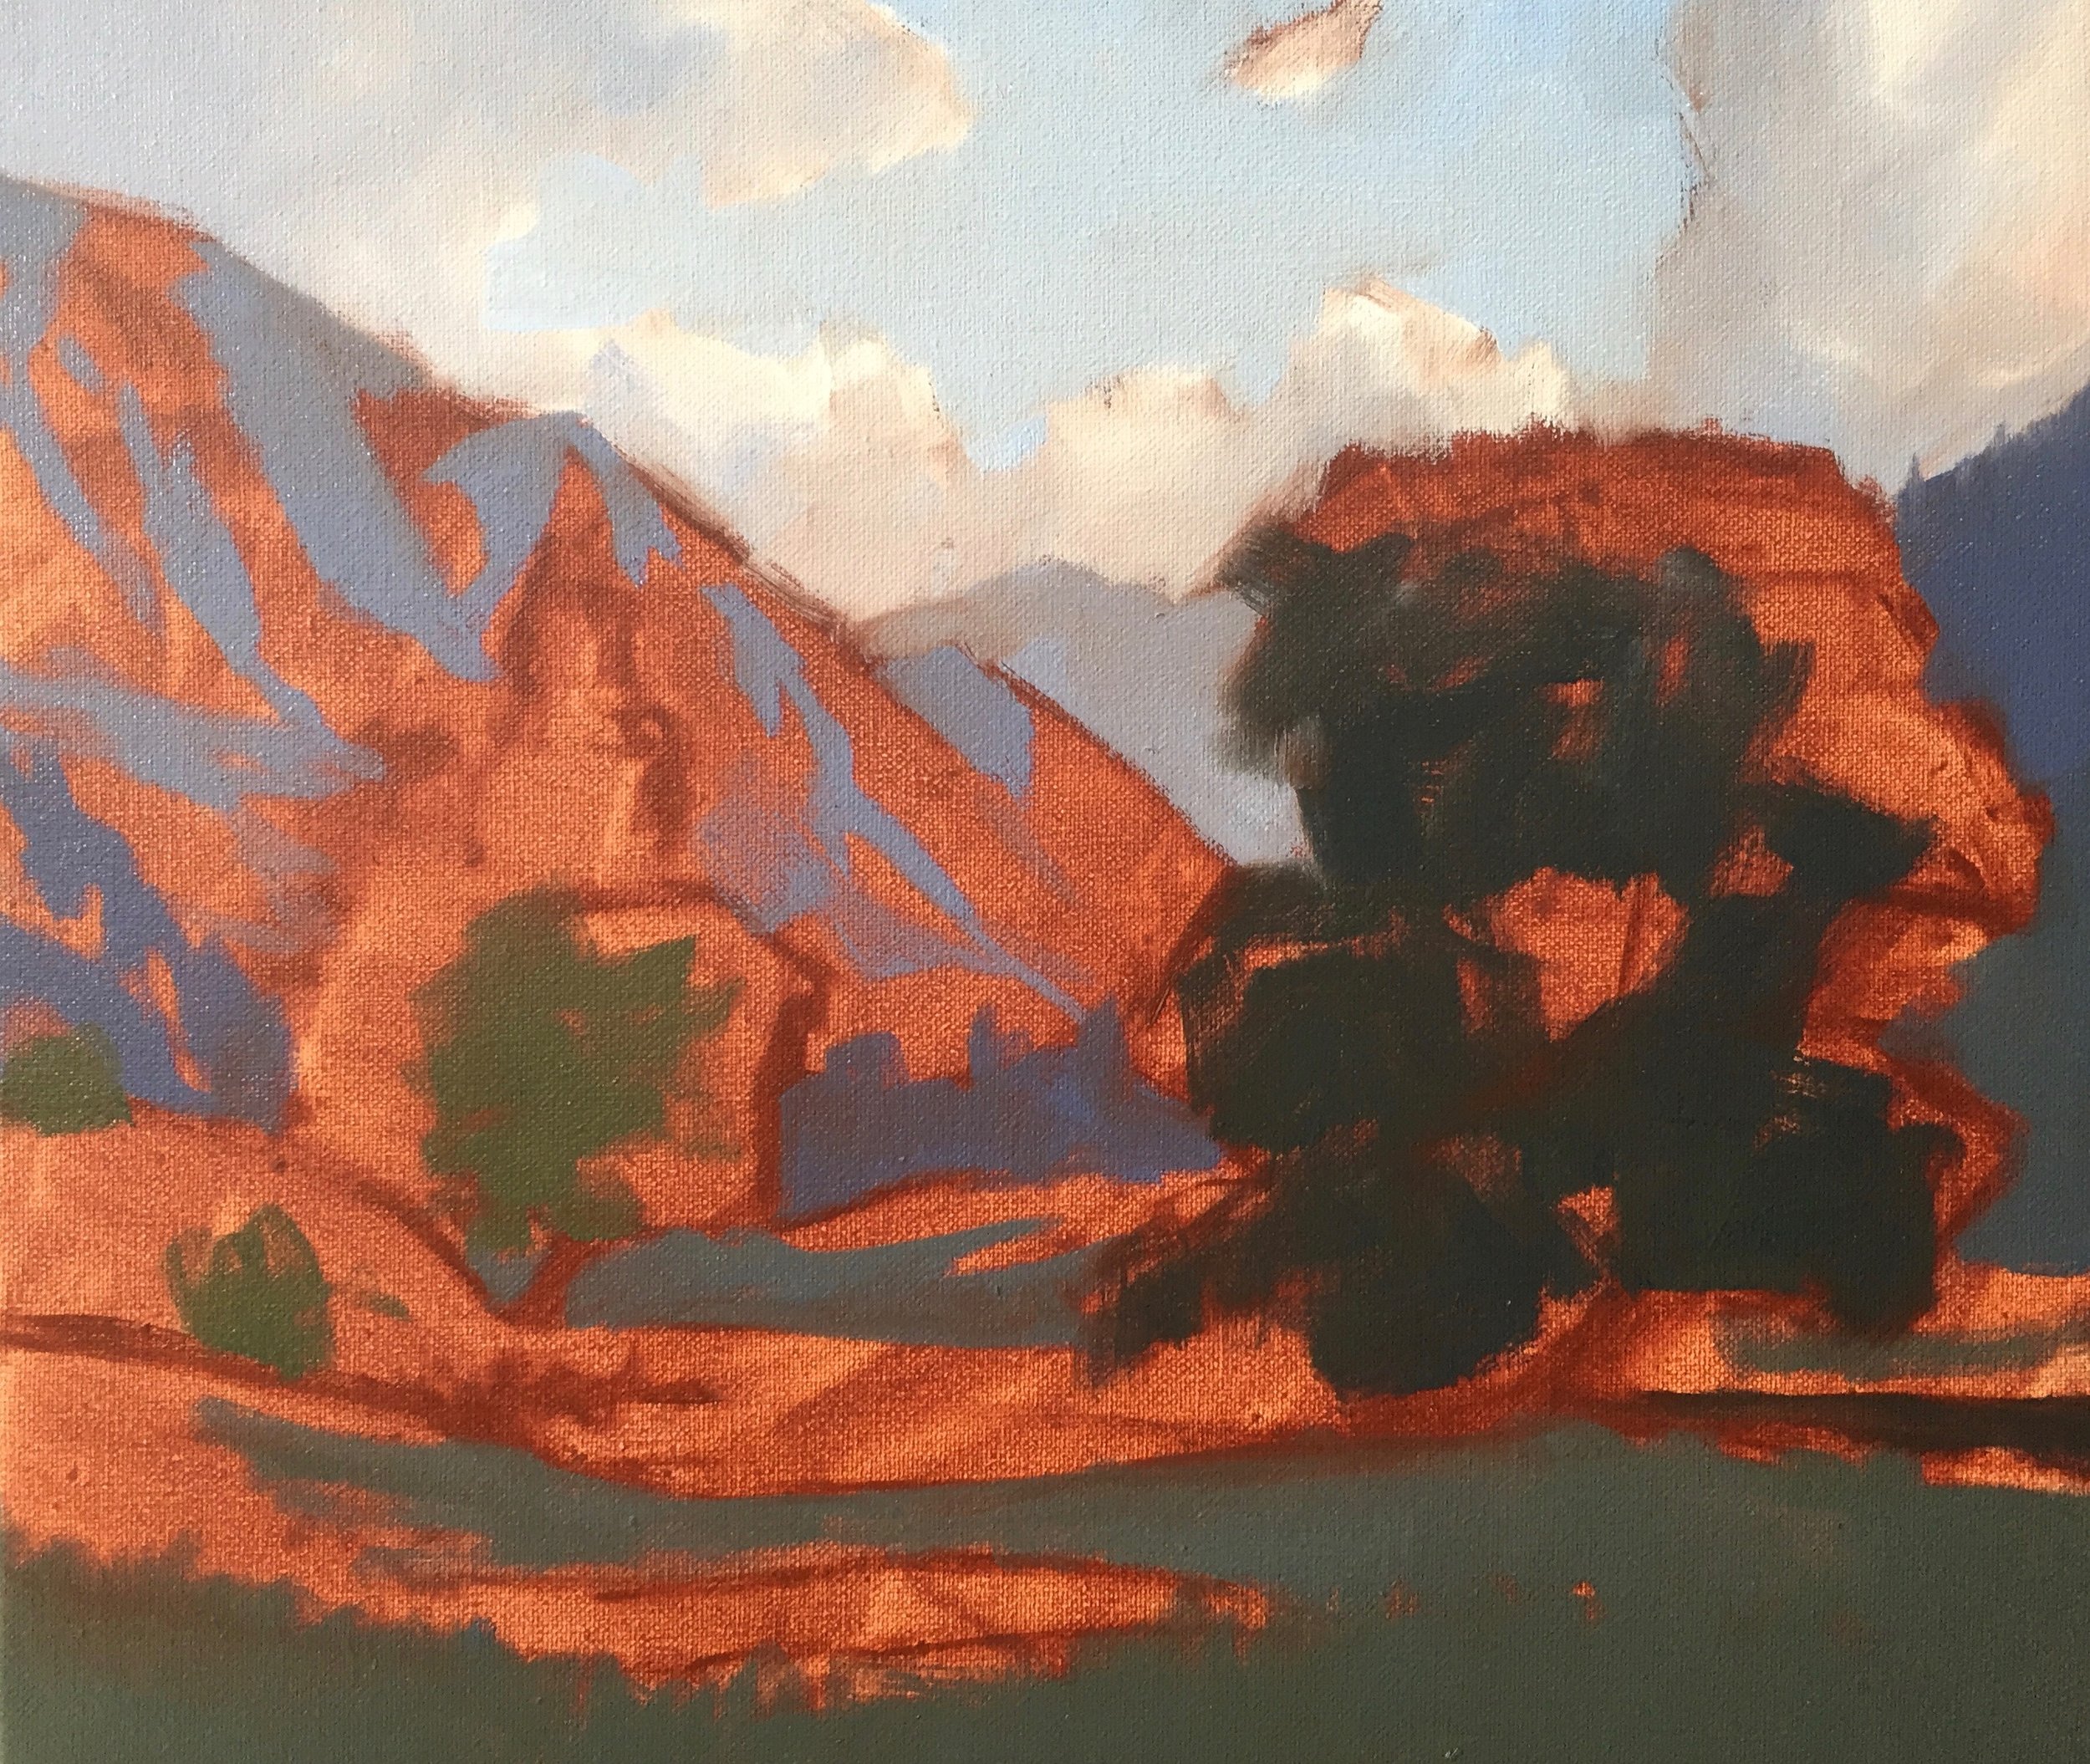

I’m still using a No.6 flat to block in the areas of the grass and the willow trees that are in the light. I’m starting my colour mix with cadmium yellow and ultramarine blue and adding yellow oxide, quinacridone magenta and titanium white to lighten the value in the mid-ground grass.
I use the same colours for the grass in the foreground but I am using burnt sienna instead of quinacridone magenta.
Why am I adding quinacridone magenta or burnt sienna to my grass? Well, both these colours contain red, so why is that important? Red is opposite to green on the colour wheel so by mixing red or a colour that contains red it will desaturate the green and reduce its chroma and vibrancy. This will also make the colour look more natural and organic.
Green is a tricky colour to work with, get it right and you can create some very rich, vibrant and natural-looking landscape painting but get it wrong and it can form a massive overpowering distraction in your painting.

I complete the blocking-in stage by painting the basic forms of the trunks and scaffold branches of the willow tree and as these form dark accents in the painting, I mix the colours with a combination of ultramarine blue and burnt sienna.
I add some darker tone to the grass in the foreground again with a mixture of ultramarine blue, yellow oxide and quinacridone magenta.
Once the blocking in stage is complete I allow the painting to dry. The blocking in stage just serves as a map from which I can add detail to afterwards and it’s also a means of establishing the tonality of the painting. I can make changes afterwards once the painting is dry.

Adding Details
Once the painting is dry I can start adding detail, revisit the clouds and refine the forms. I am still using a No.6 flat brush and the same colours as I used in the blocking-in stage.
I emphasise those cloud highlights more by adding titanium white mixed with a little yellow oxide and burnt sienna.
I use a No.2 Filbert brush to form the cracks and ridges of the rock faces in Cecil Peak, the mountain in the background. I use the same colours that I used in my shadow mix during the blocking-in stage.
I then start adding detail to the willow tree and conifers in the mid-ground. For the conifers, I mix yellow oxide, ultramarine blue and burnt sienna, but I add a bit more titanium white to lighten the value and create texture. I apply horizontal marks in the direction the foliage is growing.
I start forming the texture of the foliage in the mid-ground willow tree with a combination of cadmium yellow, yellow oxide, ultramarine blue, burnt sienna and titanium white.
Next, I focus on the foreground willow tree on the right side of the painting, which is closest to the viewer and forms the largest mass.
I start by using a No.6 flat brush and mix a combination of greens including greens for my shadows and for the zones that are lit up in the sun.
For the shadows, I mix a combination of yellow oxide, ultramarine blue and burnt sienna but I also vary the texture and tone by adding phthalo green and/or cadmium orange. I’ll be adding a lighter tone to create the illusion of reflected light as I build up the detail of the tree.
For the areas of the tree in light, I am mainly using cadmium yellow, ultramarine blue and cadmium orange but I am also creating texture by adding burnt sienna, yellow oxide and phthalo green in places. If I need to lighten the value I add titanium white and if I need to increase the saturation I add more cadmium yellow.
The process of building up the detail in the foreground willow tree can take a while and may require several passes but this is fine because it will add more texture and interest to the tree and help to establish its form to make it look three-dimensional.
As I build up the detail I switch to using small brushes including No.2 flats and No.2 filbert brushes.
With each successive layer, I apply a lighter tone as I generally want to save my lightest values until the end of the painting.
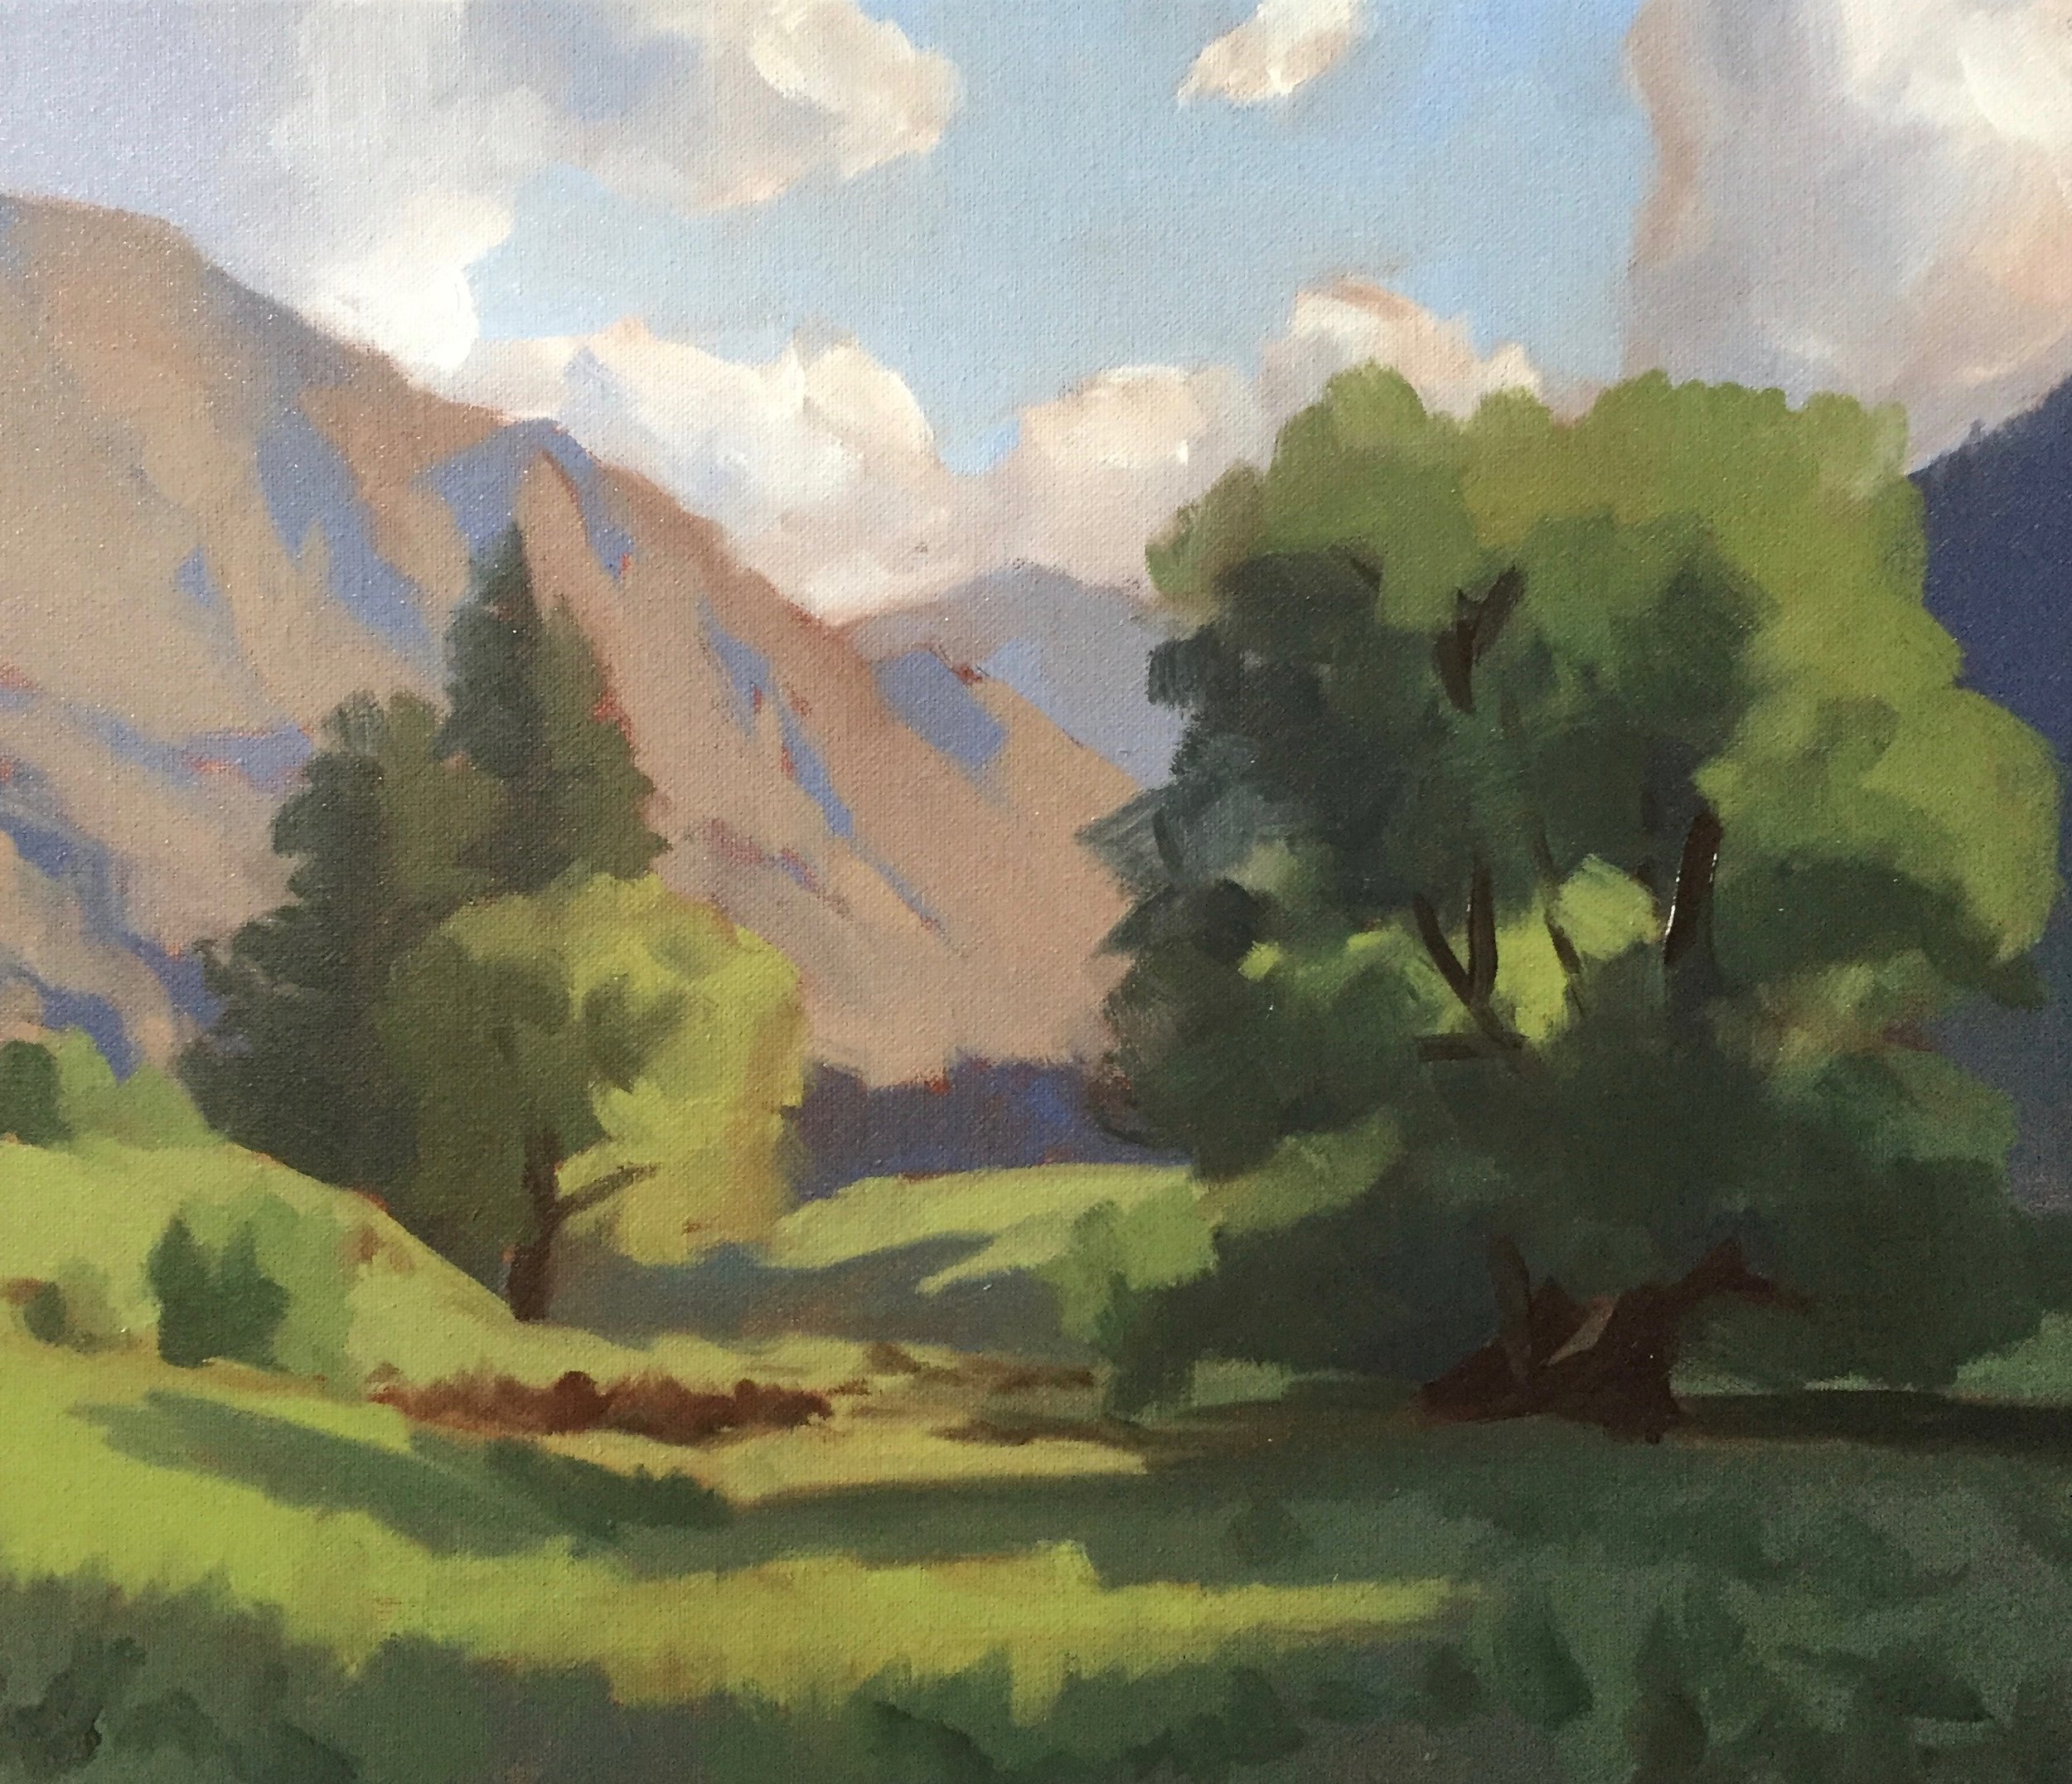
Final Details
I finish the painting by adding the lightest tone to the leaves in the willow tree and I apply this with a No.1 round brush. I am still using my same green mix but lightening the value each time with titanium white, but also adding more cadmium yellow and cadmium orange as white also has a desaturating effect on the colour. The cadmium colours will increase the saturation in your mixture.
I add a highlight to the scaffold branches in the tree with a combination of titanium white, burnt sienna and yellow oxide. I can also add a little ultramarine blue to desaturate if required.
I finish up the painting by adding some sheep which adds a bit of life to the painting. The shadows in the sheep are mixed with a combination of ultramarine blue and burnt sienna and the highlights are mixed with a combination of titanium white, burnt sienna and yellow oxide.
One thing to keep in mind throughout your painting is to try and use common colours throughout your painting, this will make your painting more cohesive and the colours more harmonious.
Thanks for reading 😊
