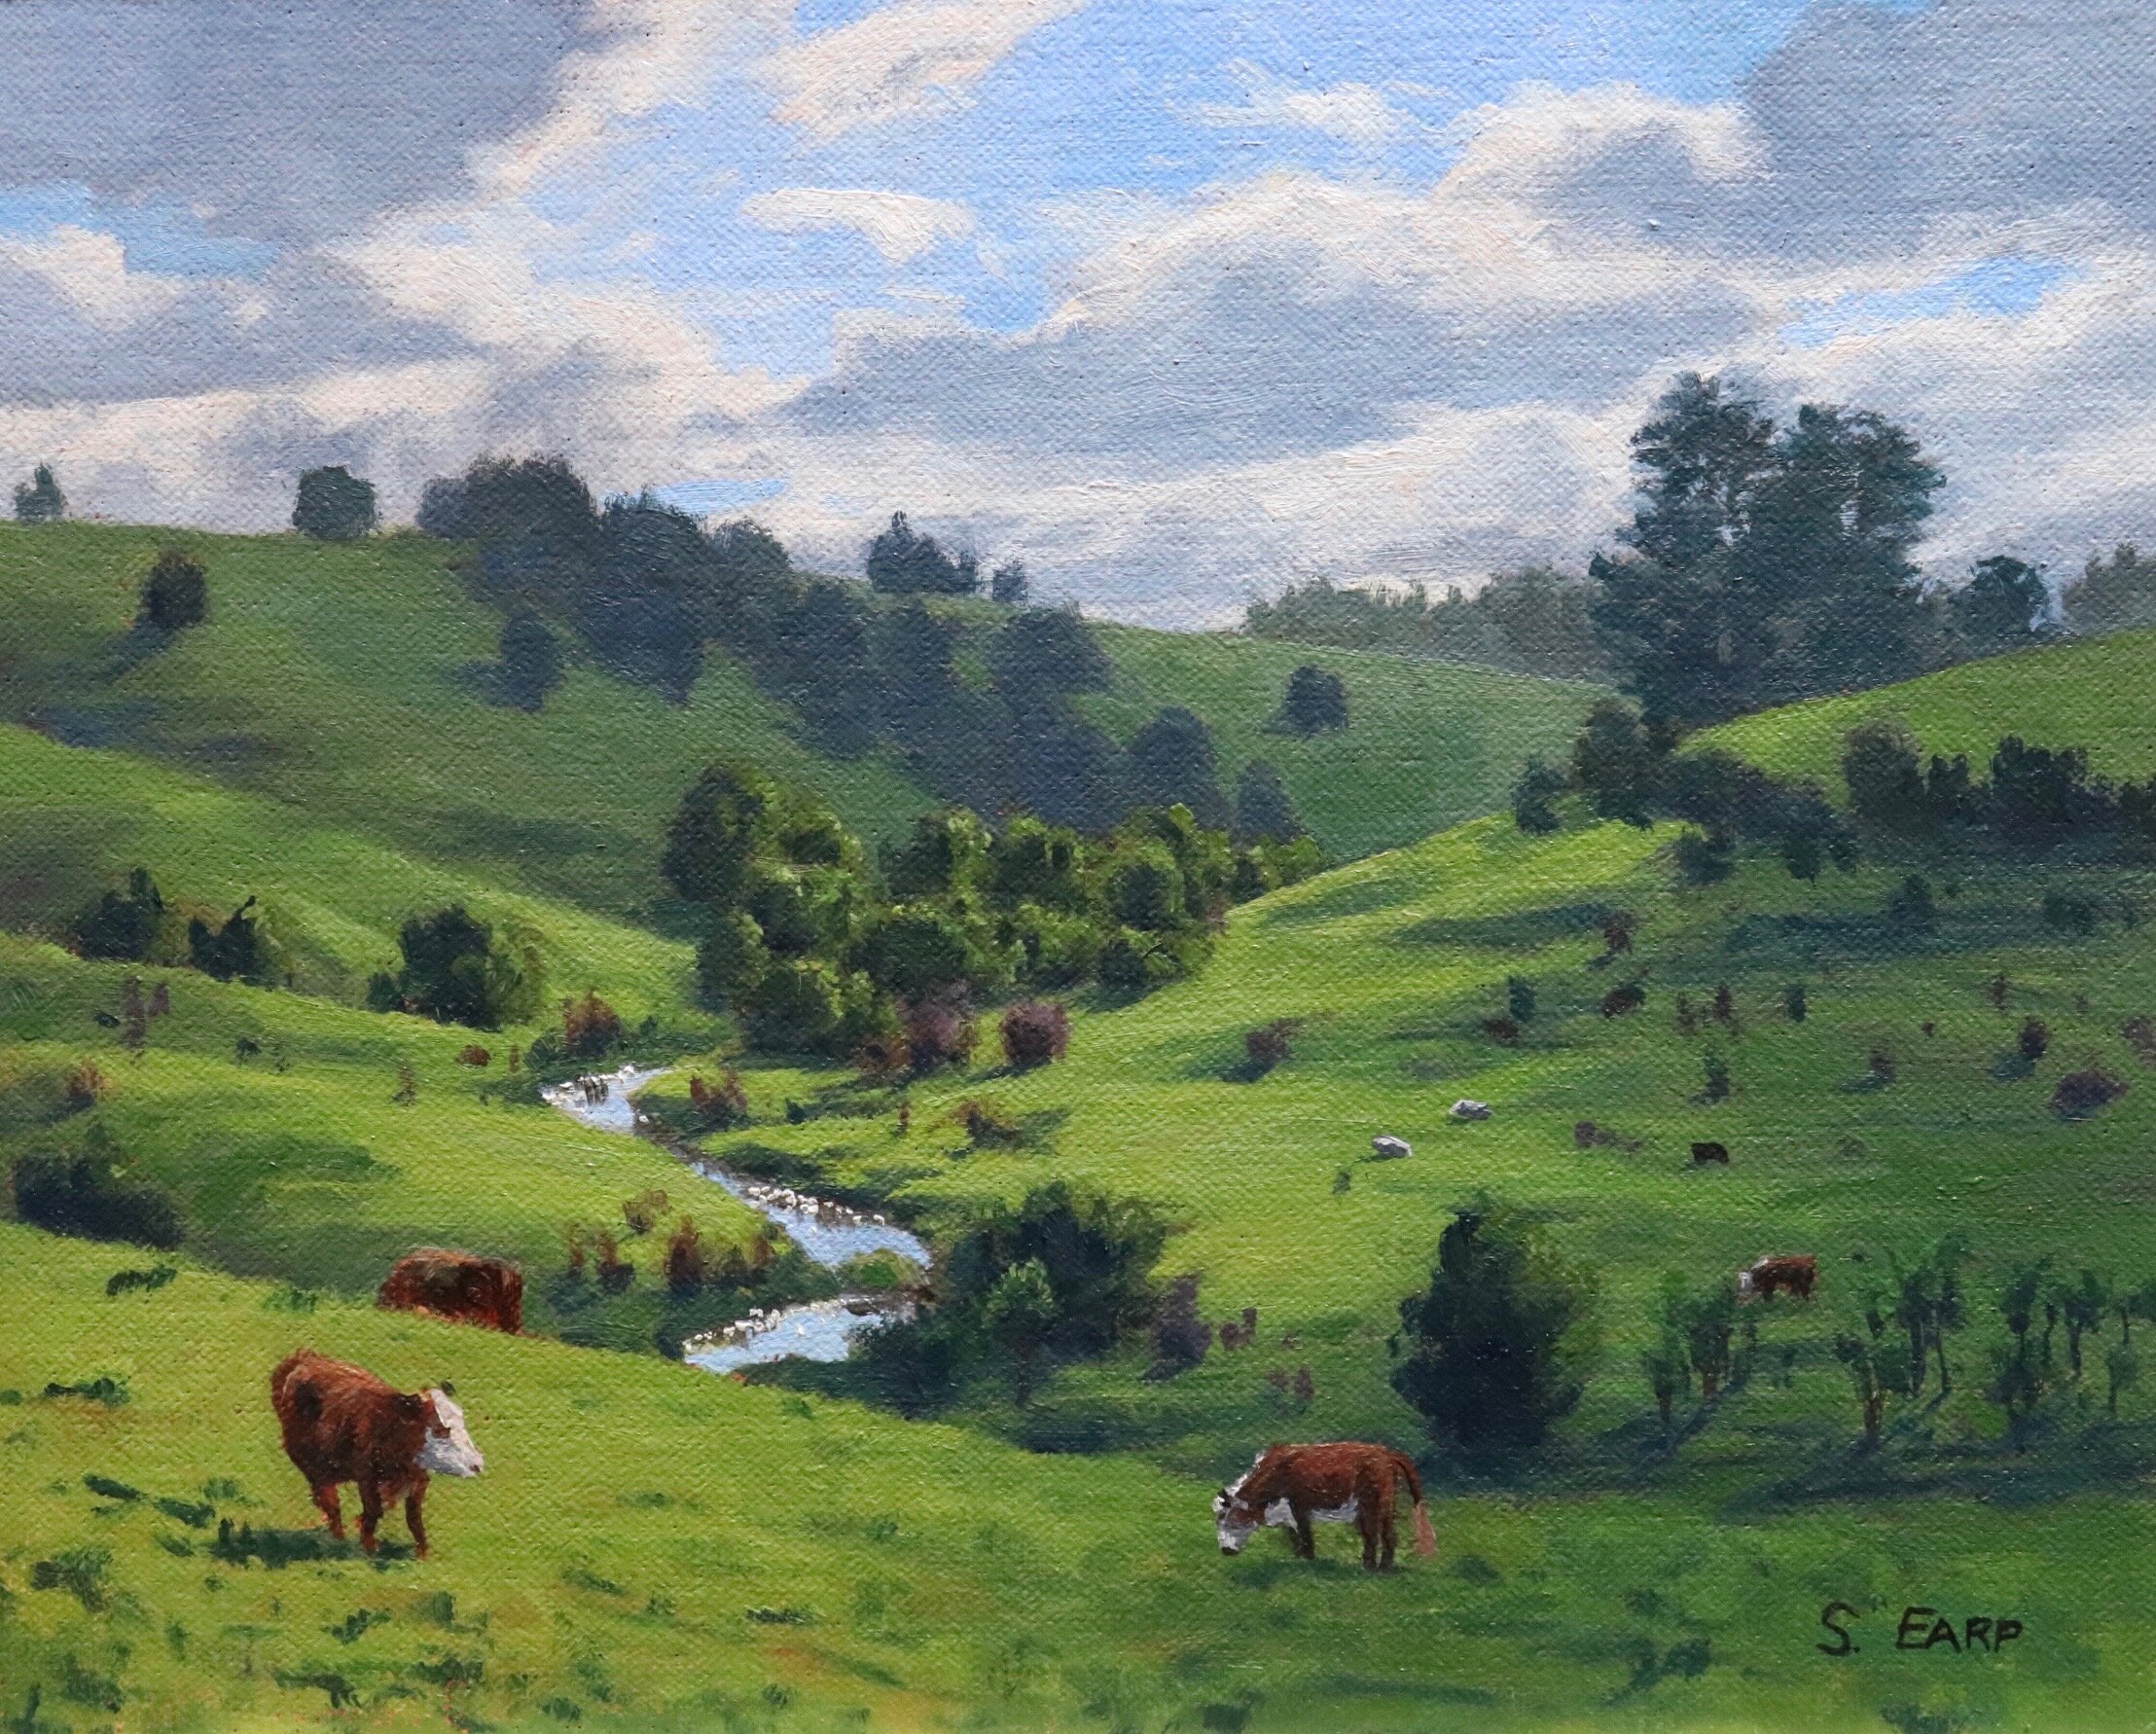
In this blog post I will show you how to paint this rural landscape that features some atmospheric spotlighting effects. This painting is inspired by the Northland region in northern New Zealand and it originally started as a plein air painting. I then took it back to the studio and added more details to it.
Now, even though this art work started as a field painting I use the exact same painting methodology whether in the studio or painting outdoors.
The plein air process of this painting can be considered the ‘block-in’ stage.
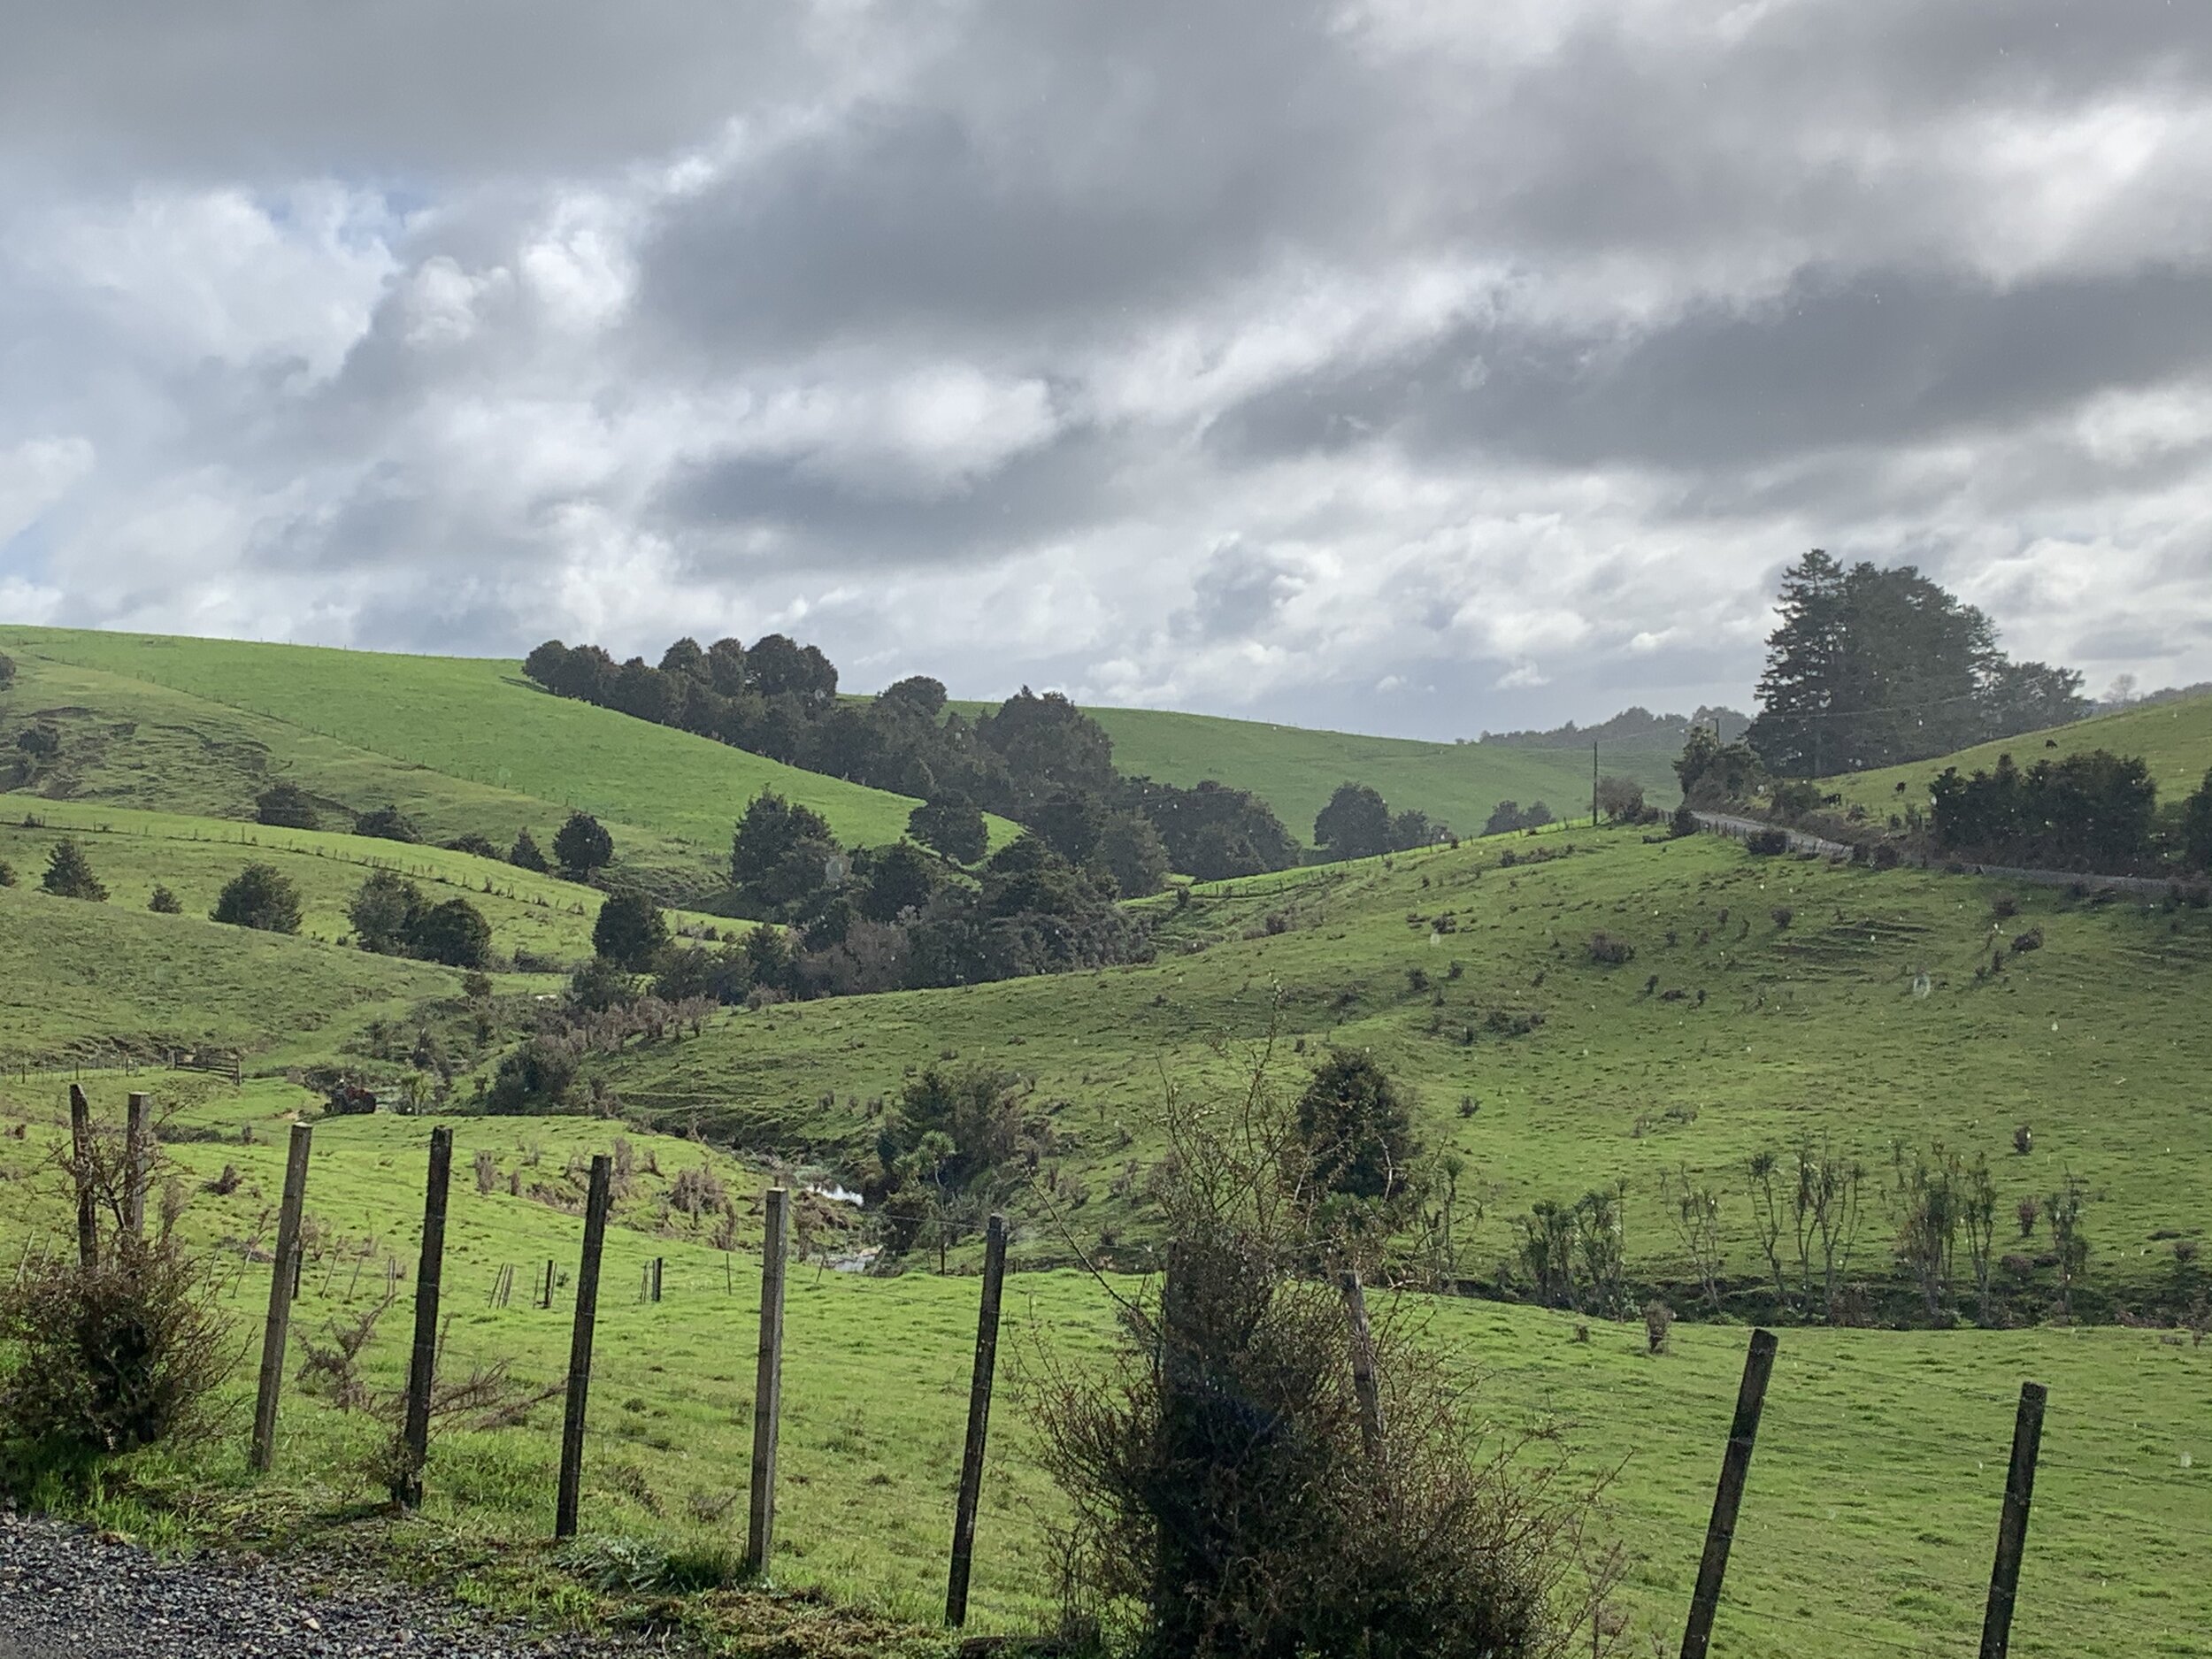
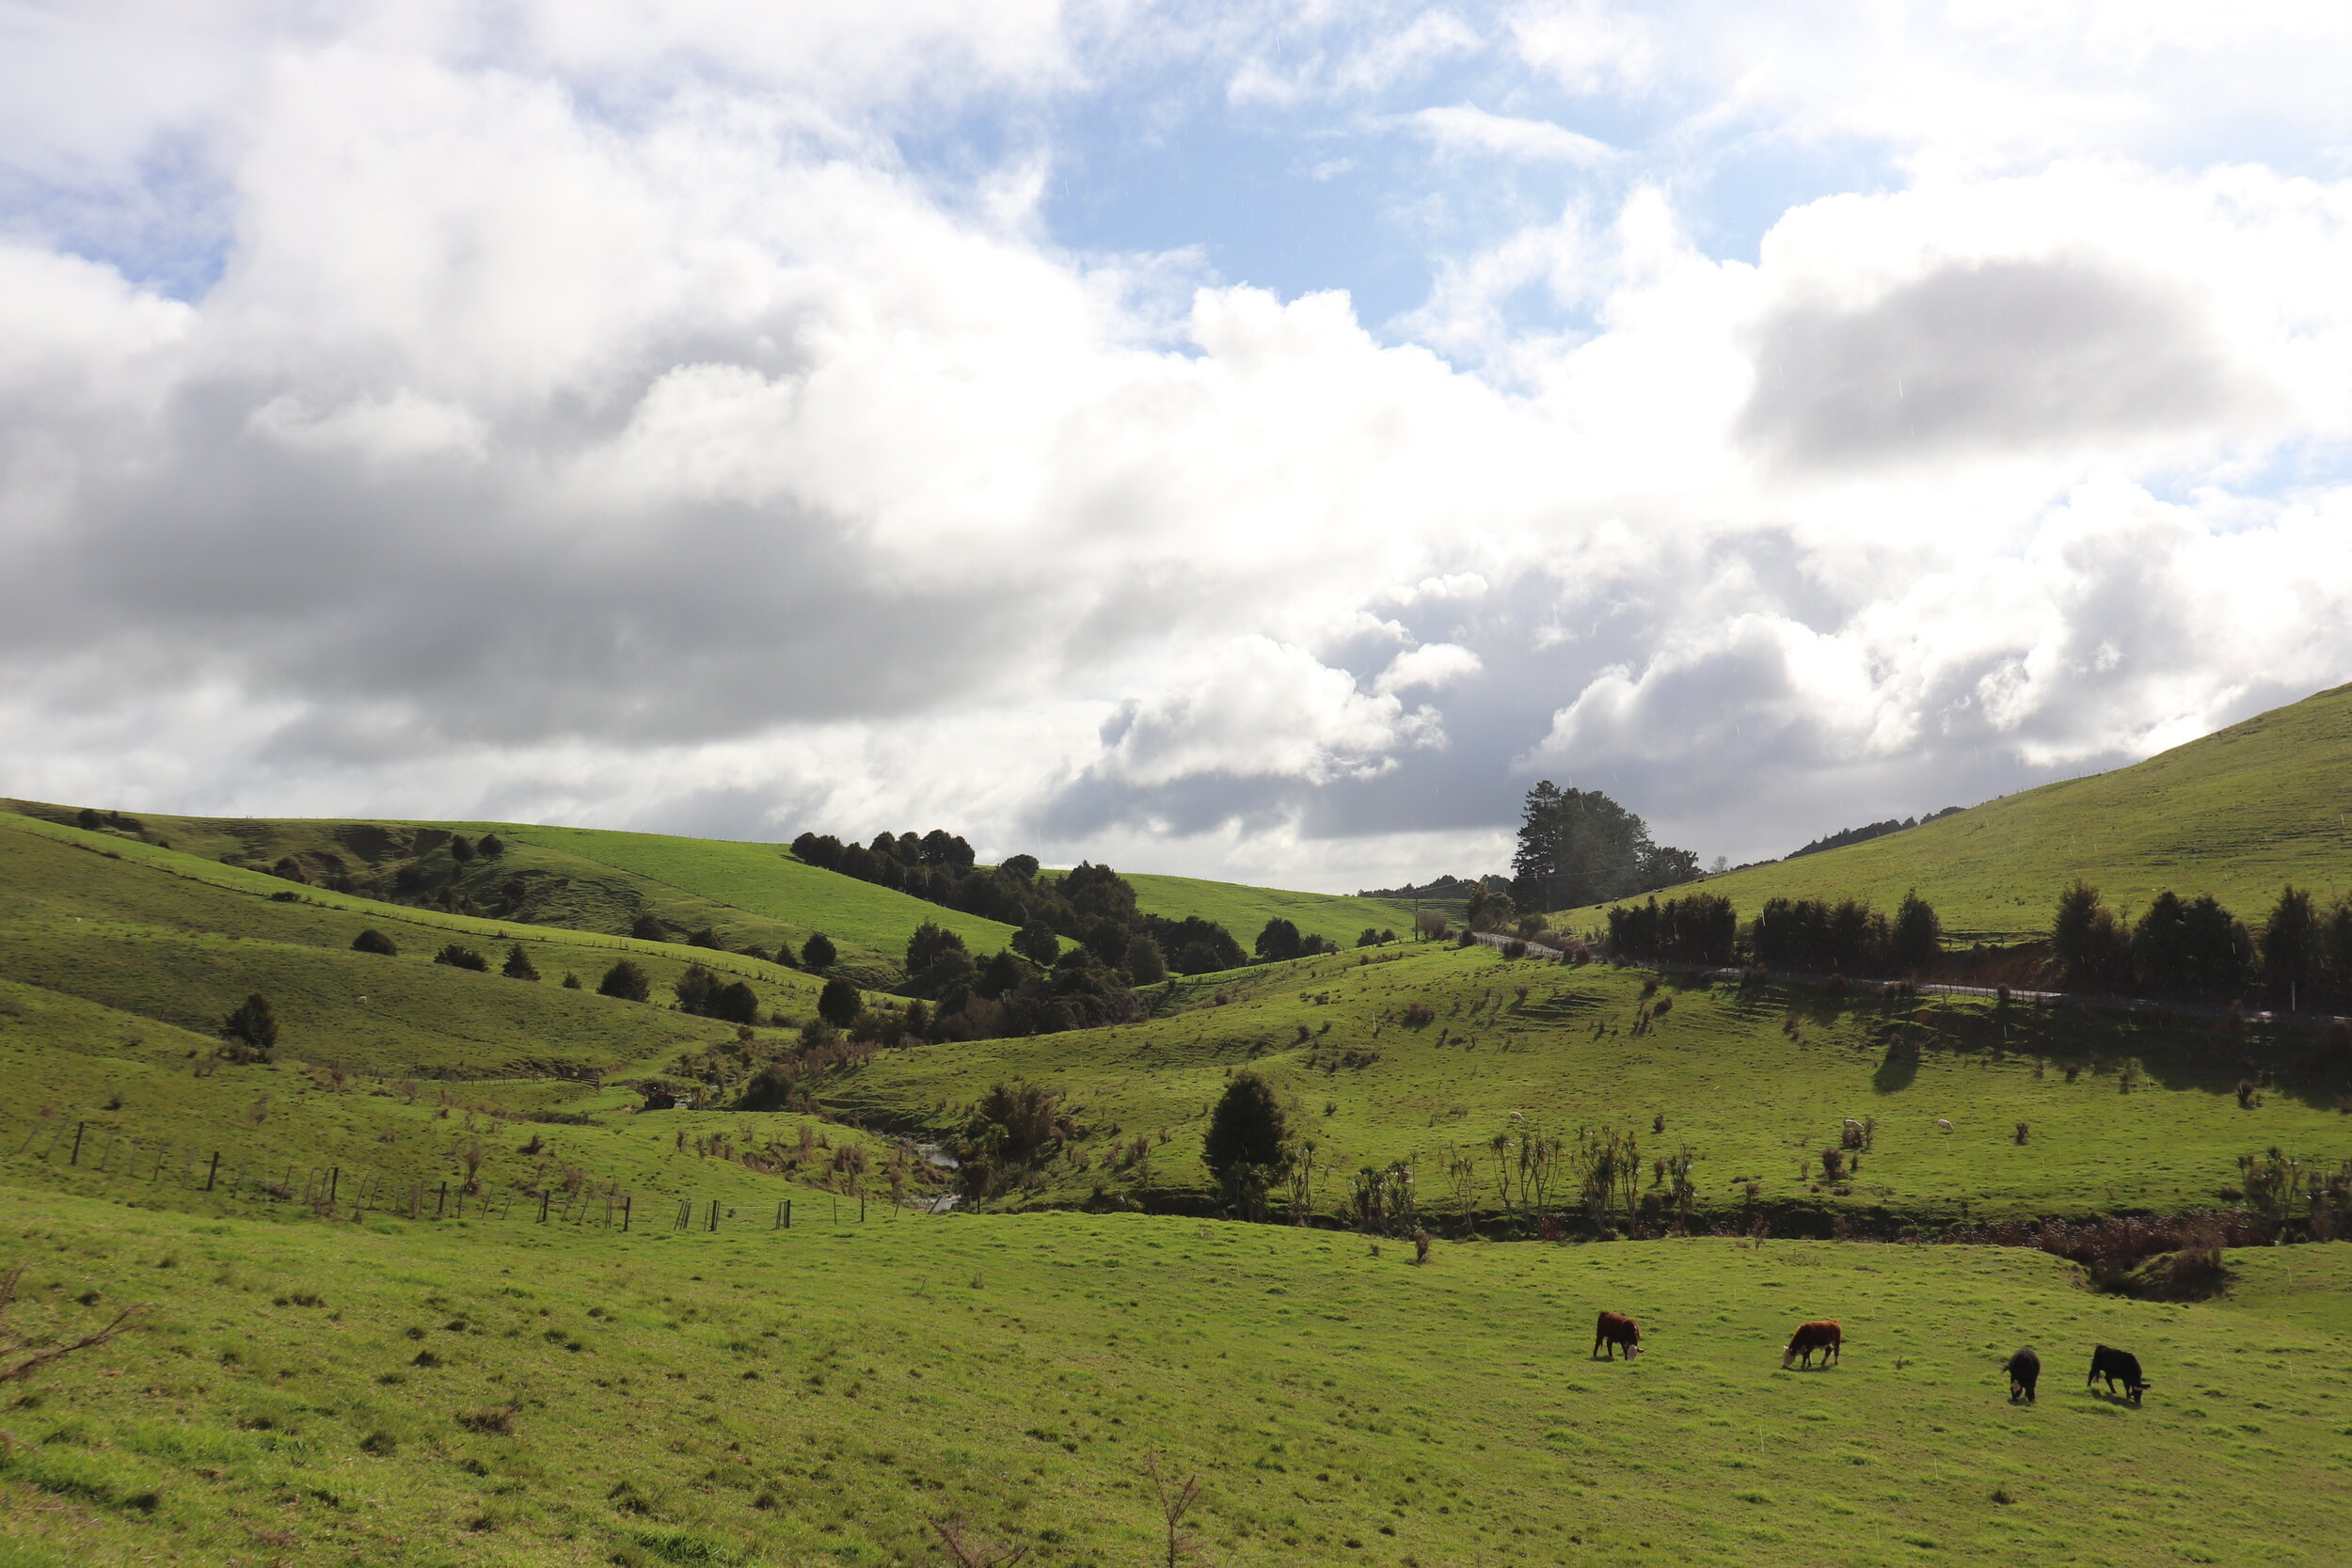
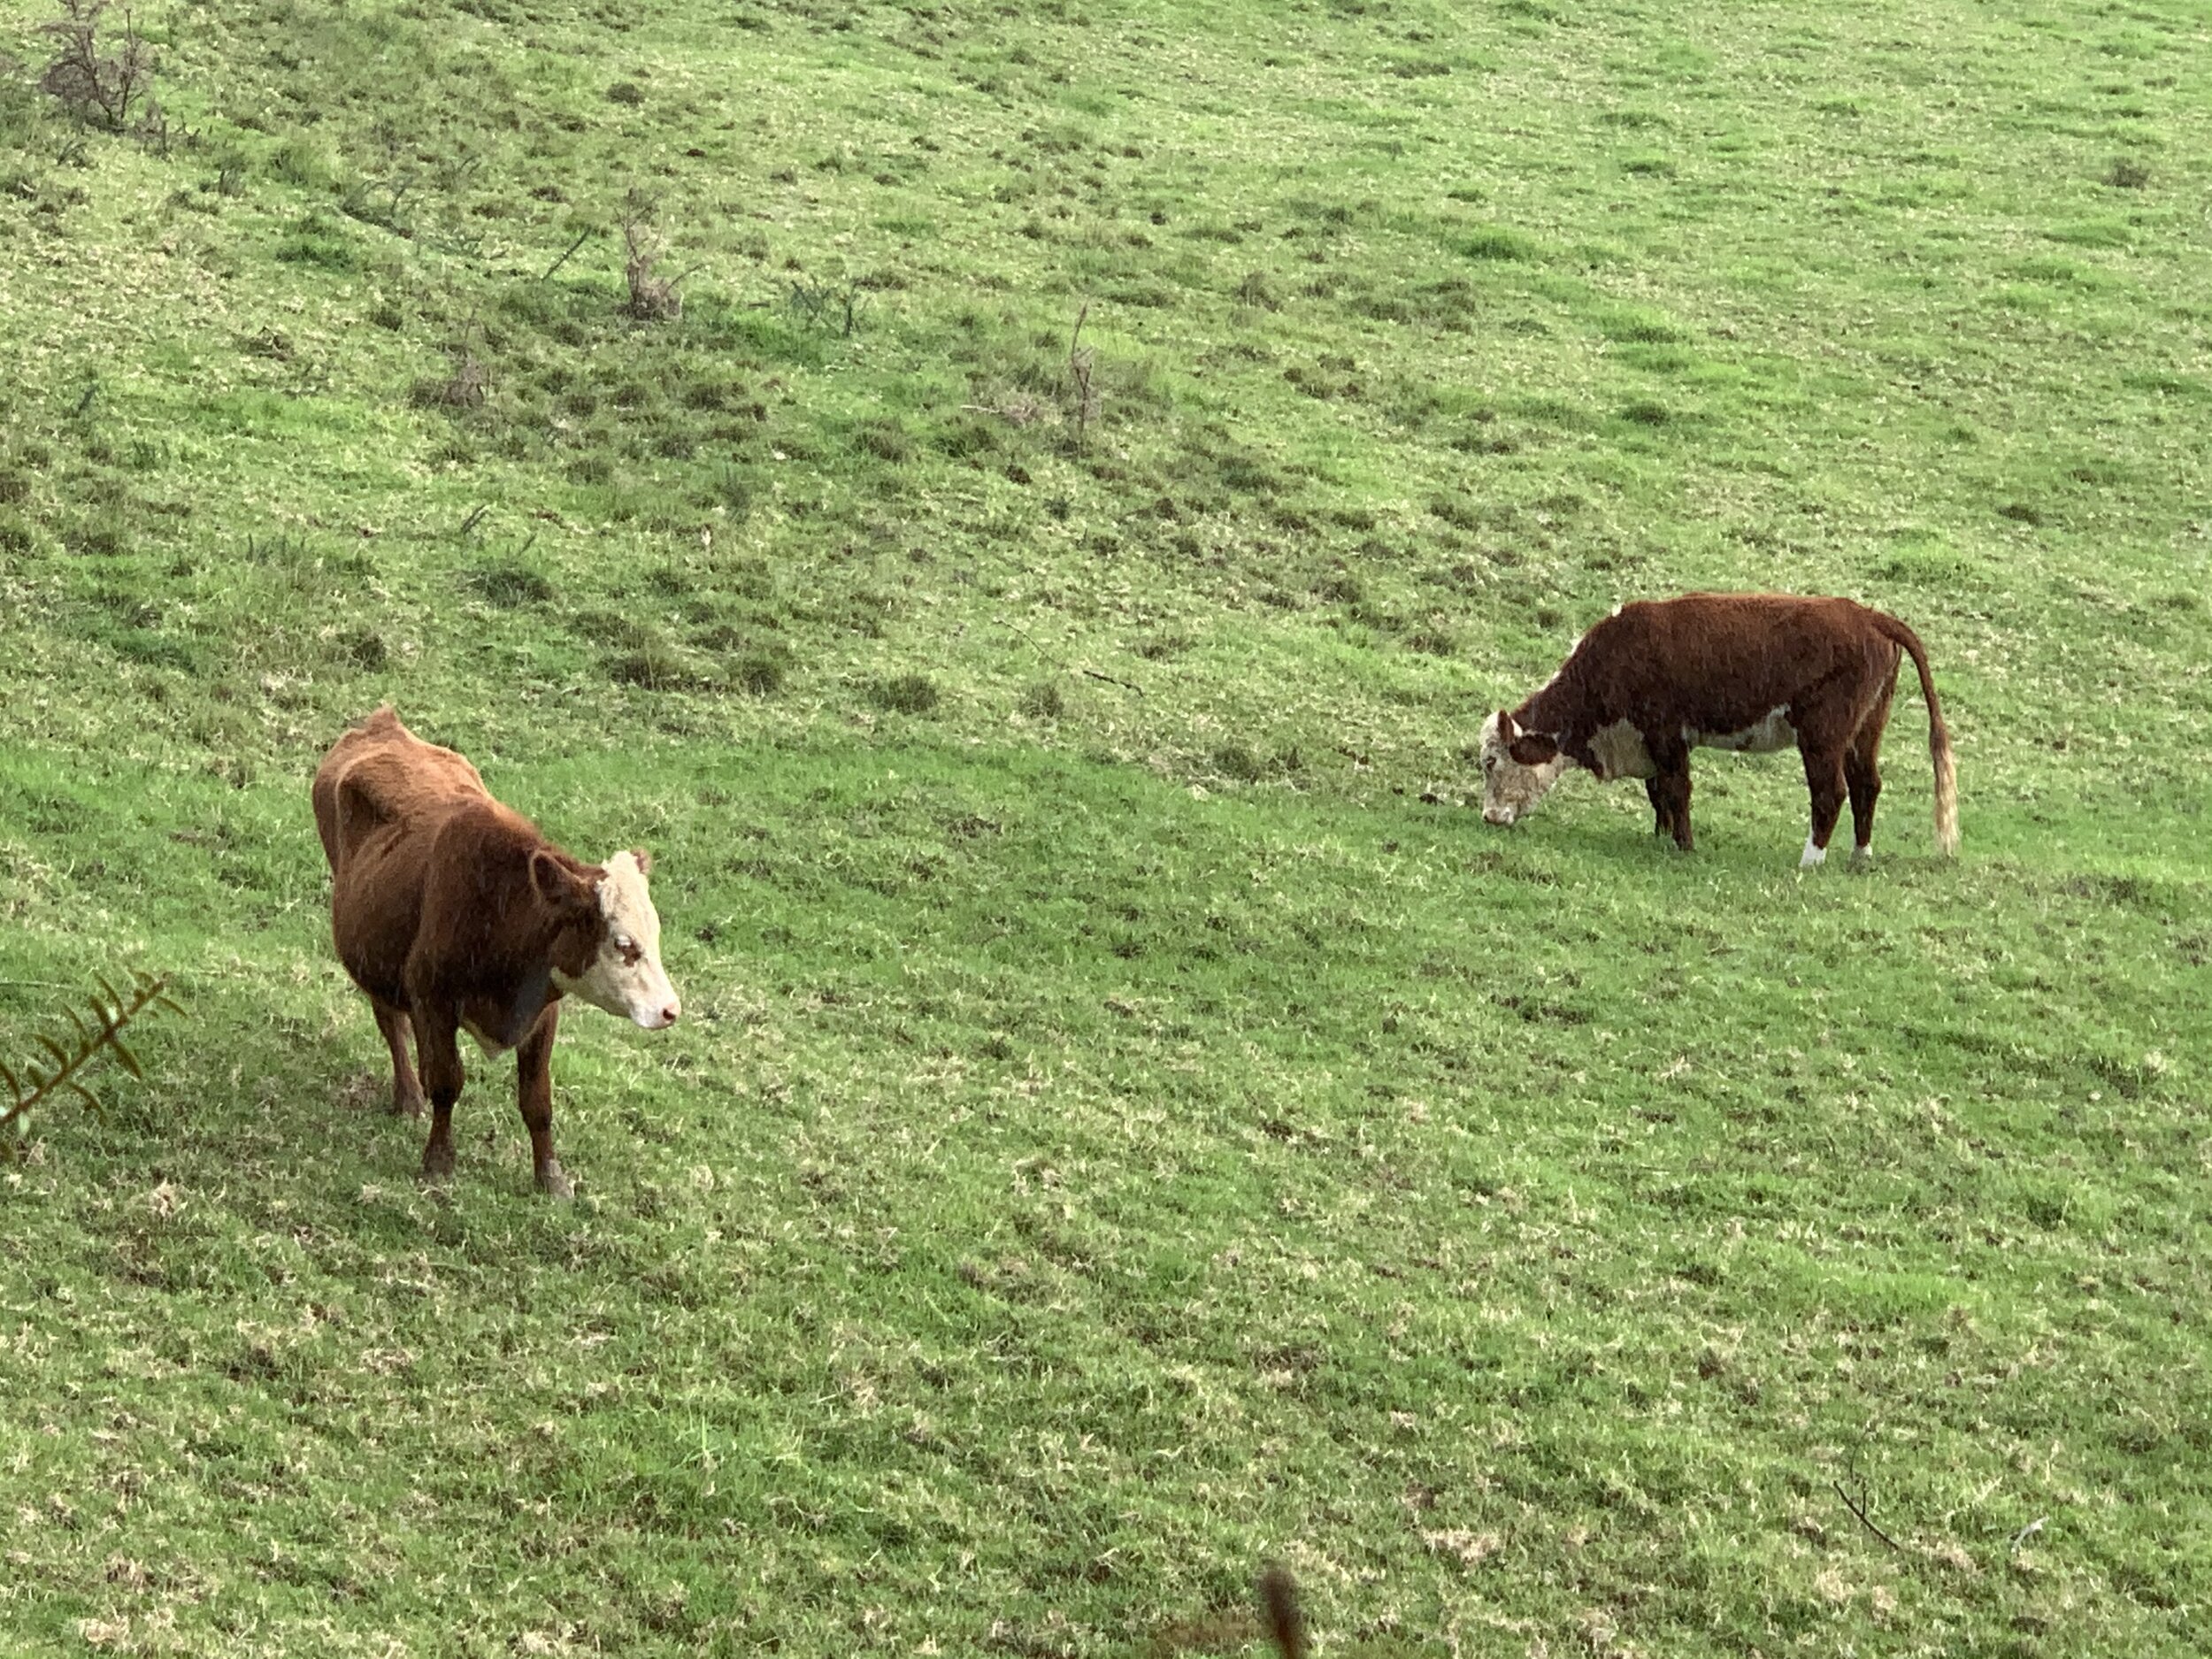
Reference Photos
Here are some of the reference photos I used to create this painting. Please feel free to use them or copy them if you would like to have a go at painting this art work.
Colours
I painted this artwork using oil paint and the colours I used in this painting are as follows:
- Titanium white
- Burnt sienna
- Yellow oxide
- Cadmium yellow
- Cadmium red
- Quinacridone magenta
- Ultramarine blue
- Cobalt teal
- Phthalo green (optional)
Brushes
Here is a list of the brushes I used in this painting:
- No.5 flat
- No.2 flat
- No.3 filbert
- No.1 round
- No.0 round
- No.00 round
- 1/4″ dagger
Composition
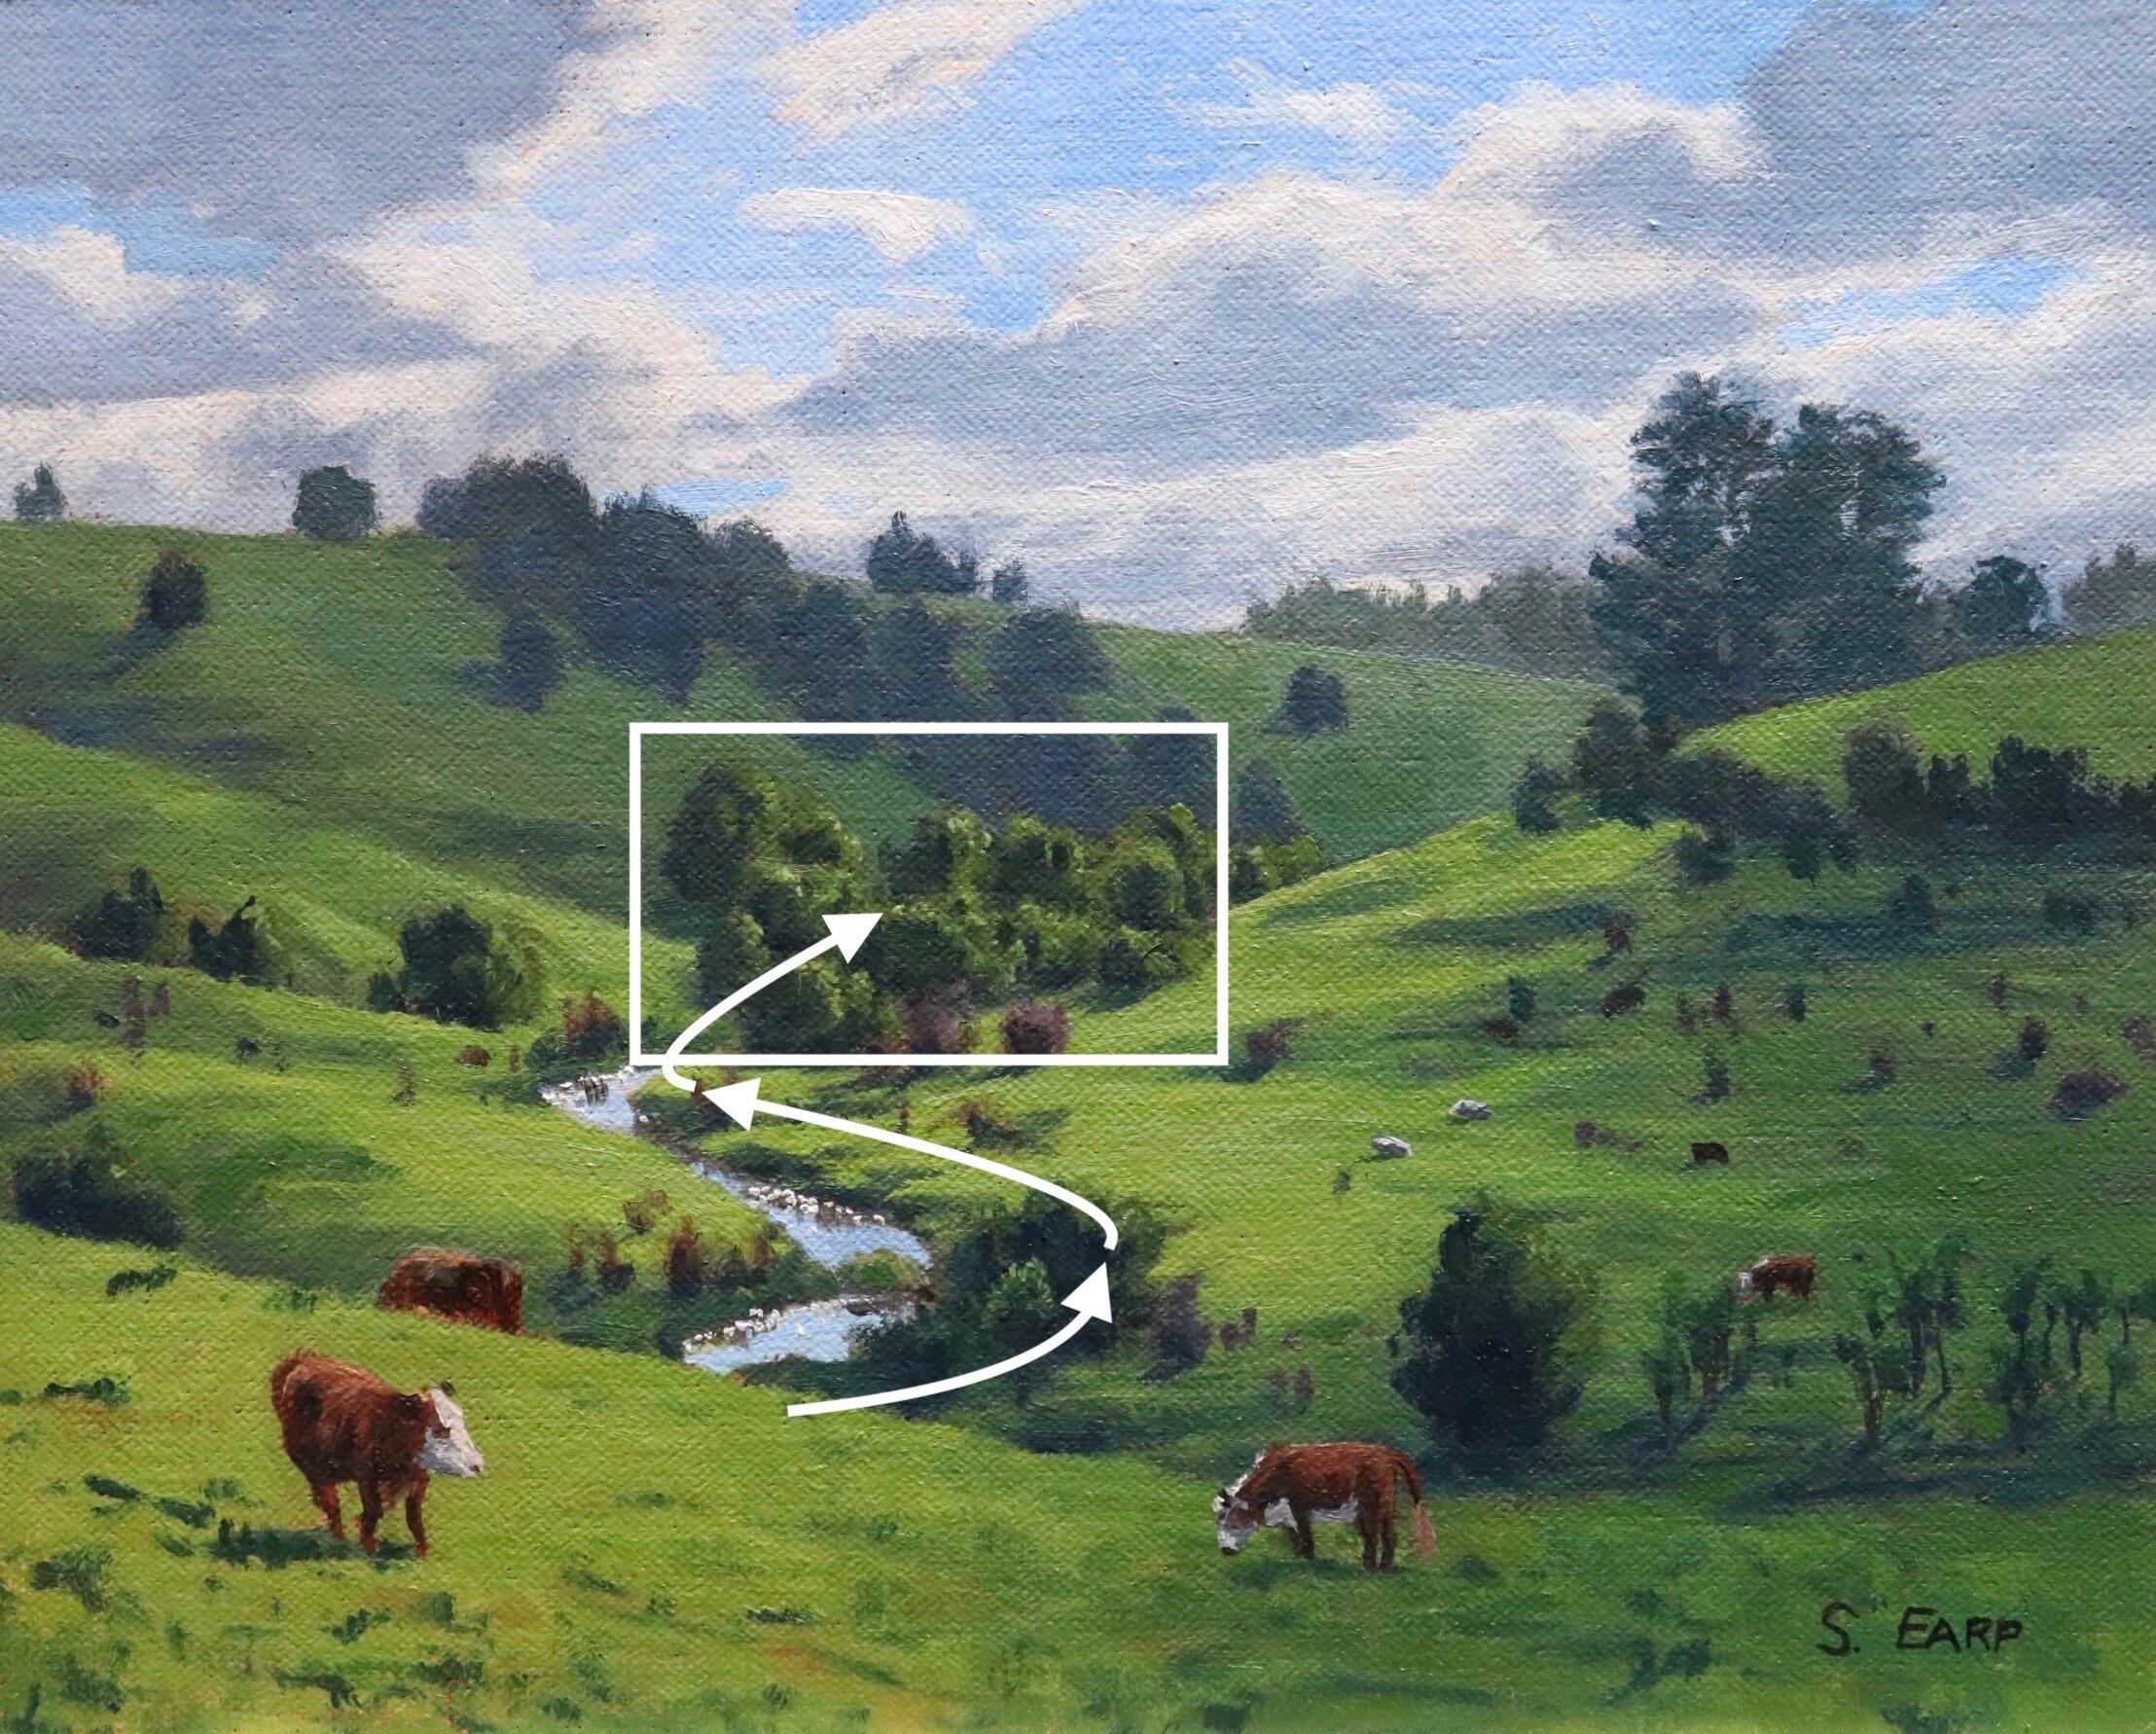
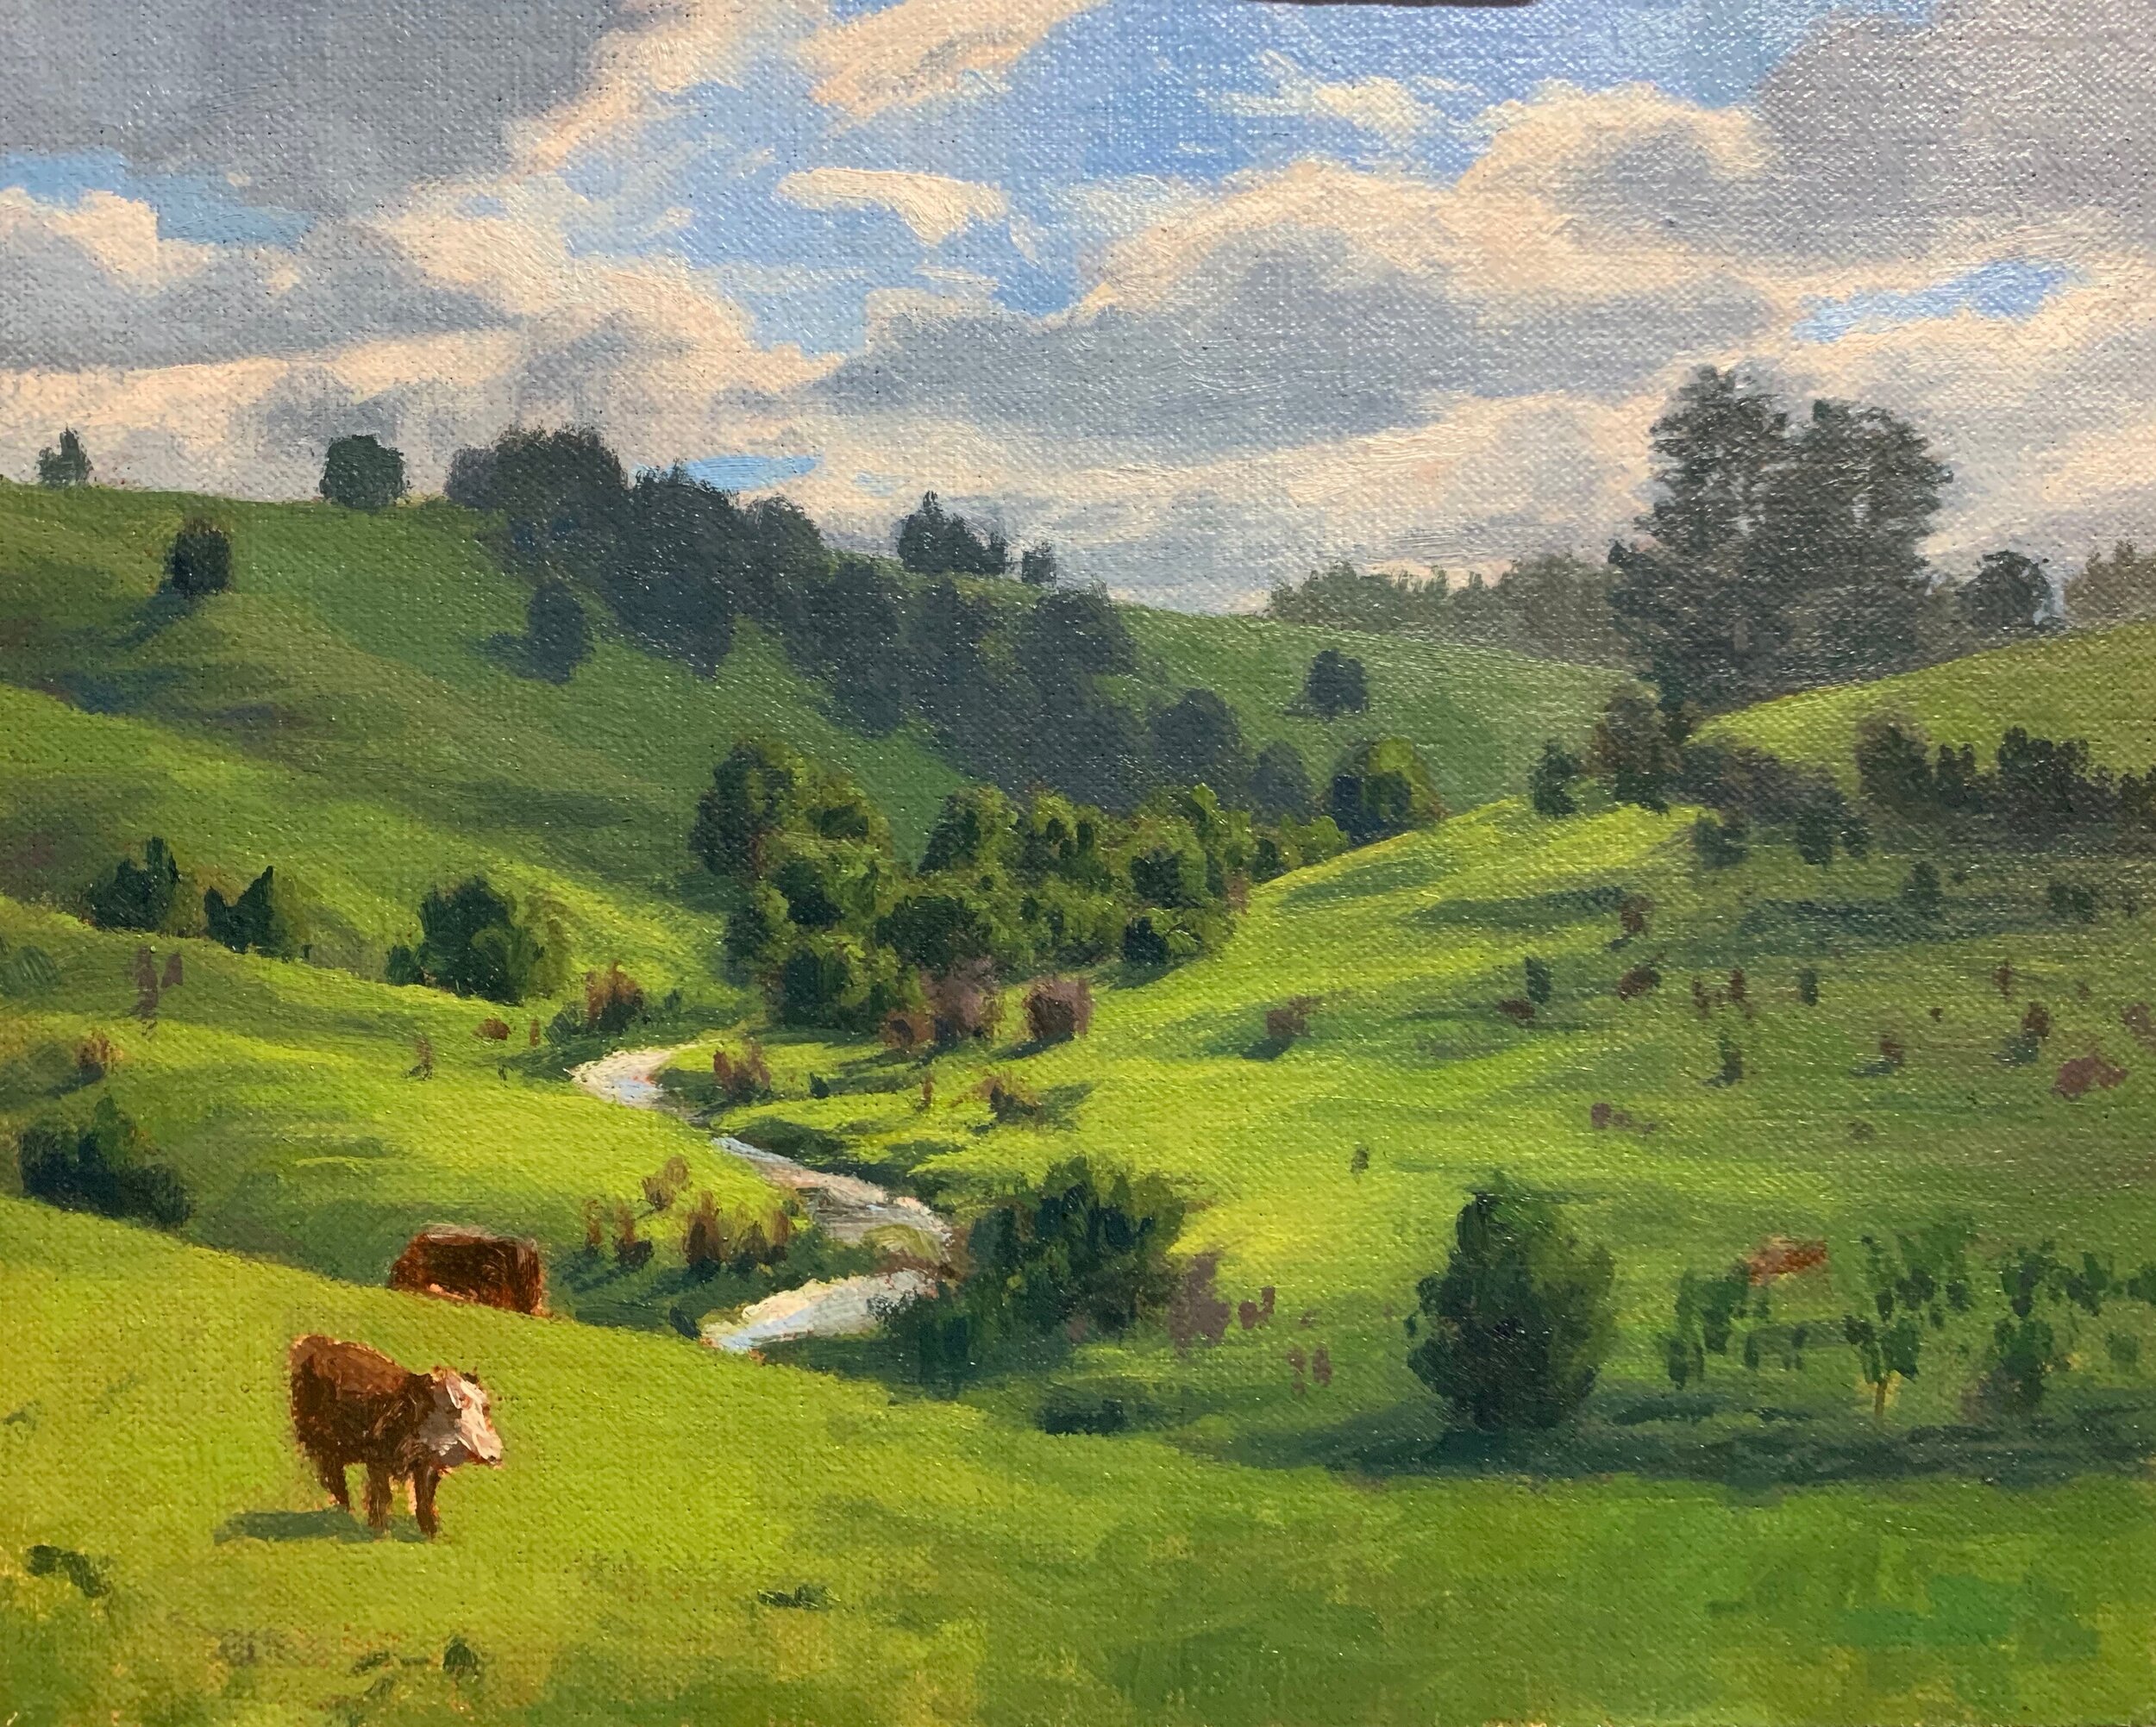
The stand of trees is one of the main focal areas in this painting. When placing a focal area make sure it is never in the middle of your composition. Centred objects form a displeasing static within the painting and disrupts flow and rhythm within the composition.
A feature I liked in this landscape was the stream which leads the eye towards the stand of trees. This is known as an ‘S’ composition.
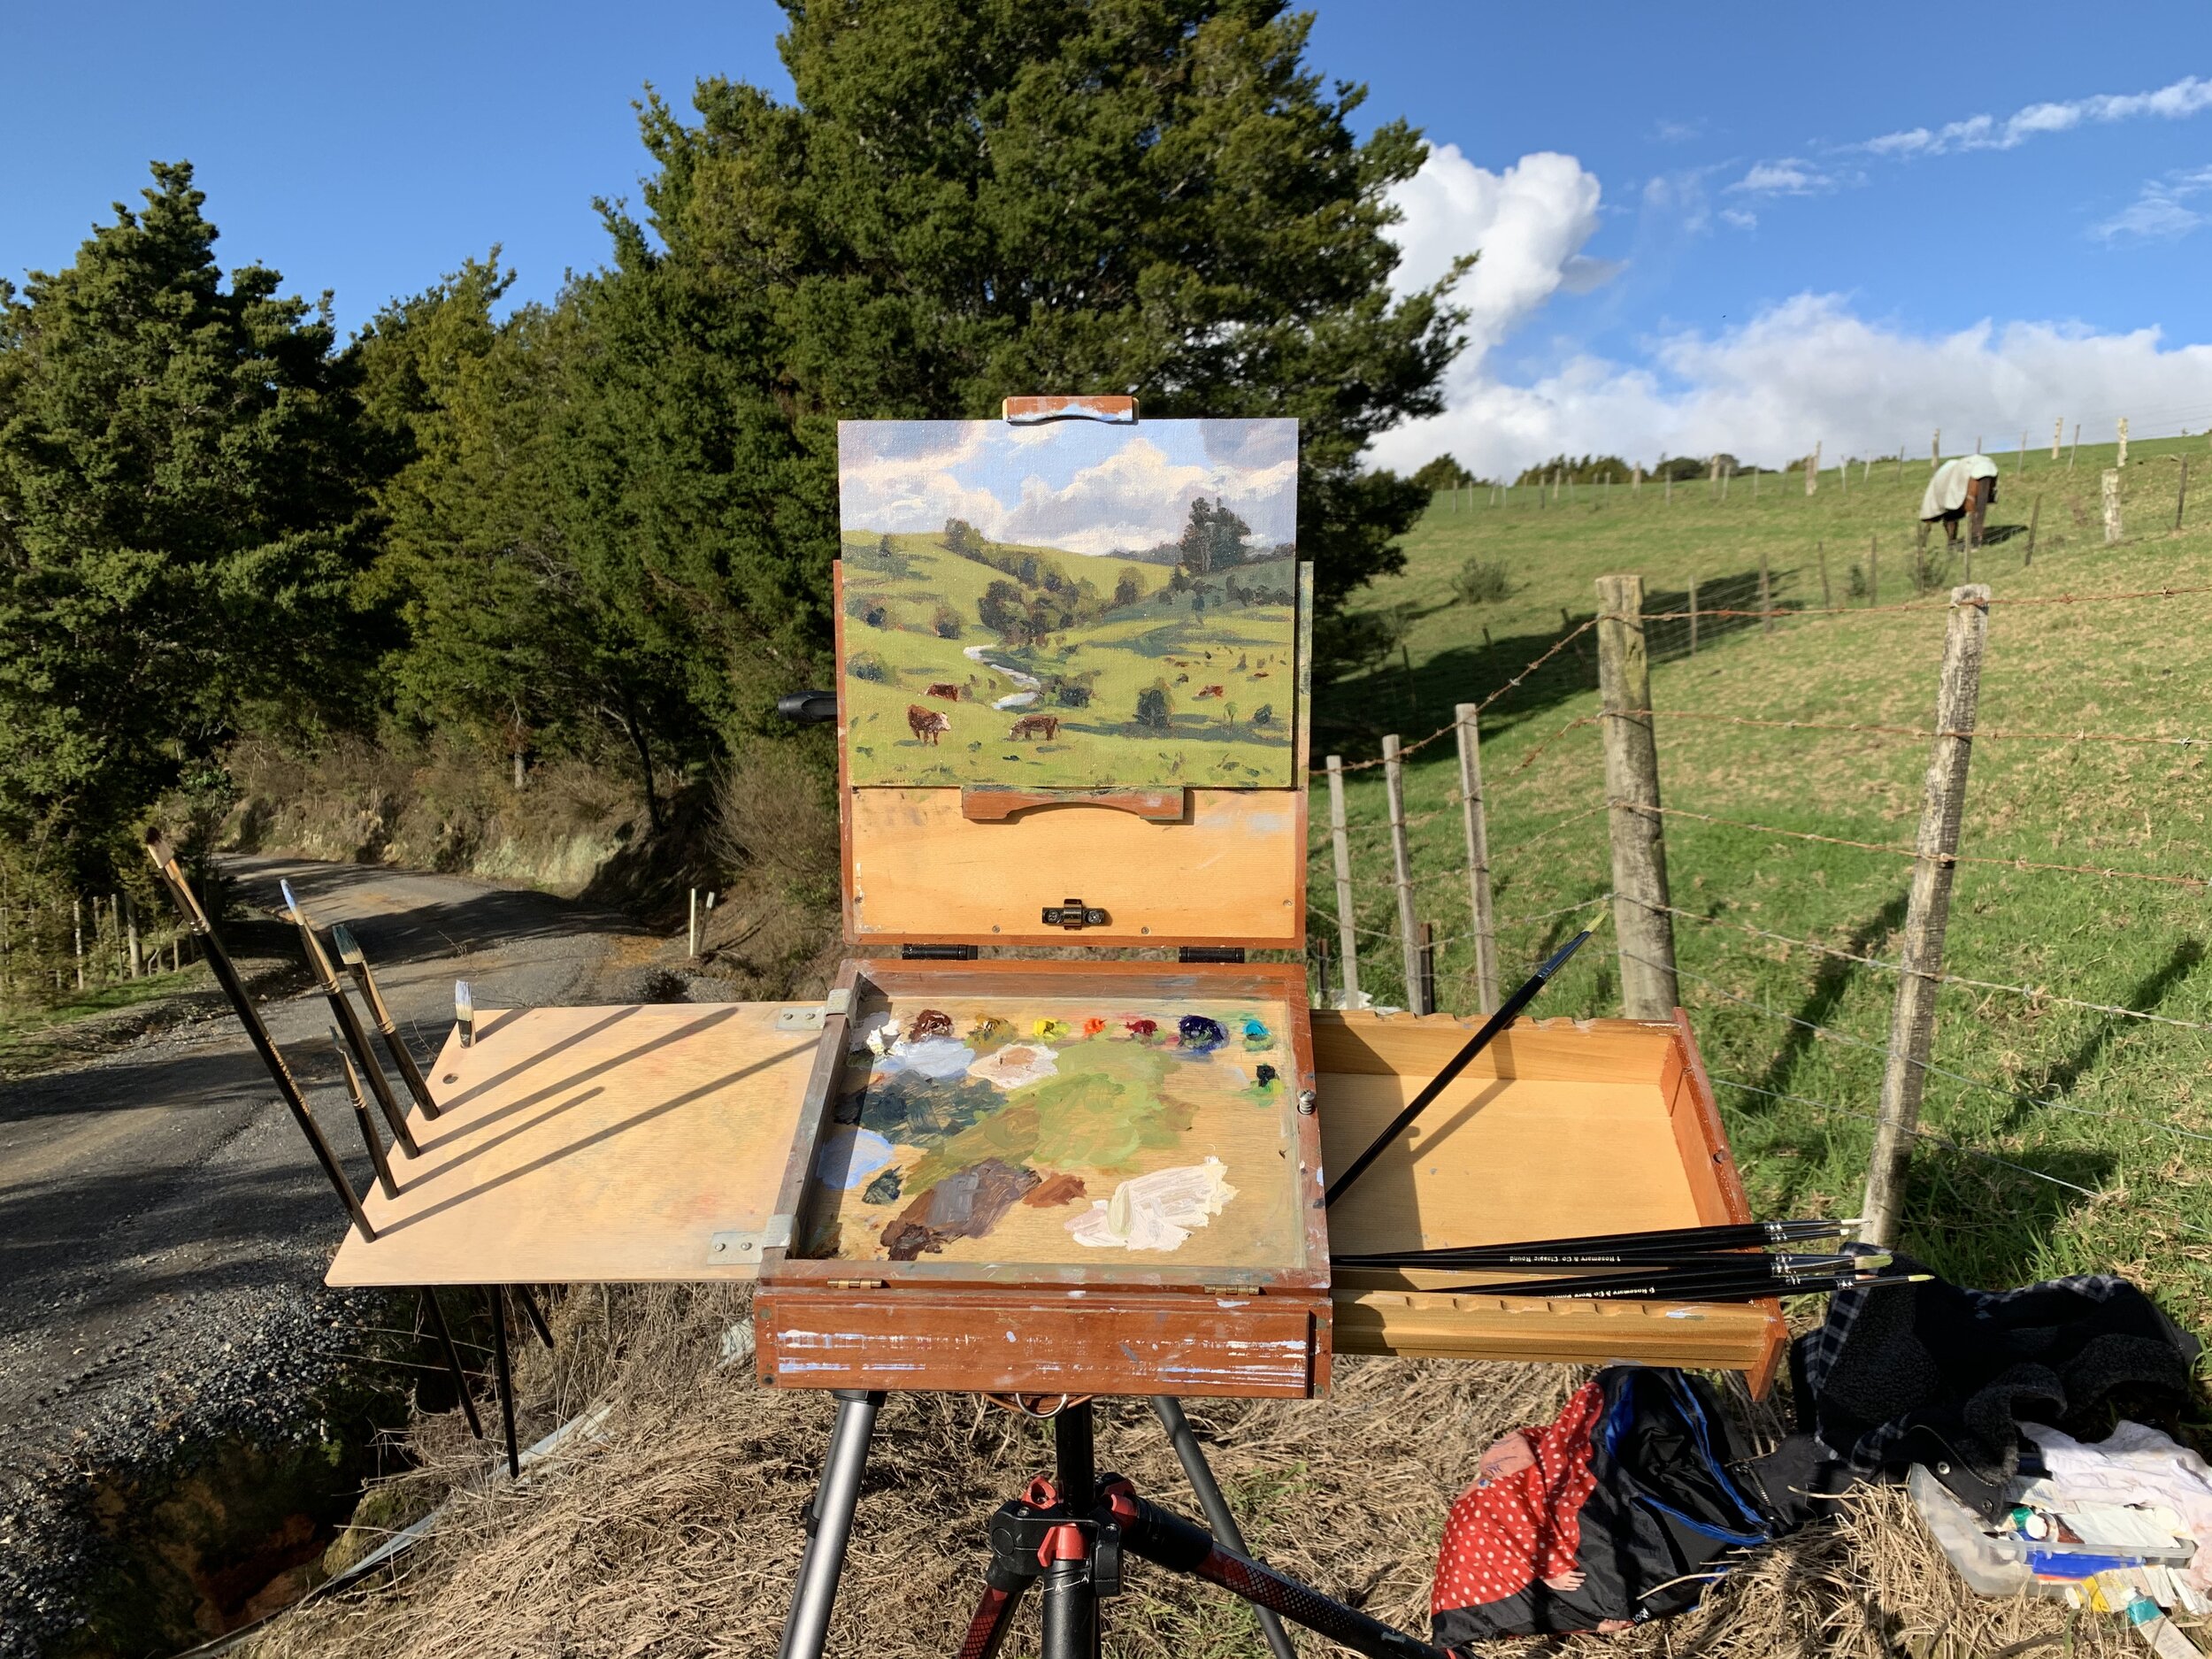
First Stage – Painting En Plein Air, the Block-In Process
I am painting on an 8” x 10” linen panel which I’ve toned with a thin wash of burnt sienna which warms up the painting and helps with colour and tone.
I sketched out the composition with a No.1 round brush and burnt sienna. I have mixed the burnt sienna with Liquin Original which thins the paint and speeds up the drying time. This is a very useful medium for painting en plein air.
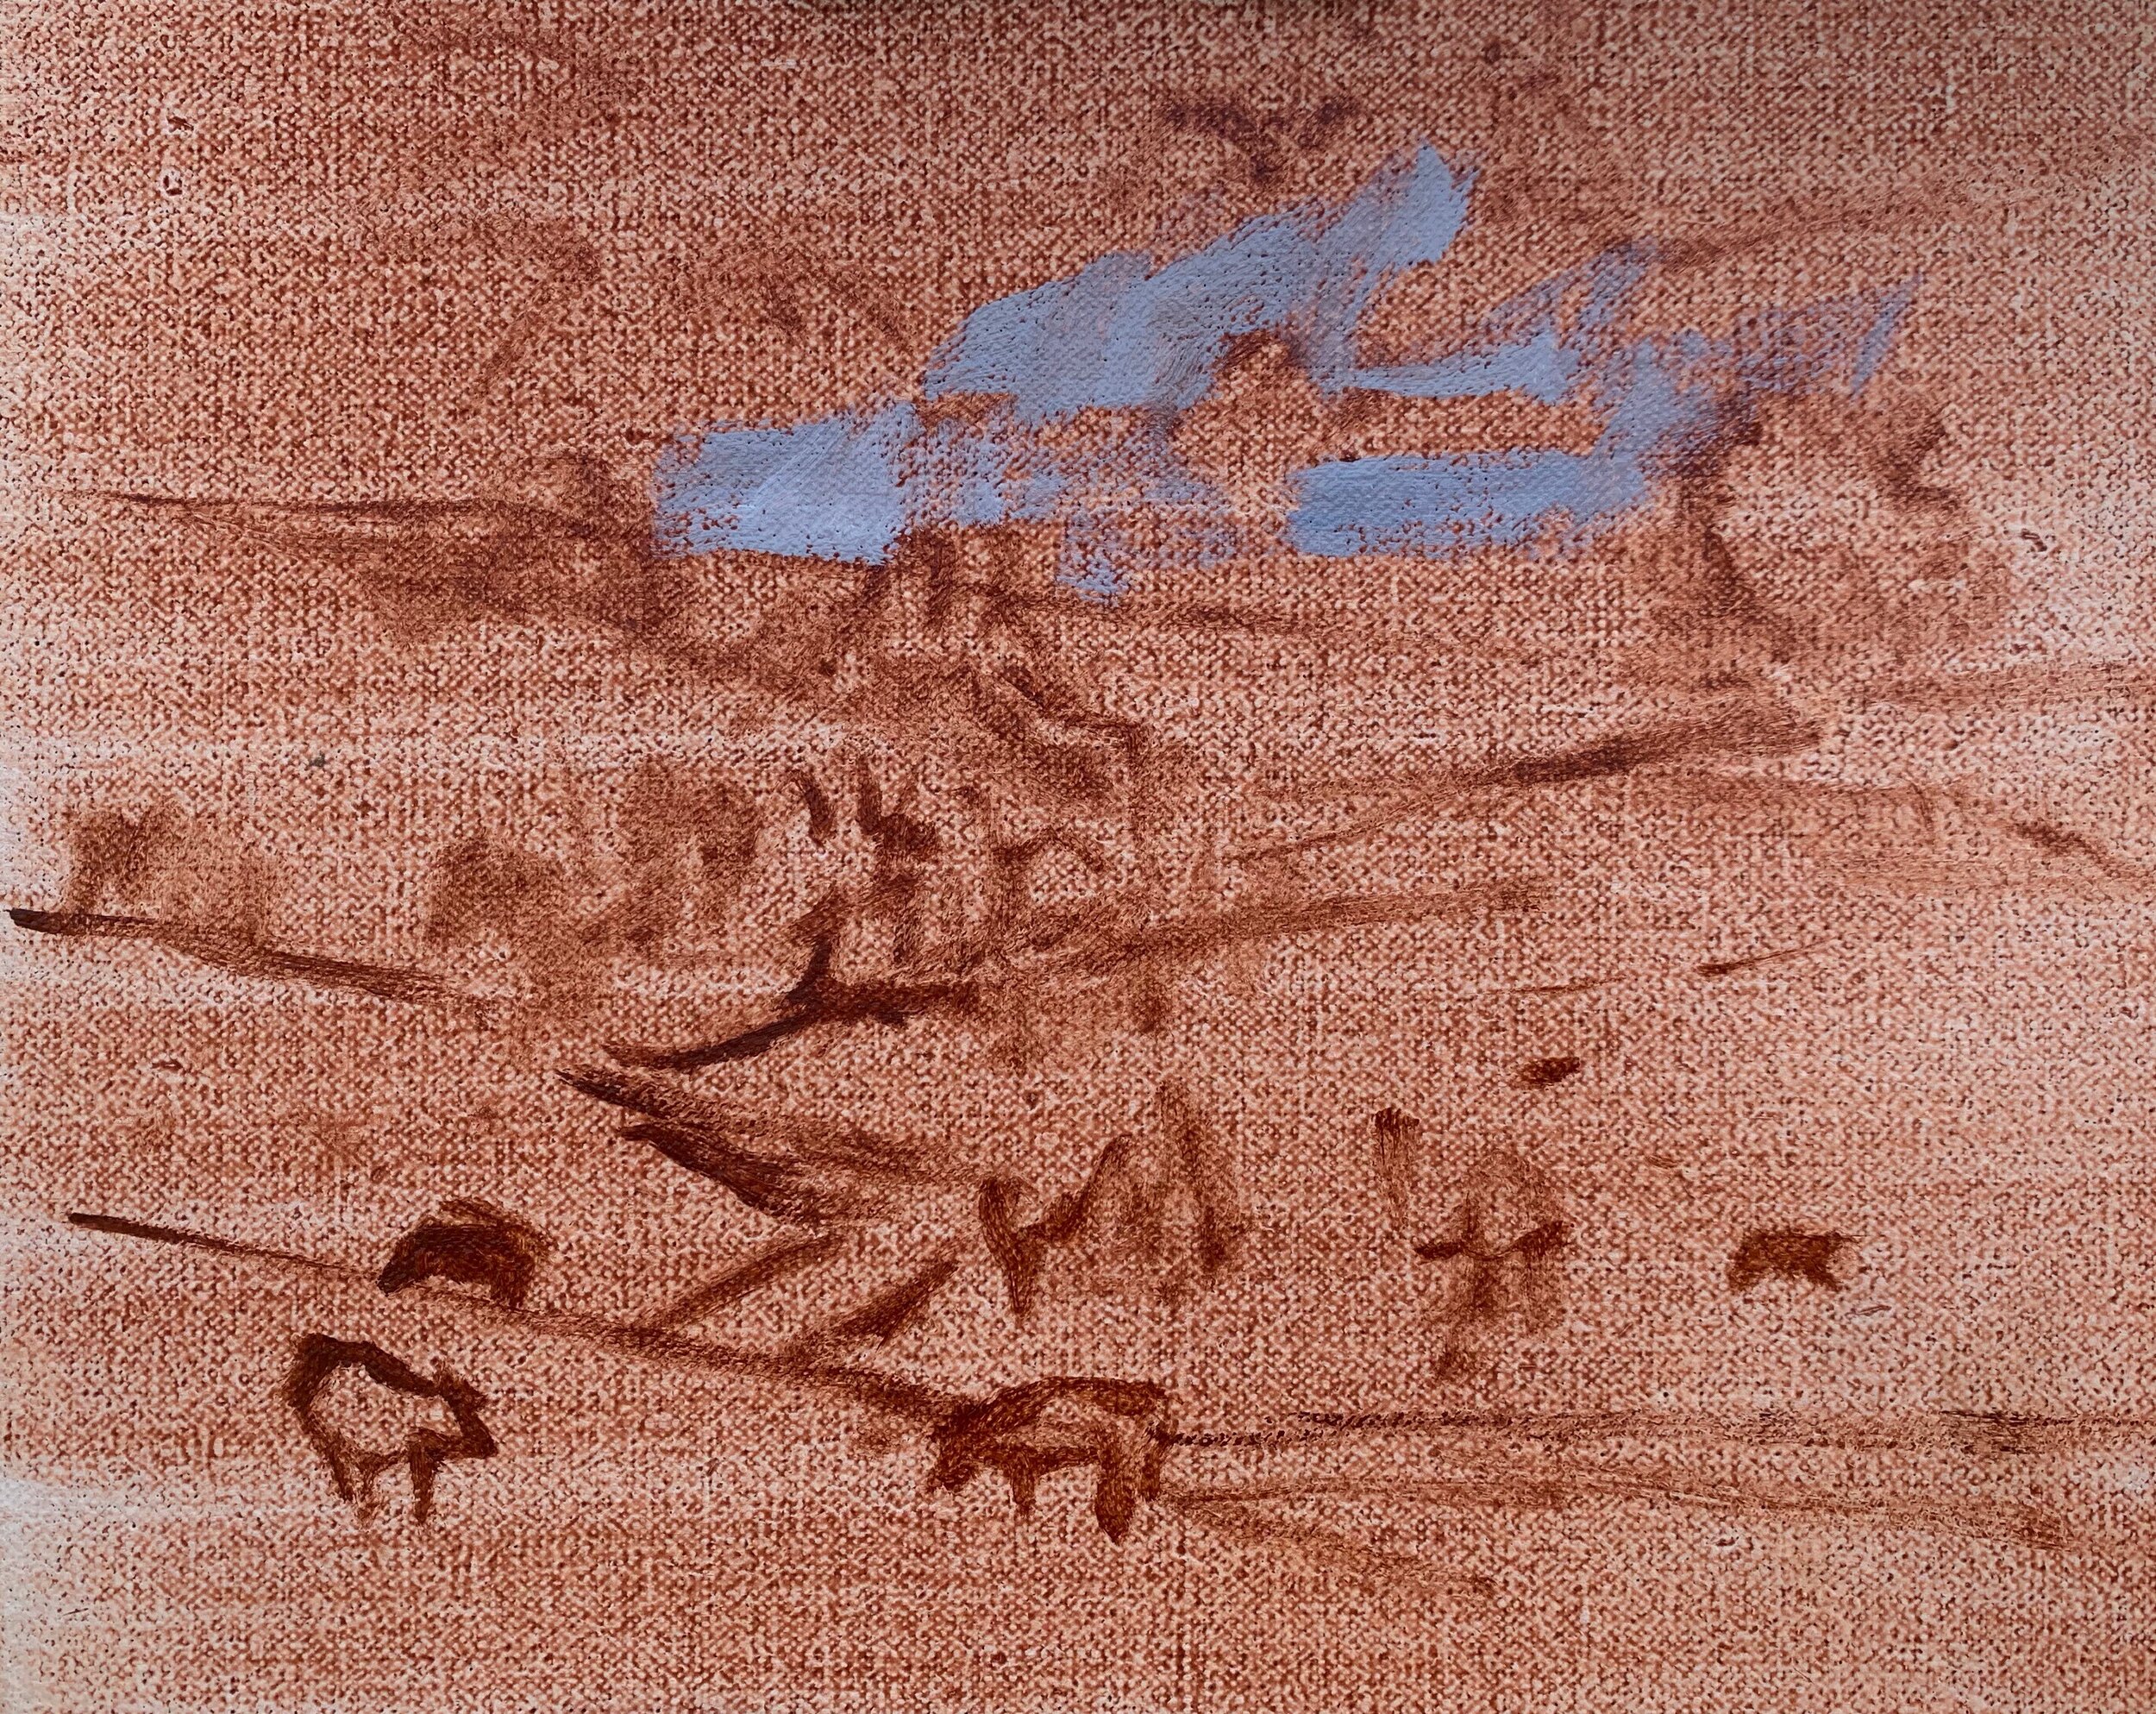
The first thing I do especially when painting outdoors is to establish the dark values and shadows first. This is especially important when you are painting en plein air as the sun, weather, light and shadows can change very quickly. By establishing your dark values first it doesn’t matter if the light changes. I have applied this same approach to my studio paintings.
I start blocking in the cloud shadows with a mix of ultramarine blue, burnt sienna and titanium white using a No.5 flat brush.
I paint the tree shadows with a mix of ultramarine blue, yellow oxide and titanium white. I use the same colours colours for the grass shadows but I also mix in a little cobalt teal in there as well.
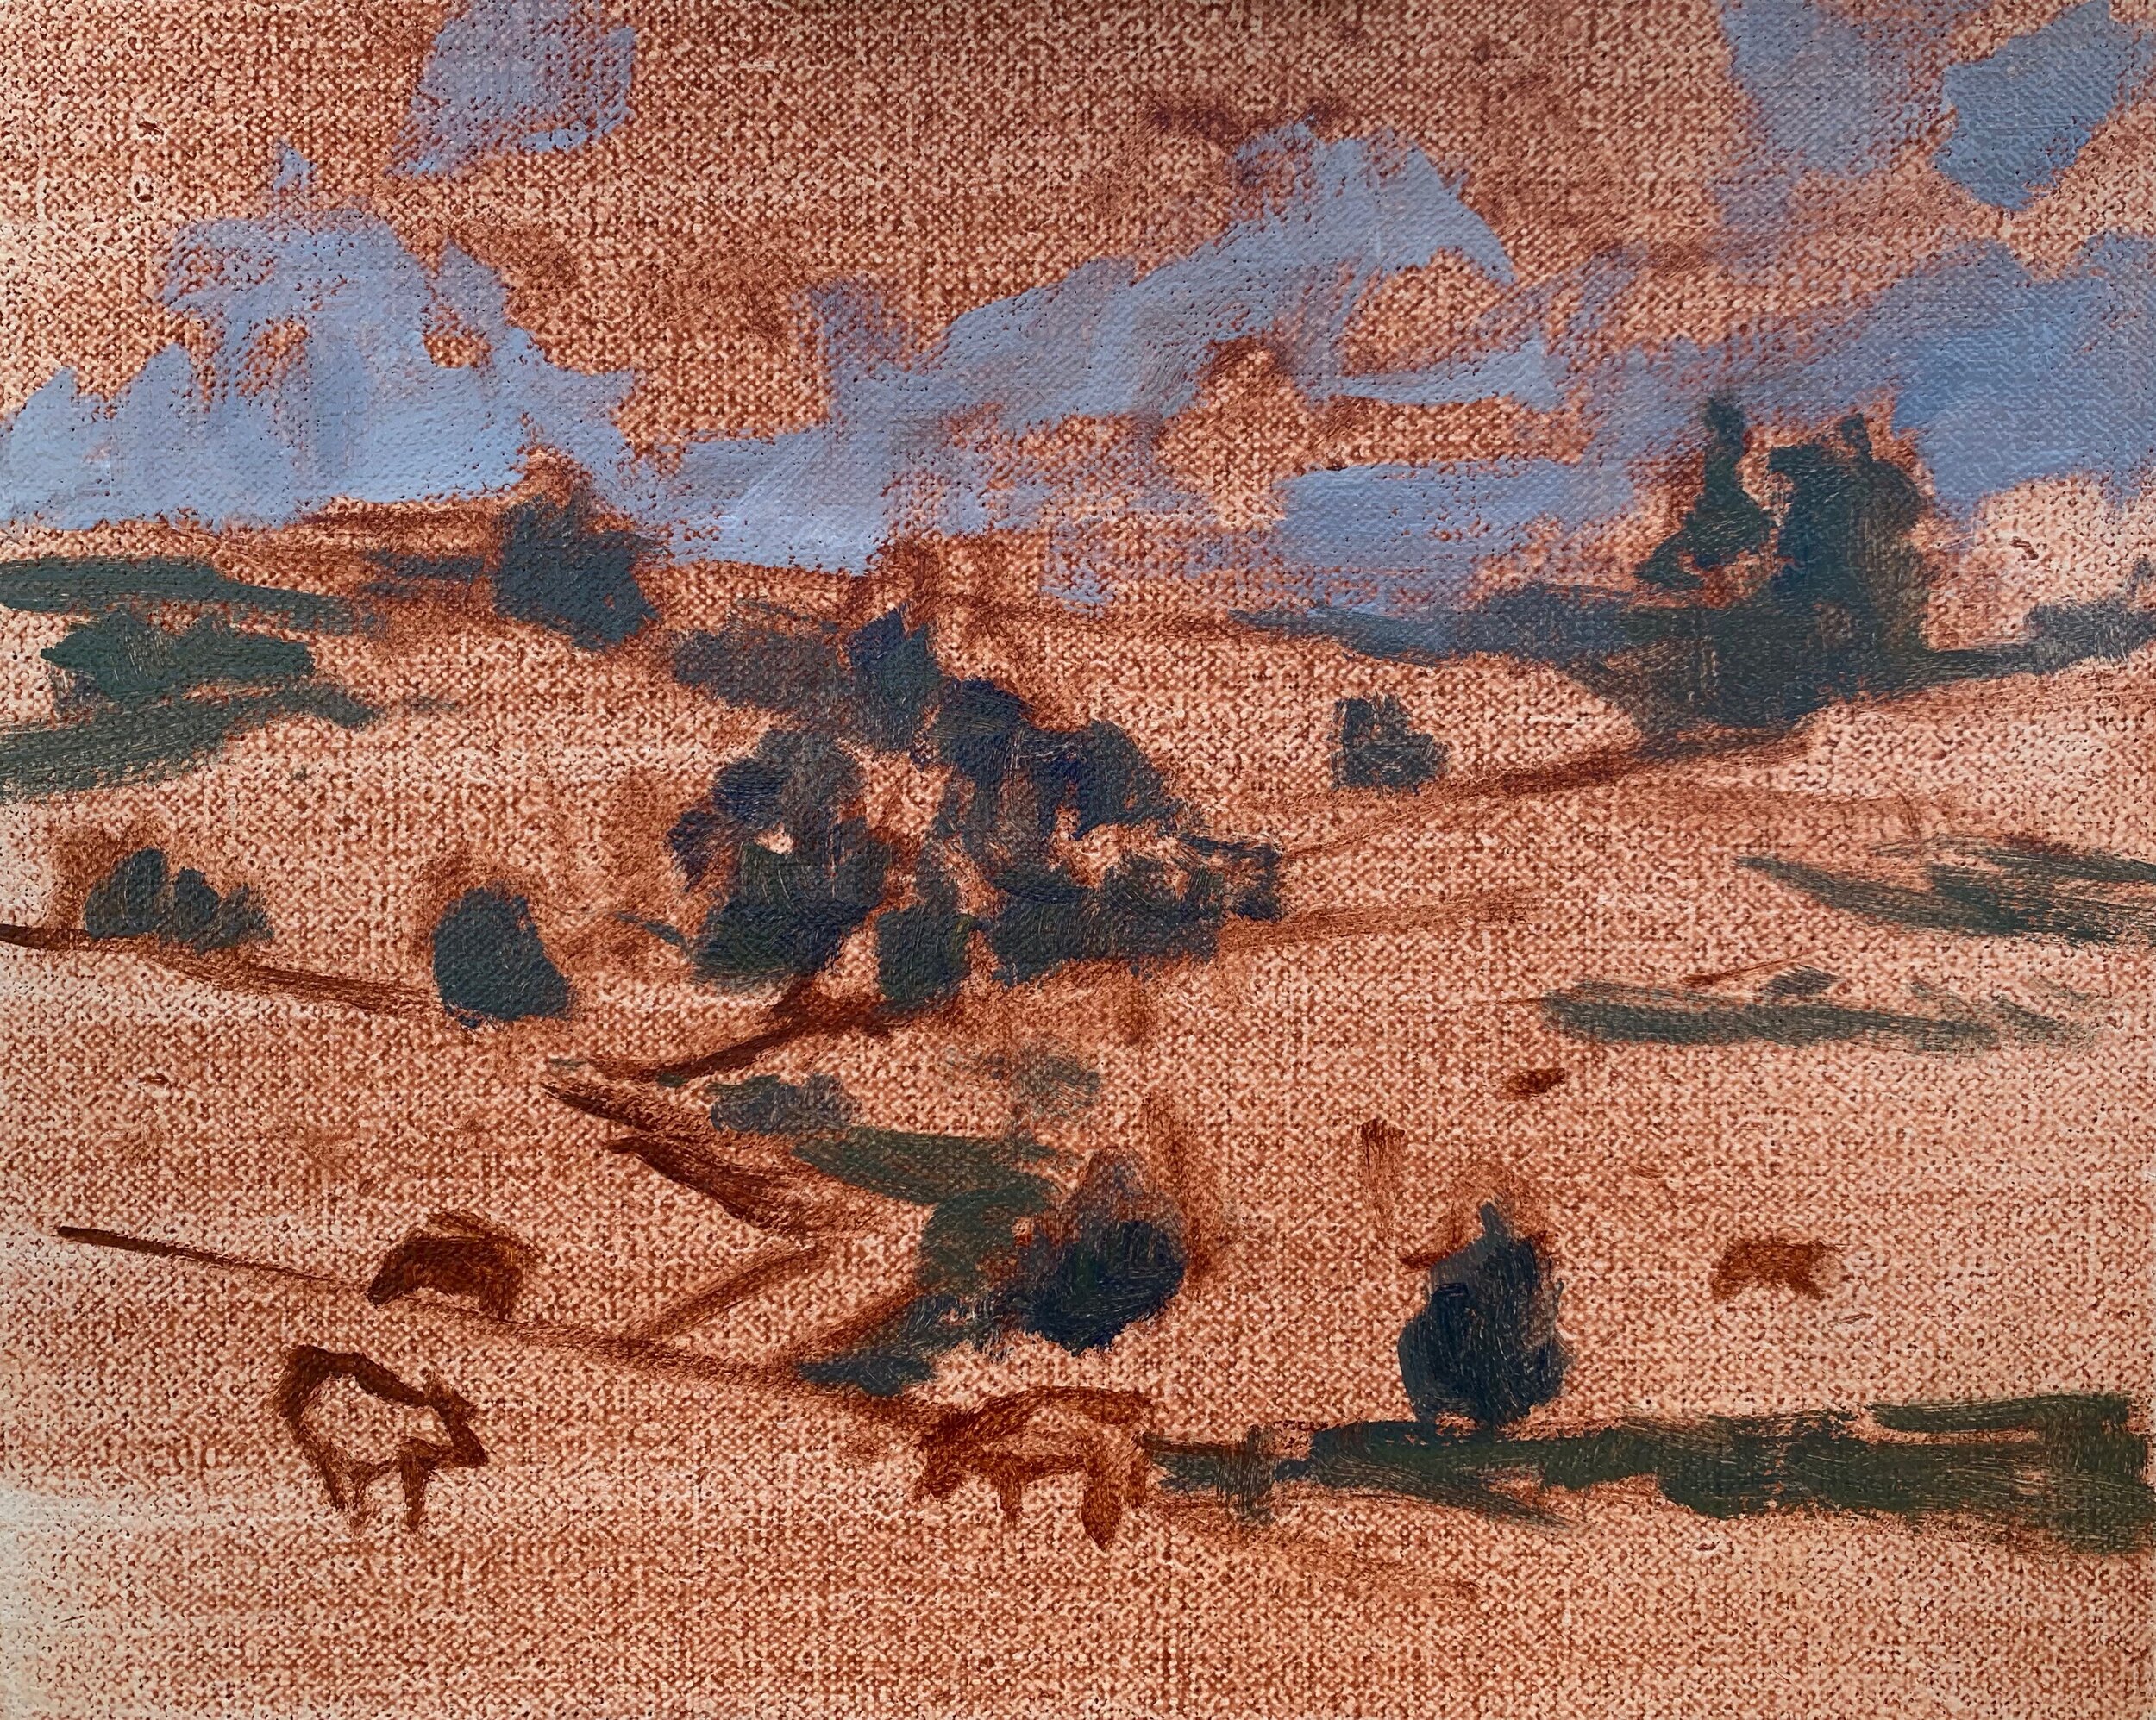
Once I have painted the main shadows I then begin adding colour and I start with the zone in the painting which furthest away and that is the sky and clouds. I paint the cloud highlights with a mix of titanium white and a little burnt sienna.
I paint the sky with a mix of ultramarine blue, cobalt teal and titanium white.
For the mid ground fields I want to keep the greens a little desaturated so I mix yellow oxide, ultramarine blue, cobalt teal and titanium white. I also mix in a very small amount of quinacridone magenta.
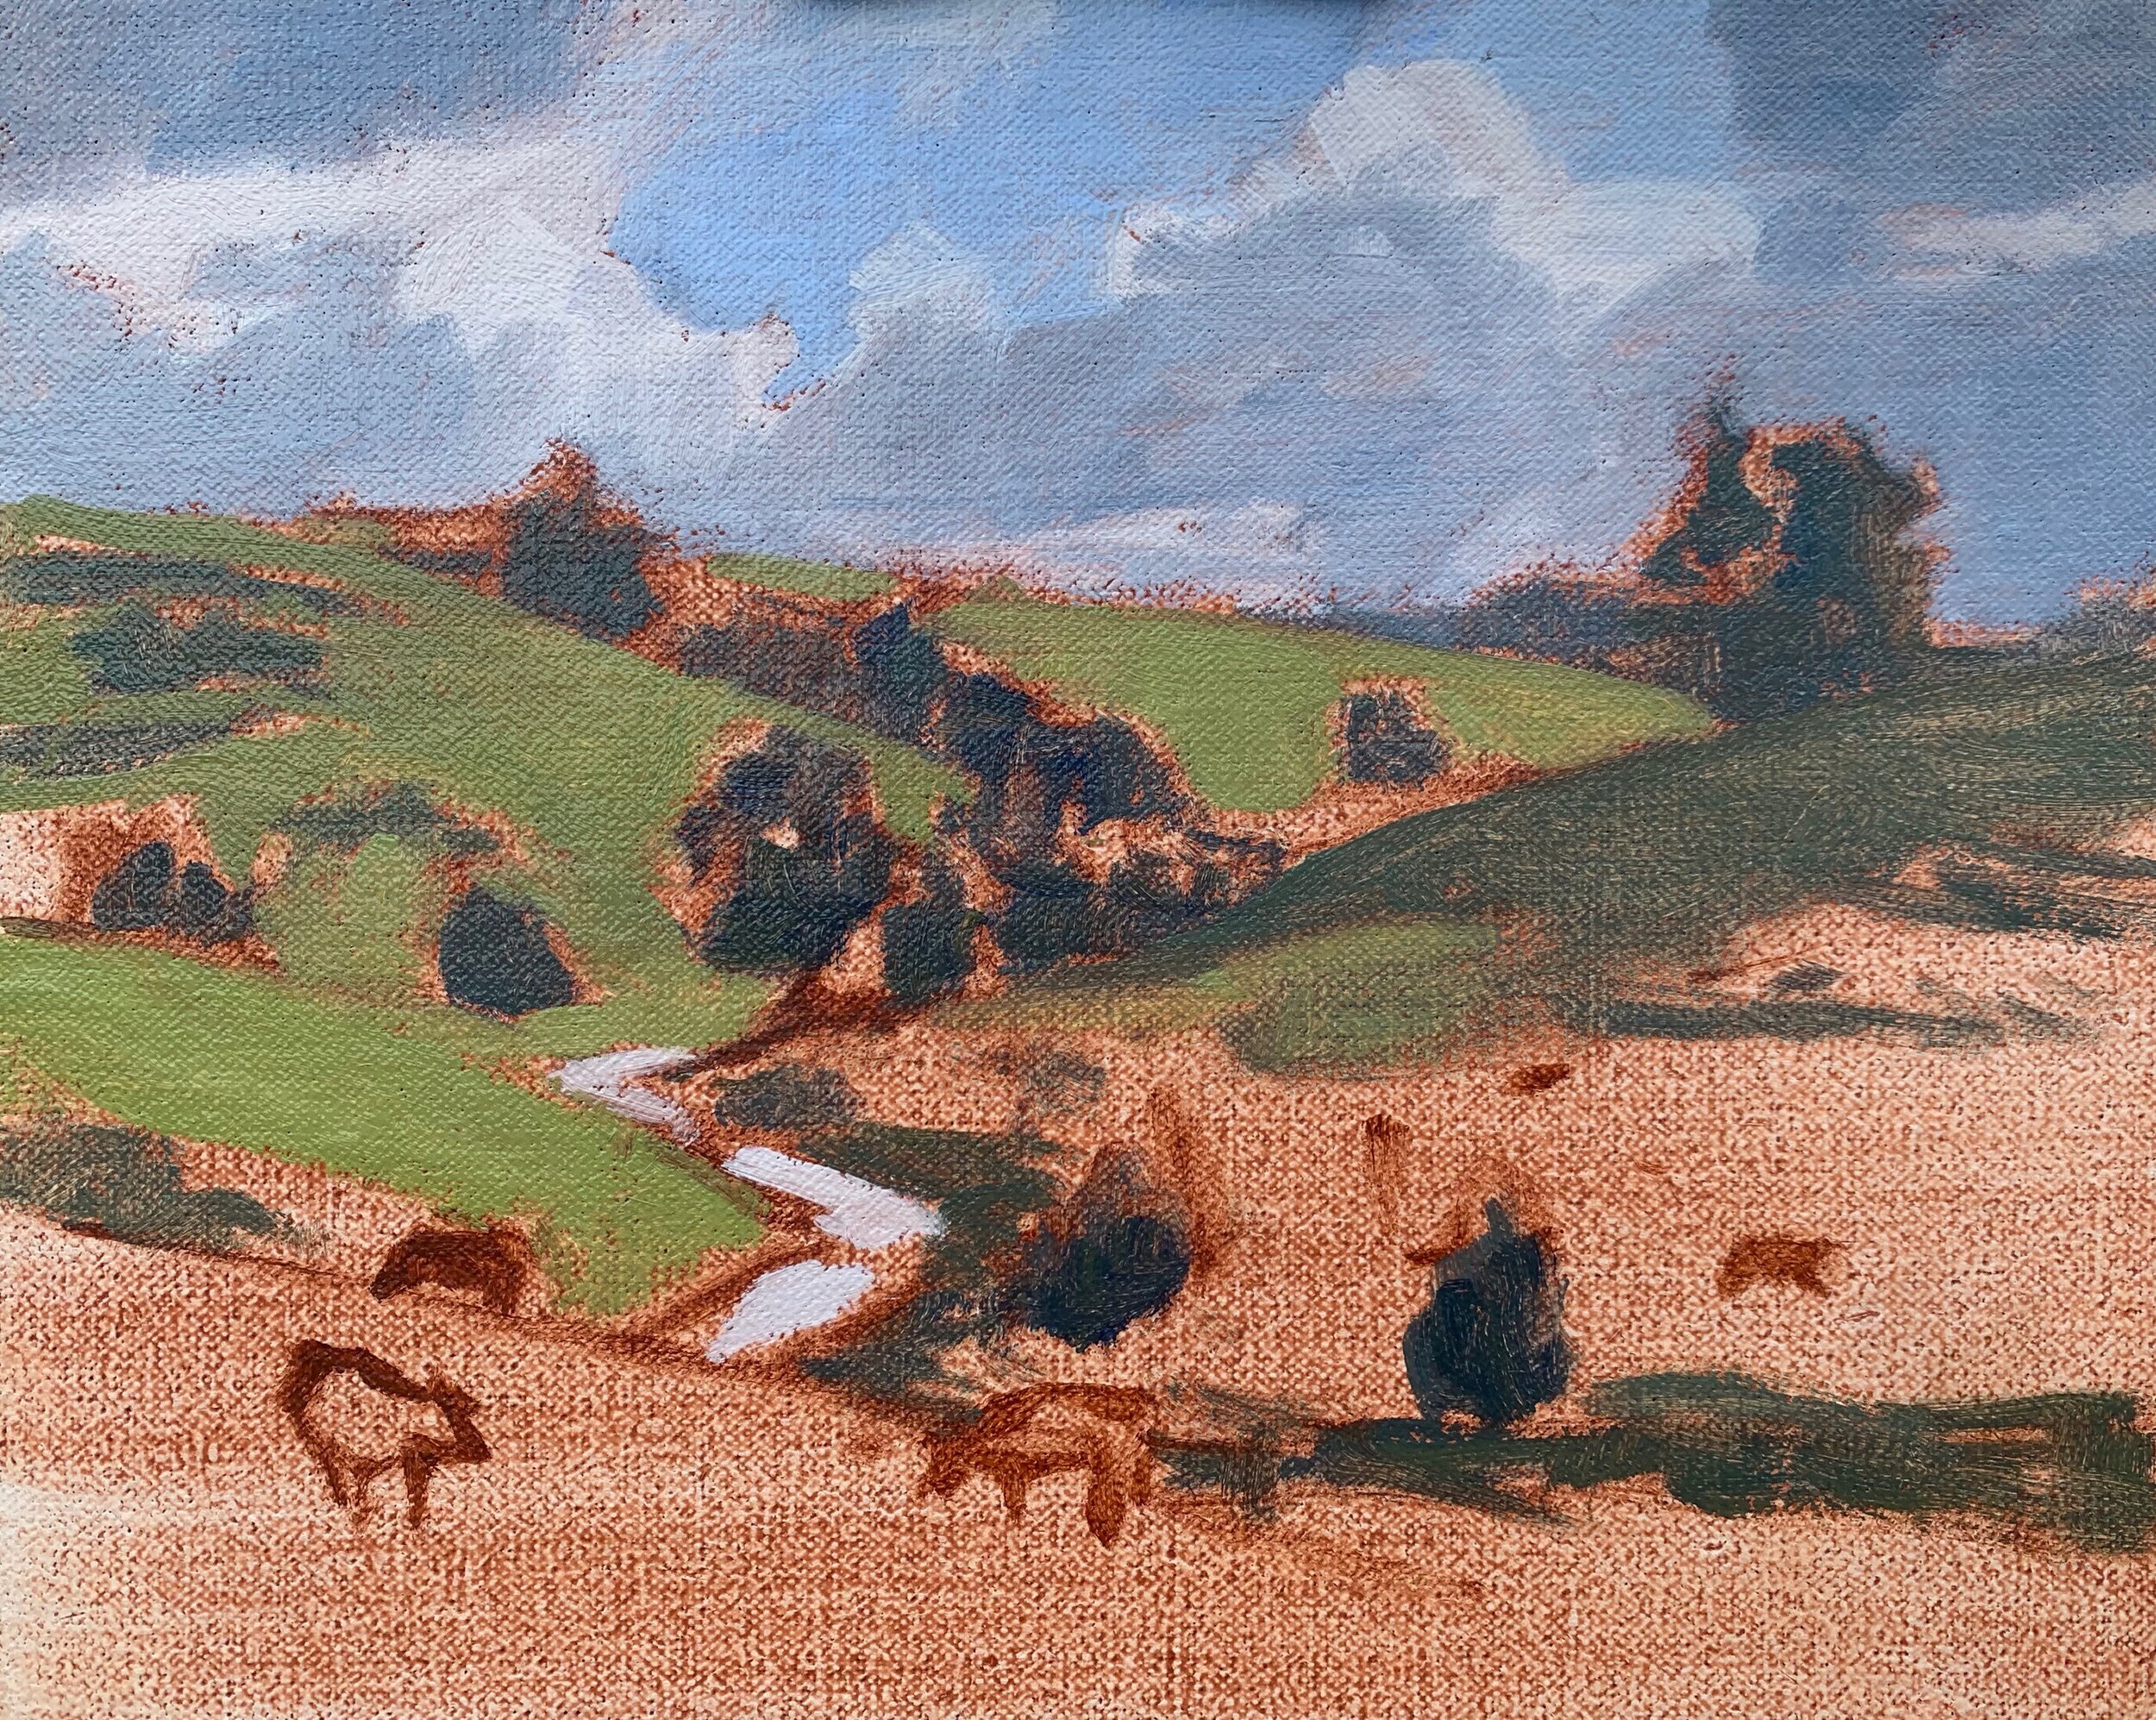
When I paint the grass in the foreground I increase the saturation a little by introducing cadmium yellow into my exisiting green mix that I used for the fields in the background. I can also introduce a little phthalo green to increase the saturation as well as shift the hue.
For the tree canopies that are in the sunlight I keep in mind that these will be darker in value than the grass so I mix ultramarine blue with yellow oxide and use more yellow oxide in my mix to increase the saturation. I also use a little titanium white as well.
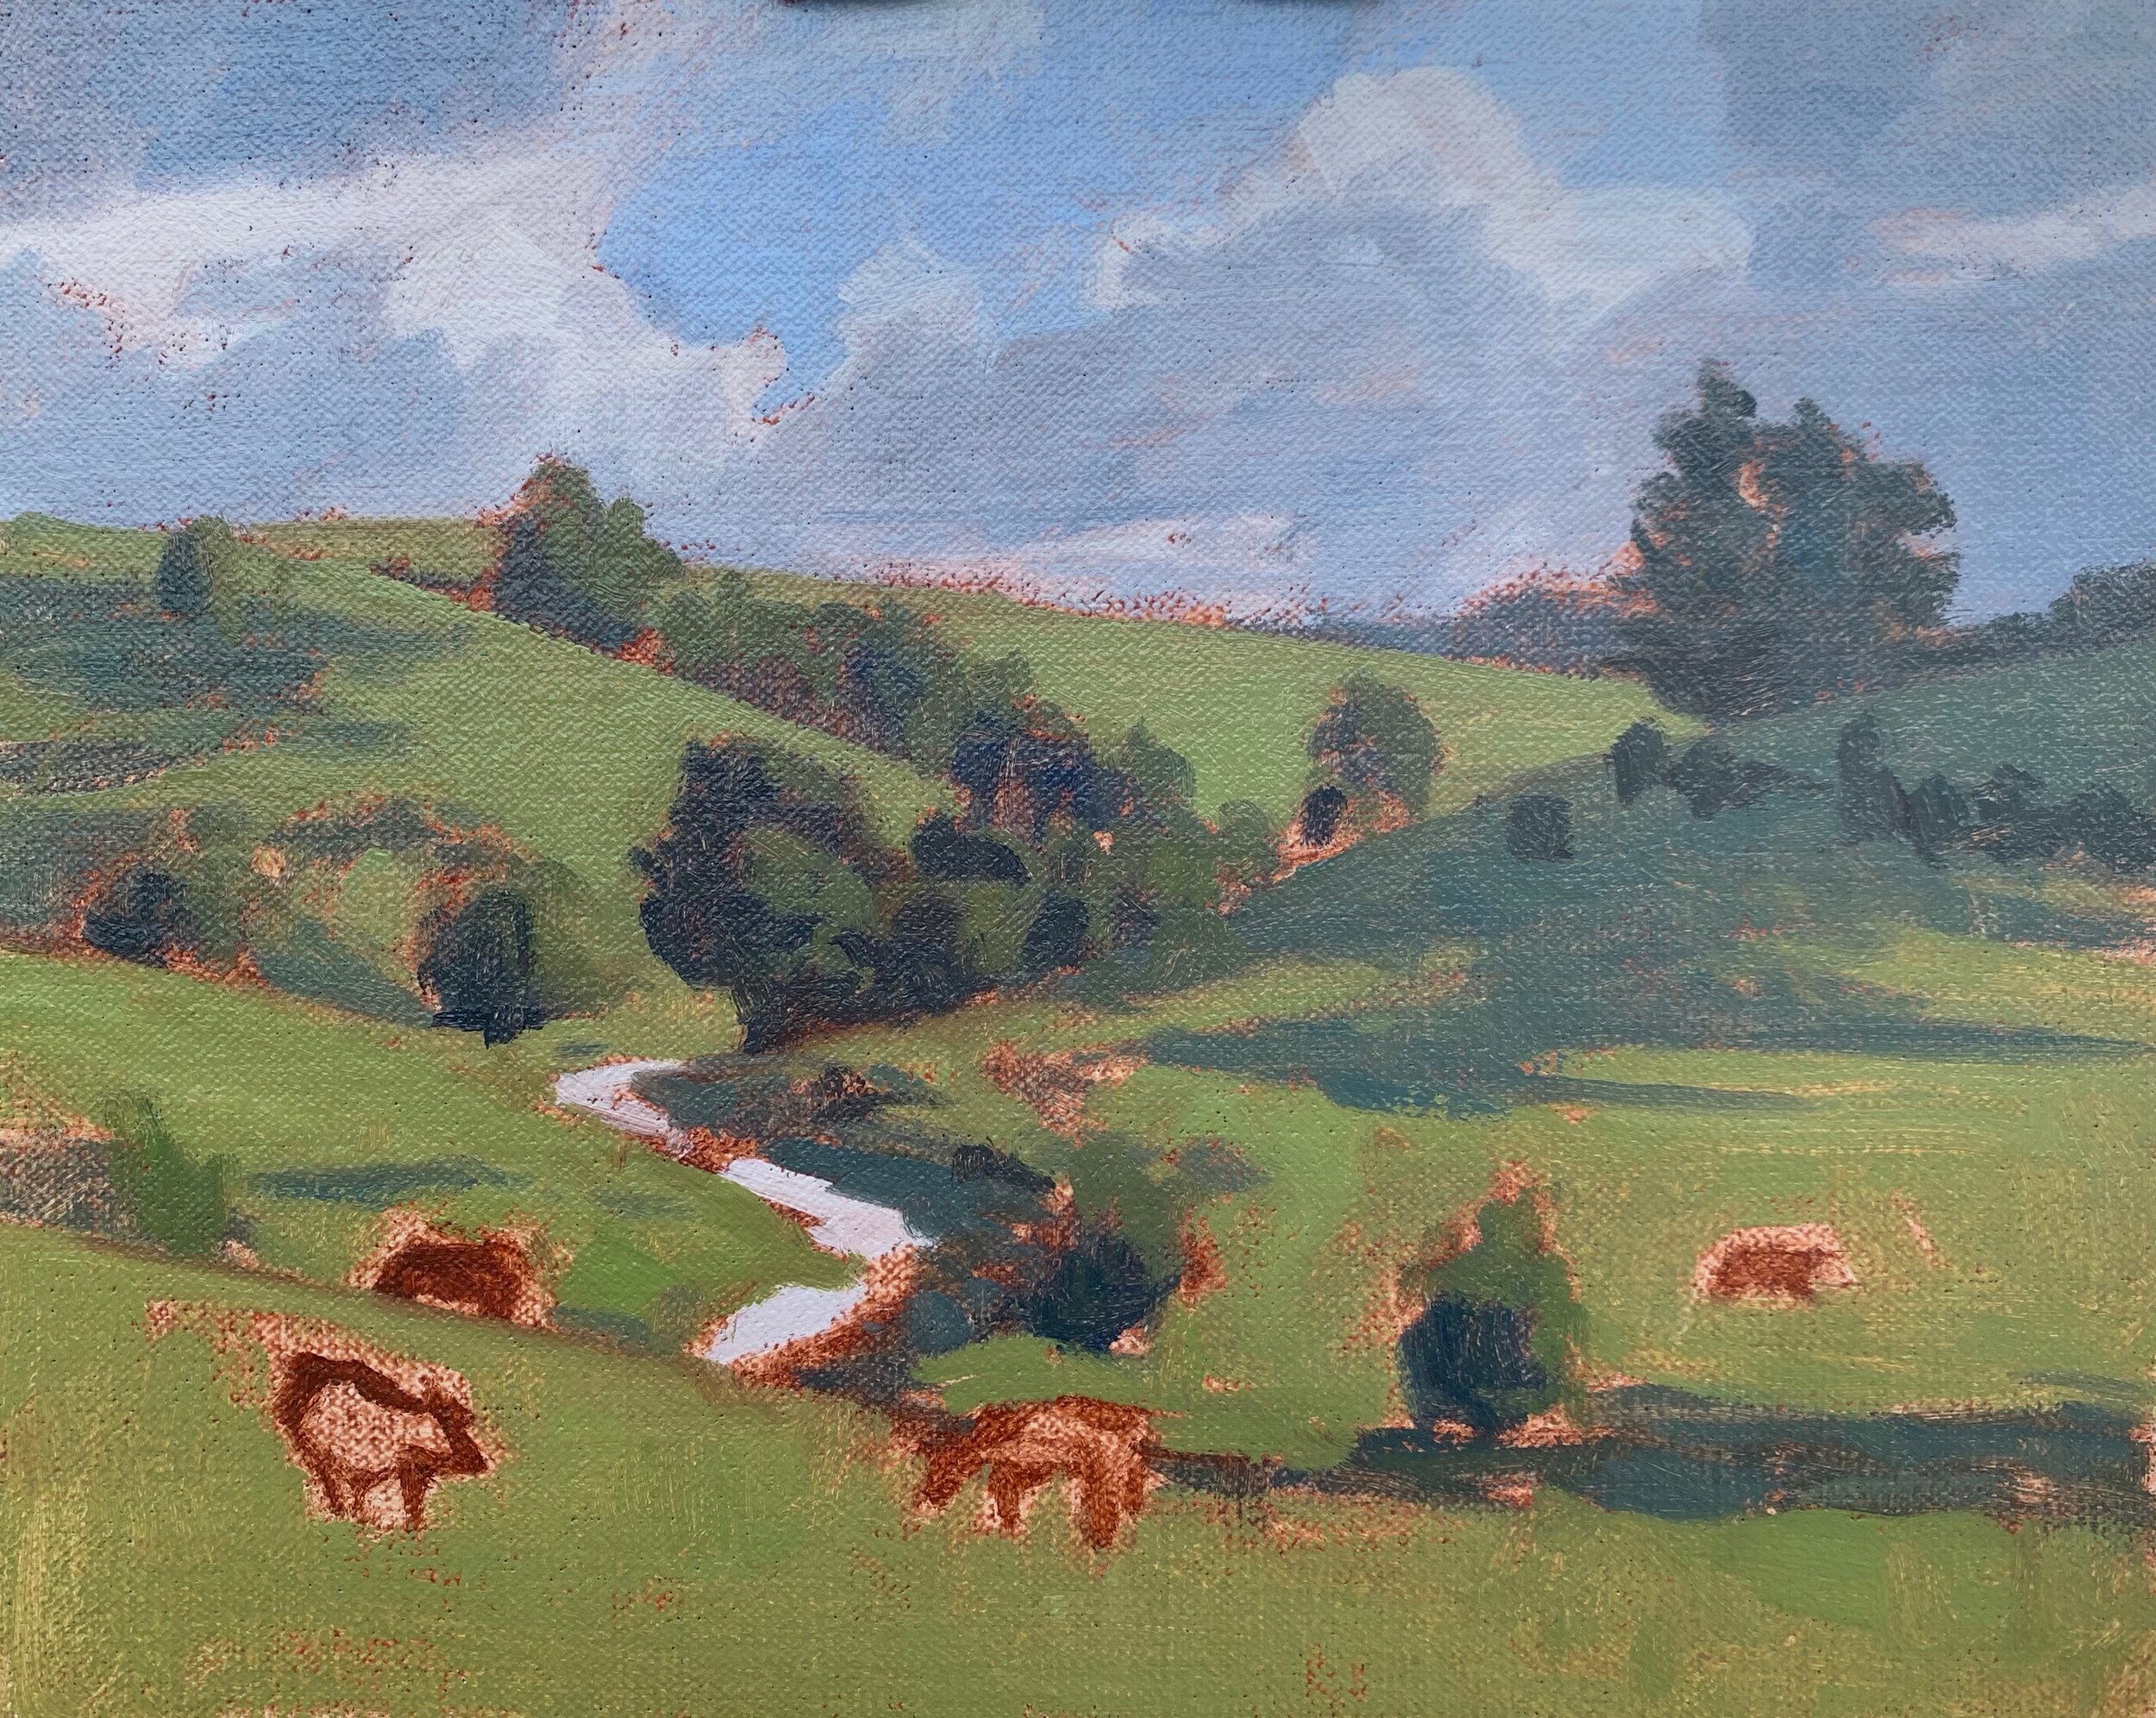
I finish up the plein air (block-in) aspect of this painting by tidying up the whole painting and filling in the gaps between the zones.
I paint the cows with a mixture of ultramarine blue, burnt sienna and titanium white and I use much more burnt sienna in the mix. For the areas of the cows white fur I mix ultramarine blue, burnt sienna and titanium white for the shadow areas and titanium white with a little burnt sienna for their faces that are in the full sunlight.
At this point of the painting the plein air aspect of it was finished. This is my painting on my pochade box easel when I turned my painting around to the light.
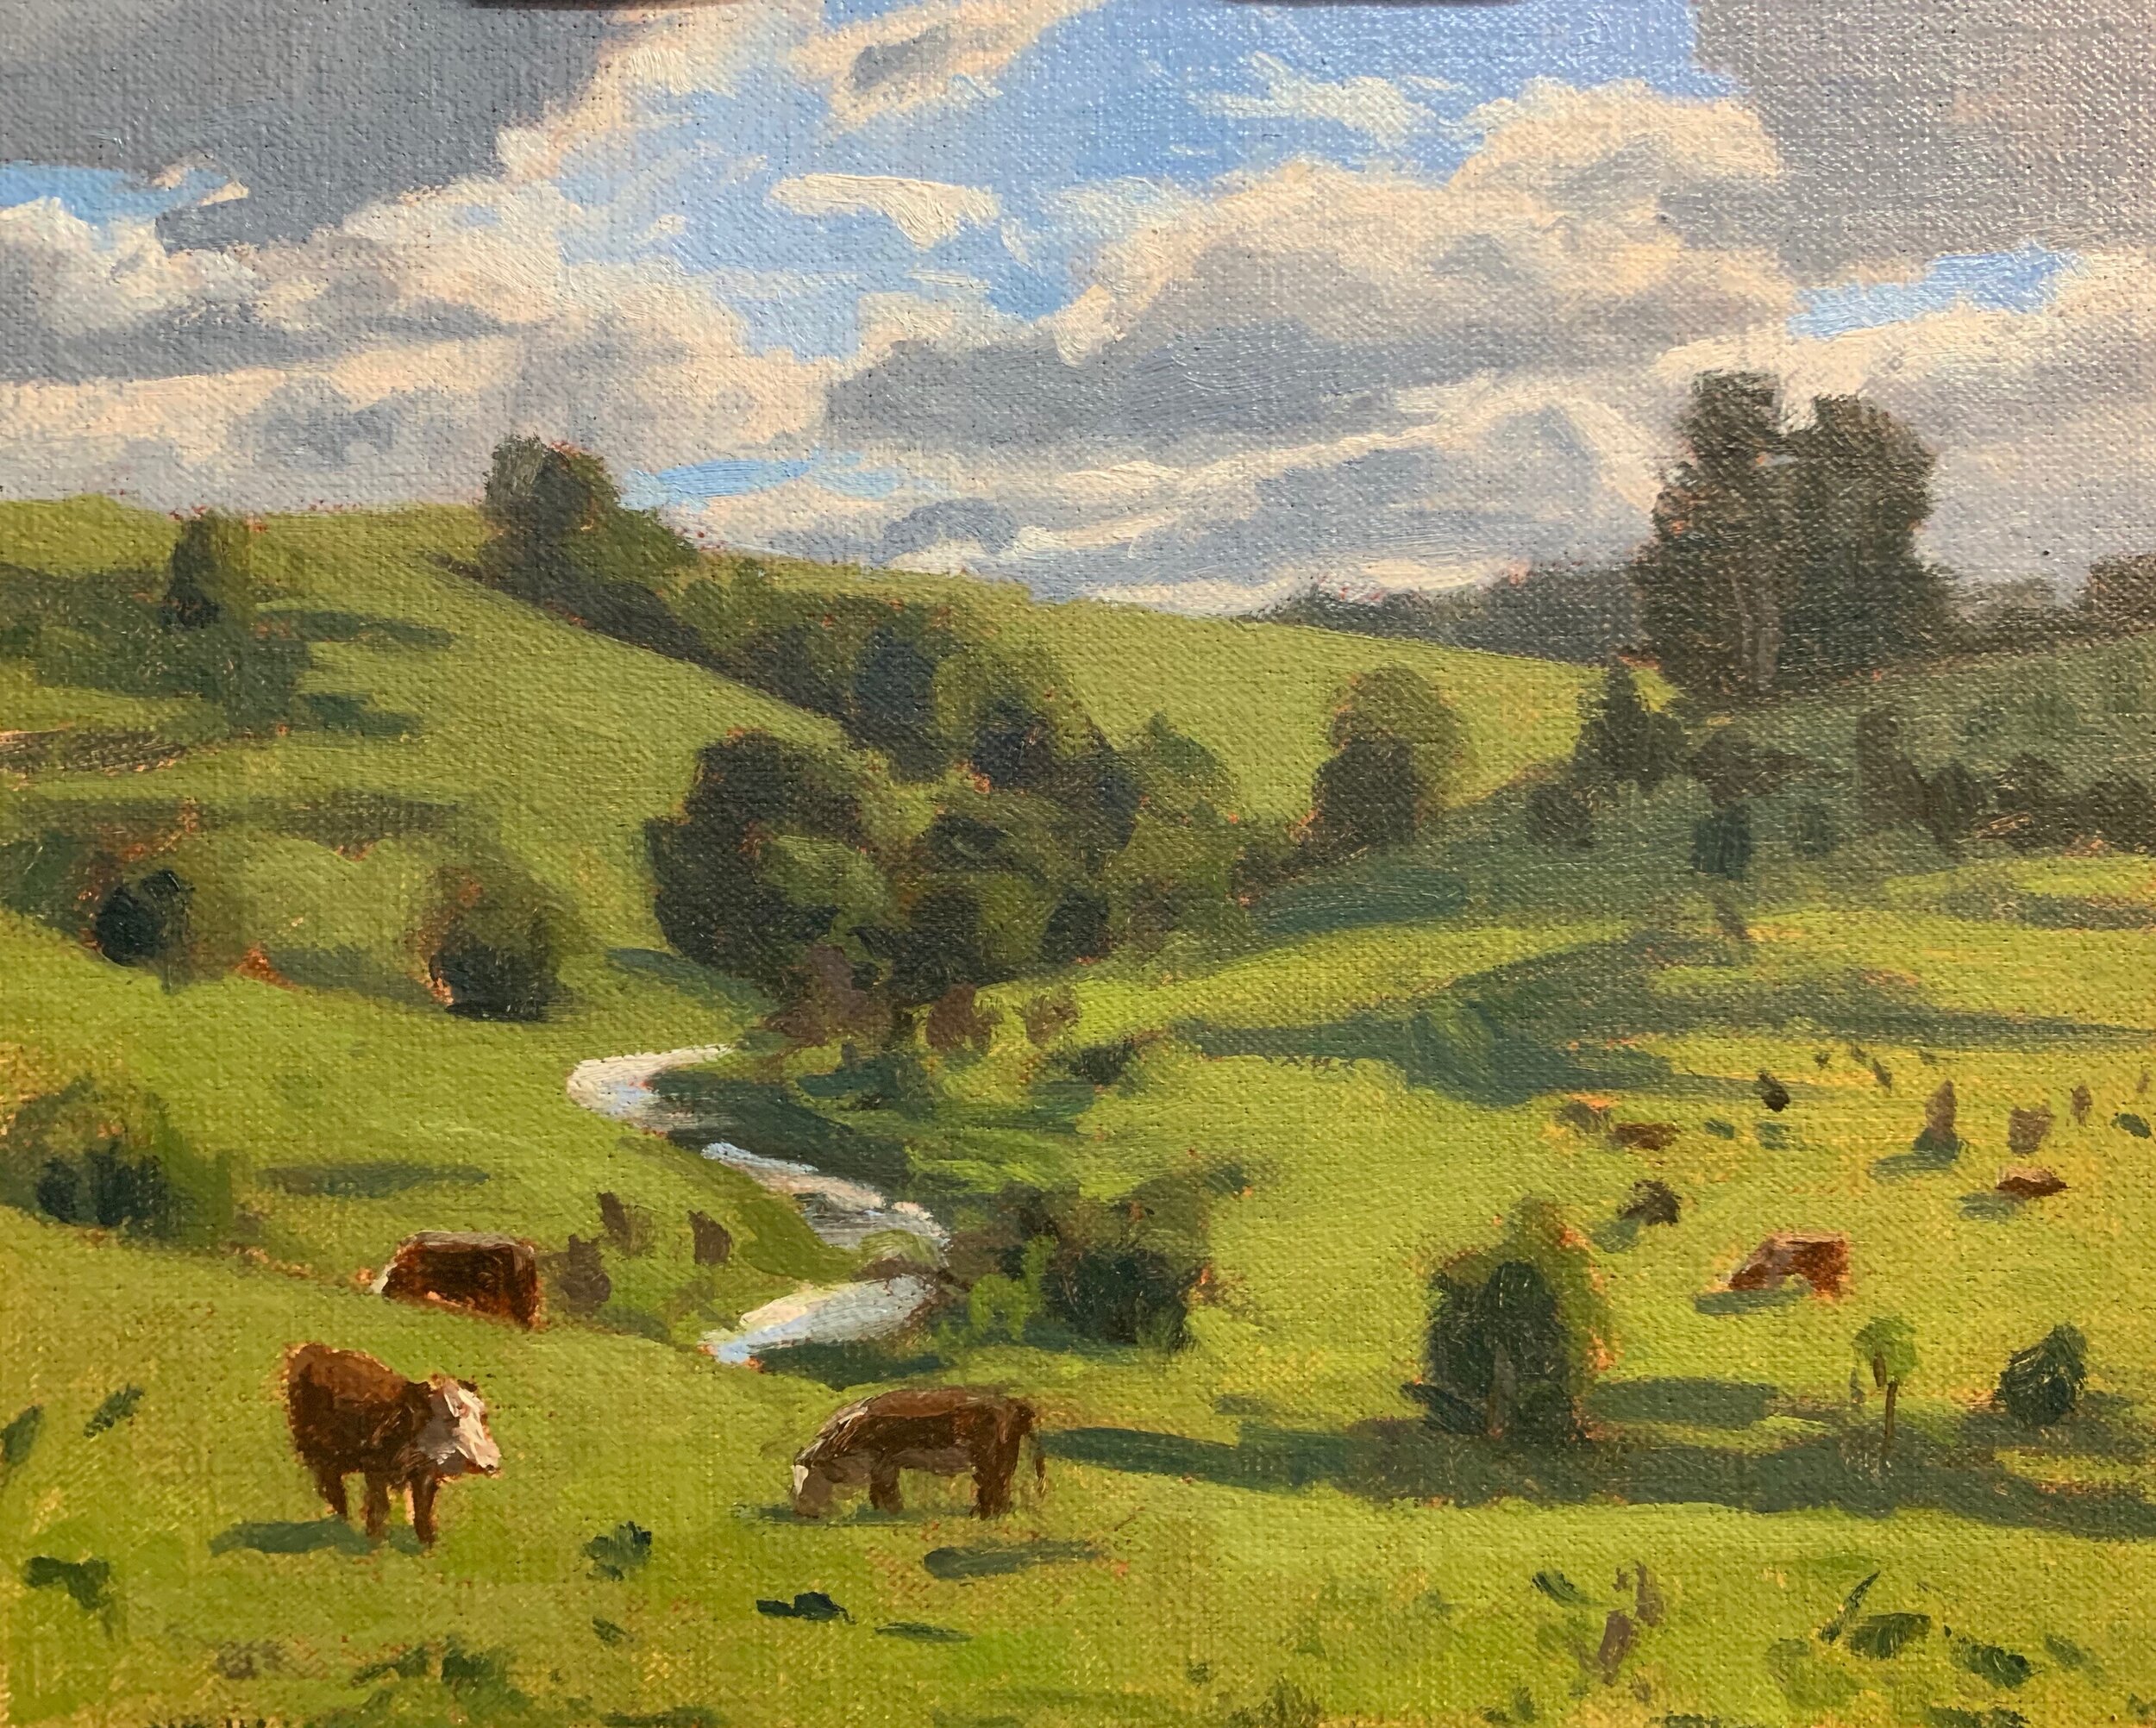
Stage Two – Modelling and Adding Details
Once back in the studio I let my painting dry and it was sat on my shelf for a few weeks whilst I decided what details I would add. I went through my photo reference and decided I would create some spotlighting effects in my painting.
I first added more details to the sky and clouds using the same colours I used during the blocking in stage. When painting the cloud shadows and highlights I used No.3 filbert brushes as I was able to use the rounded ends of the bristles to create texture within the clouds.
Next I began adding shadows to the grass but leaving the area by the stand of trees as this will be another aspect of the composition that will draw the eye towards them. I used the same colours for the grass shadows as I did when I was painting it outdoors. This was a mix of yellow oxide, ultramarine blue, a little cobalt teal and titanium white.
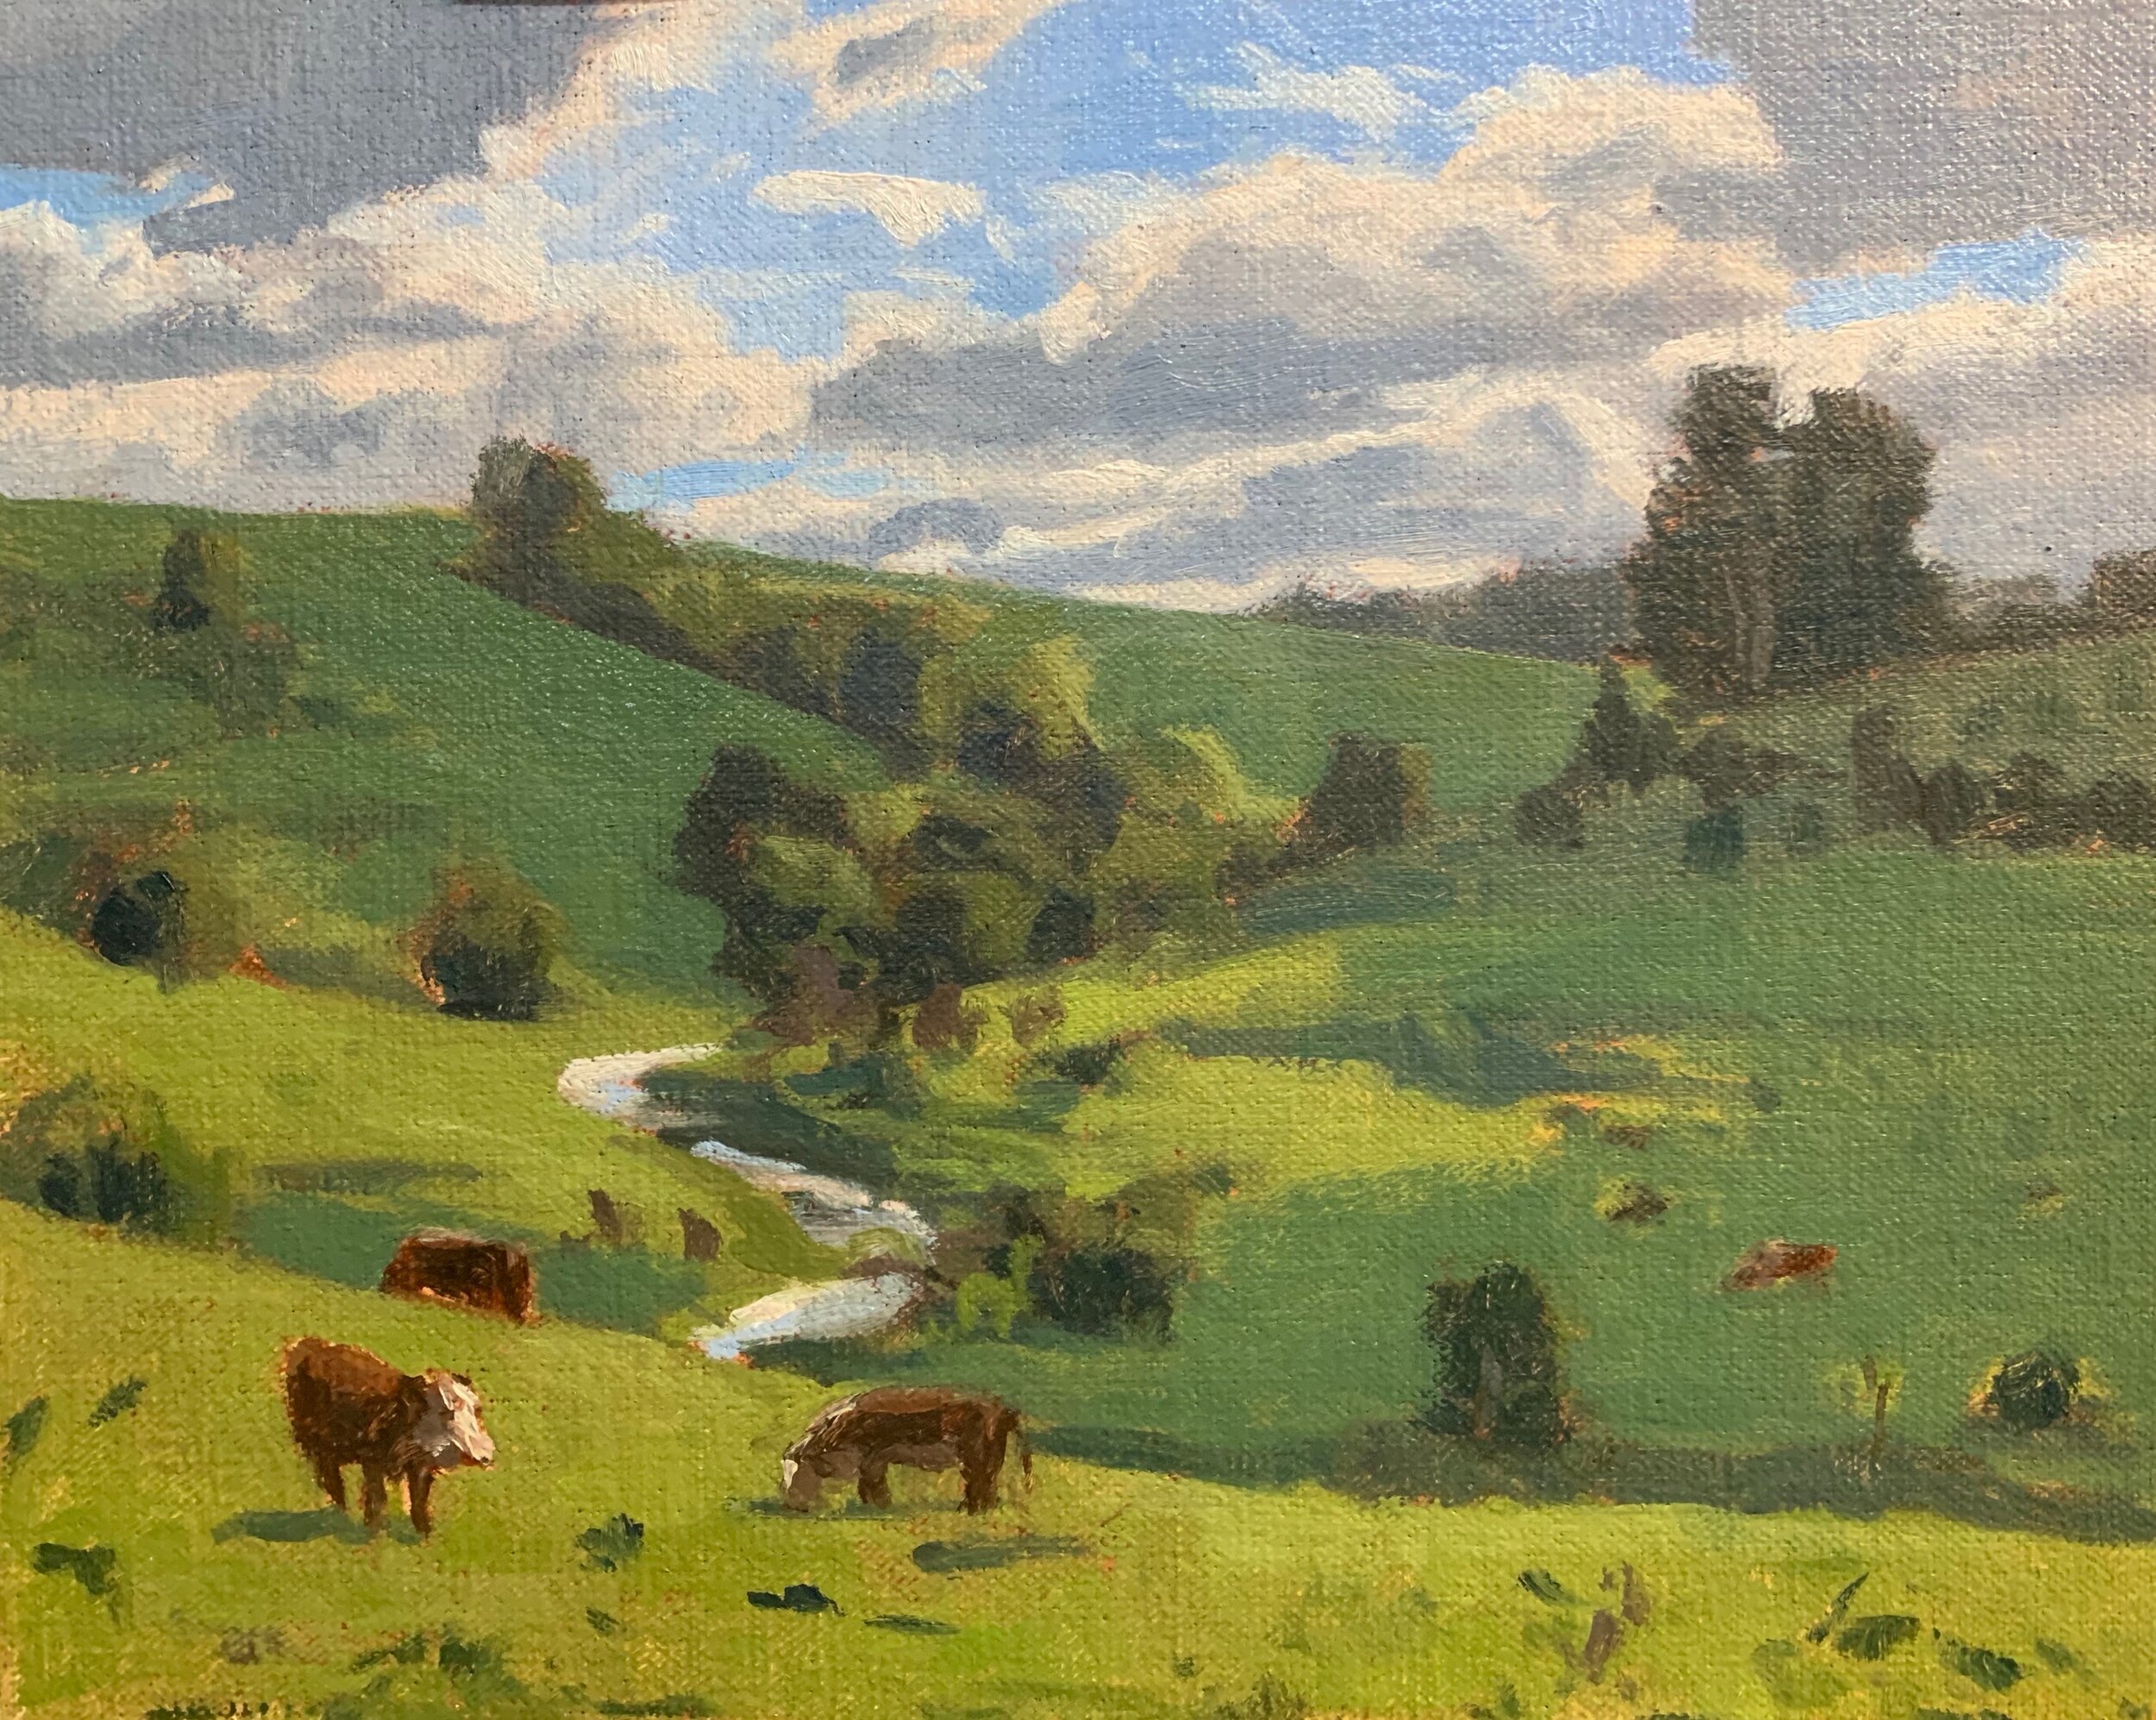
Next I do modelling on the whole main area of the landscape, working on the grass shadow half-tones and highlights. For this I am mainly using ultramarine blue, yellow oxide and titanium white as a base then adjusting the mixtures by introducing cadmium yellow, phthalo green and / or cobalt teal to increase the saturation. If my greens become too cold or saturated I can knock it back my mixing in some quinacridone magenta.
For the grass highlights I use more cadmium yellow and phthalo green in my mix and titanium white to create a light value green.
I break up the line of trees in the background on the left as I felt it was forming a distracting vector in the painting.
I add more details and highlights to the stand of trees in the mid ground and I start adding more trees and shrubs across the fields.
Last Stage – Final Details
I finish up my painting by adding a highlights to the stream where the sun is shimmering in the water. This is a mix of titanium white and a little yellow oxide. I also add a few highlights to the trees and for this I am using small No.00 synthetic round brushes for fine details.
I add final details to the cows. I also shifted the position of one of the cows as I felt it was previously obstructing the rhythm in the painting composition.
I add fine details to the cows to communicate their forms. I am still using mainly burnt sienna, ultramarine blue and titanium white for their fur but I also mix in a little cadmium red to increase the saturation a little. I use a little yellow oxide in the mix for the highlights on the fur.
Thanks for reading 😊
