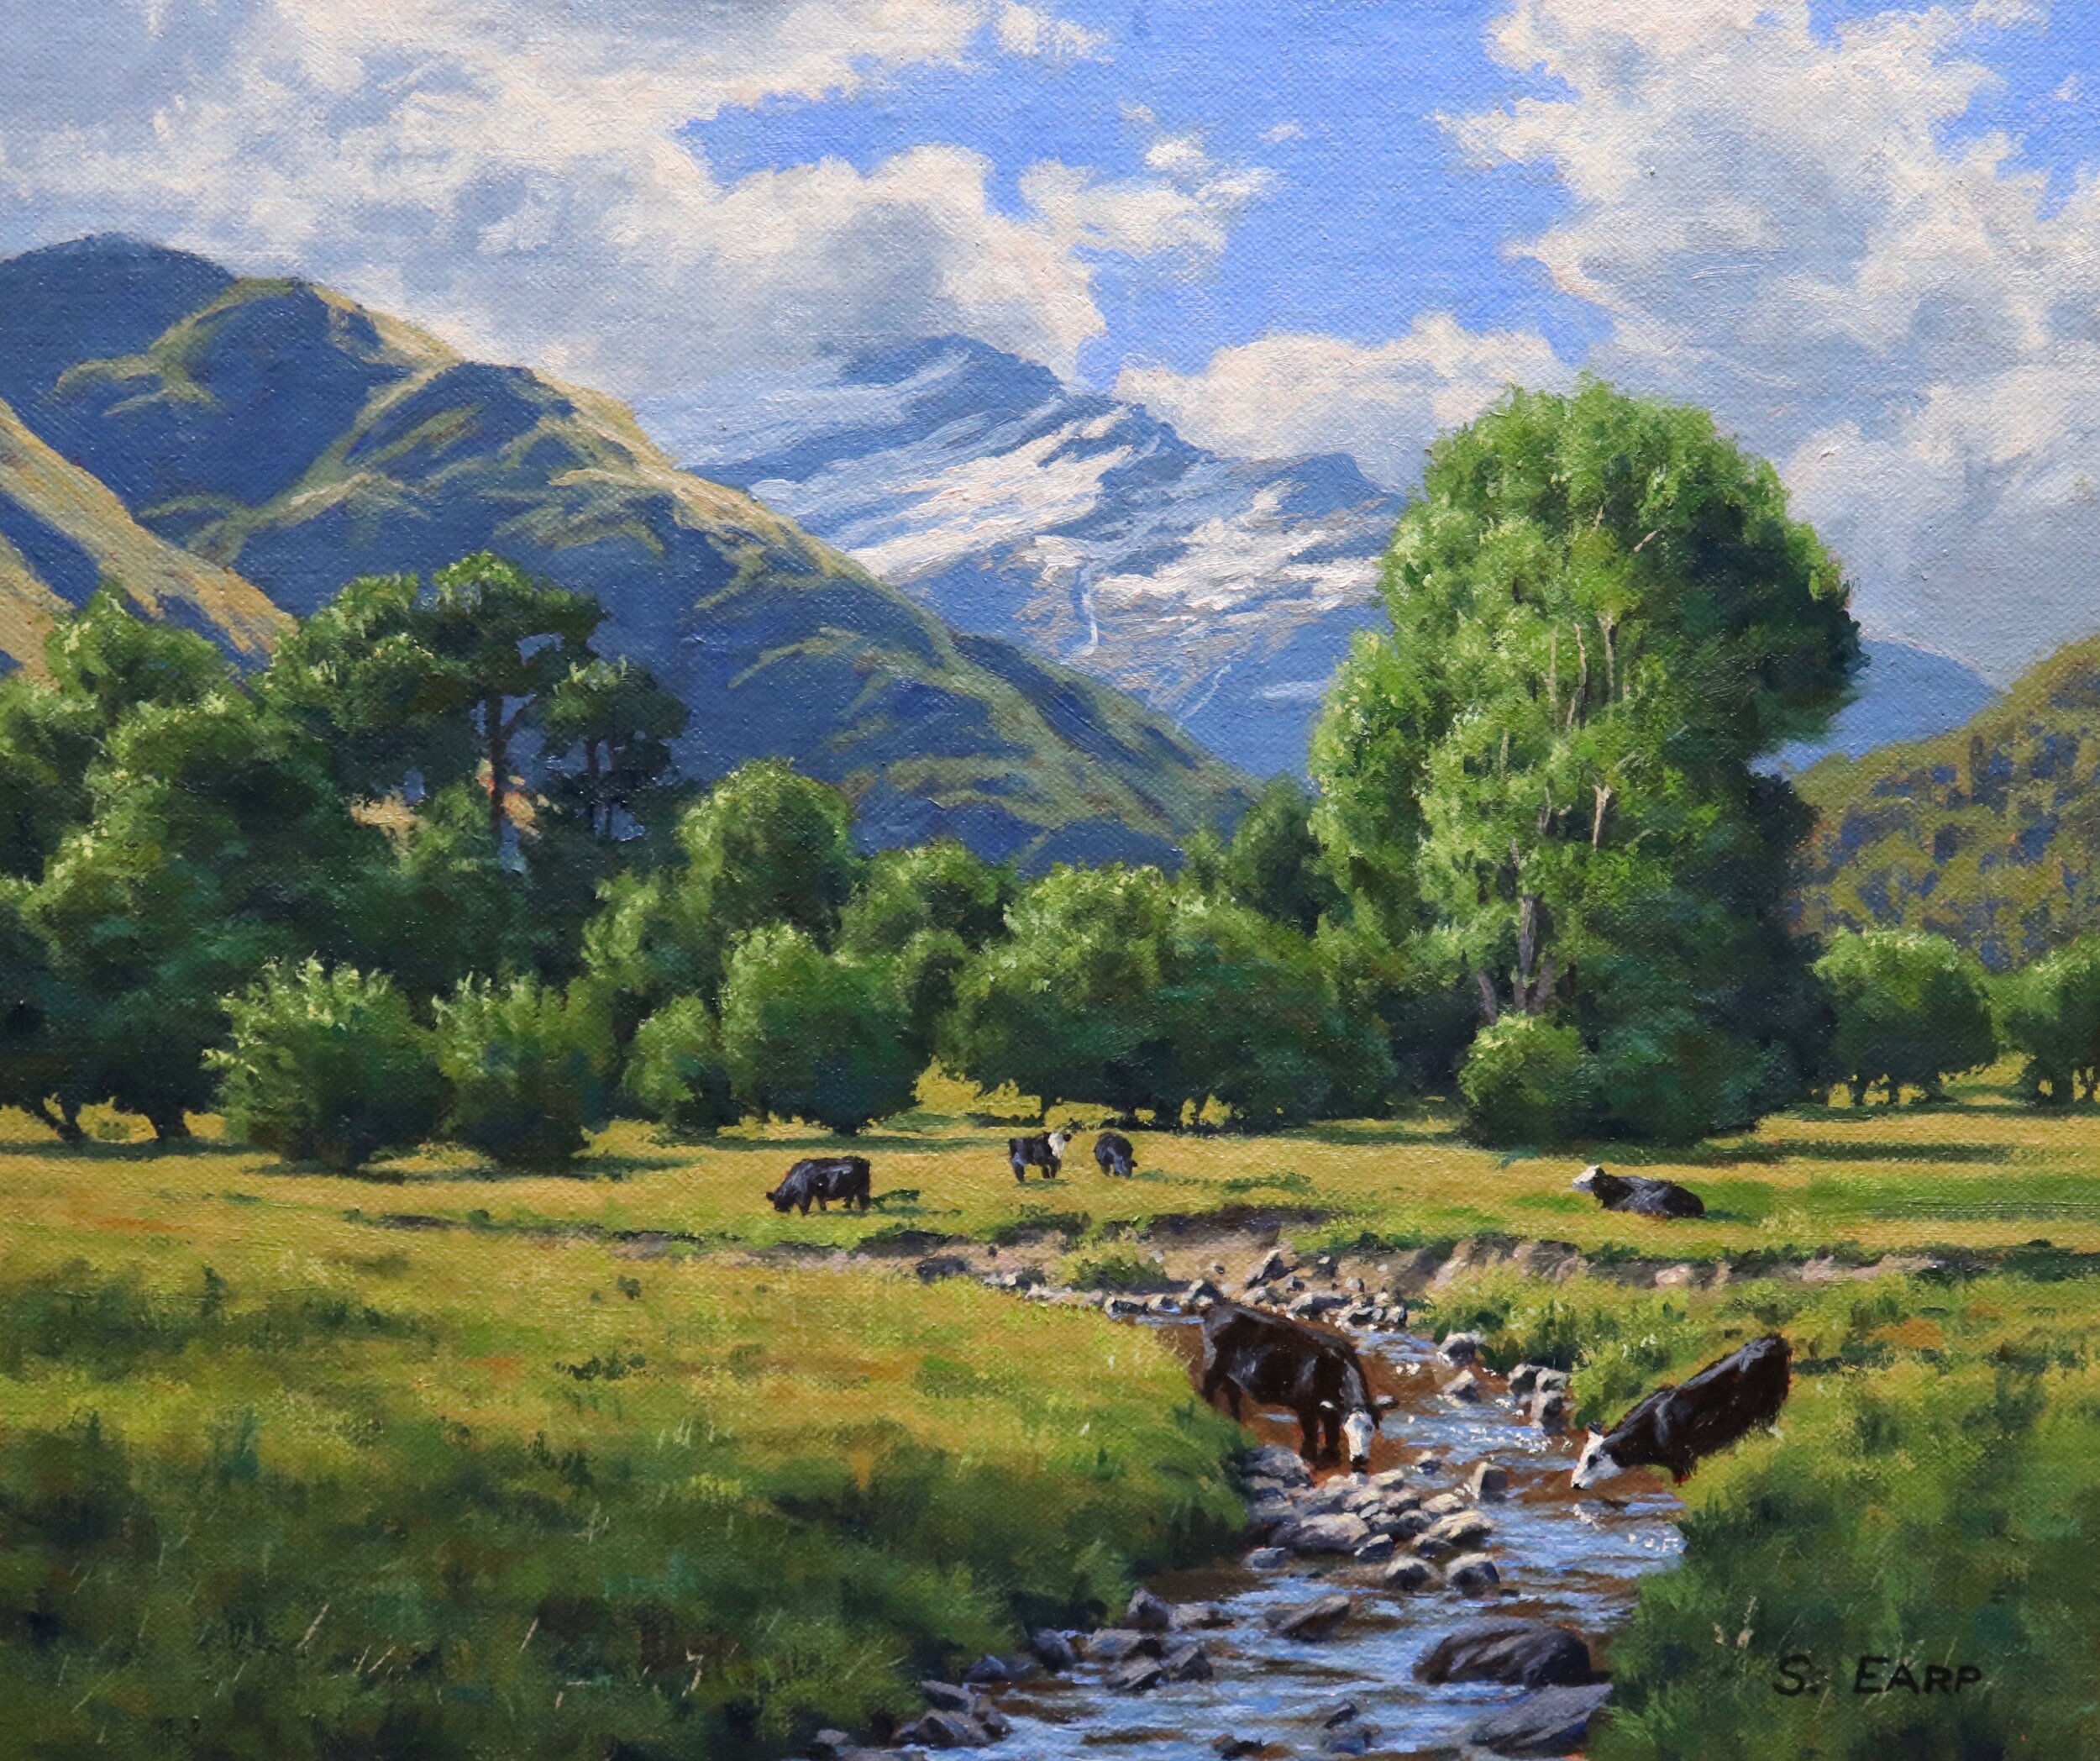
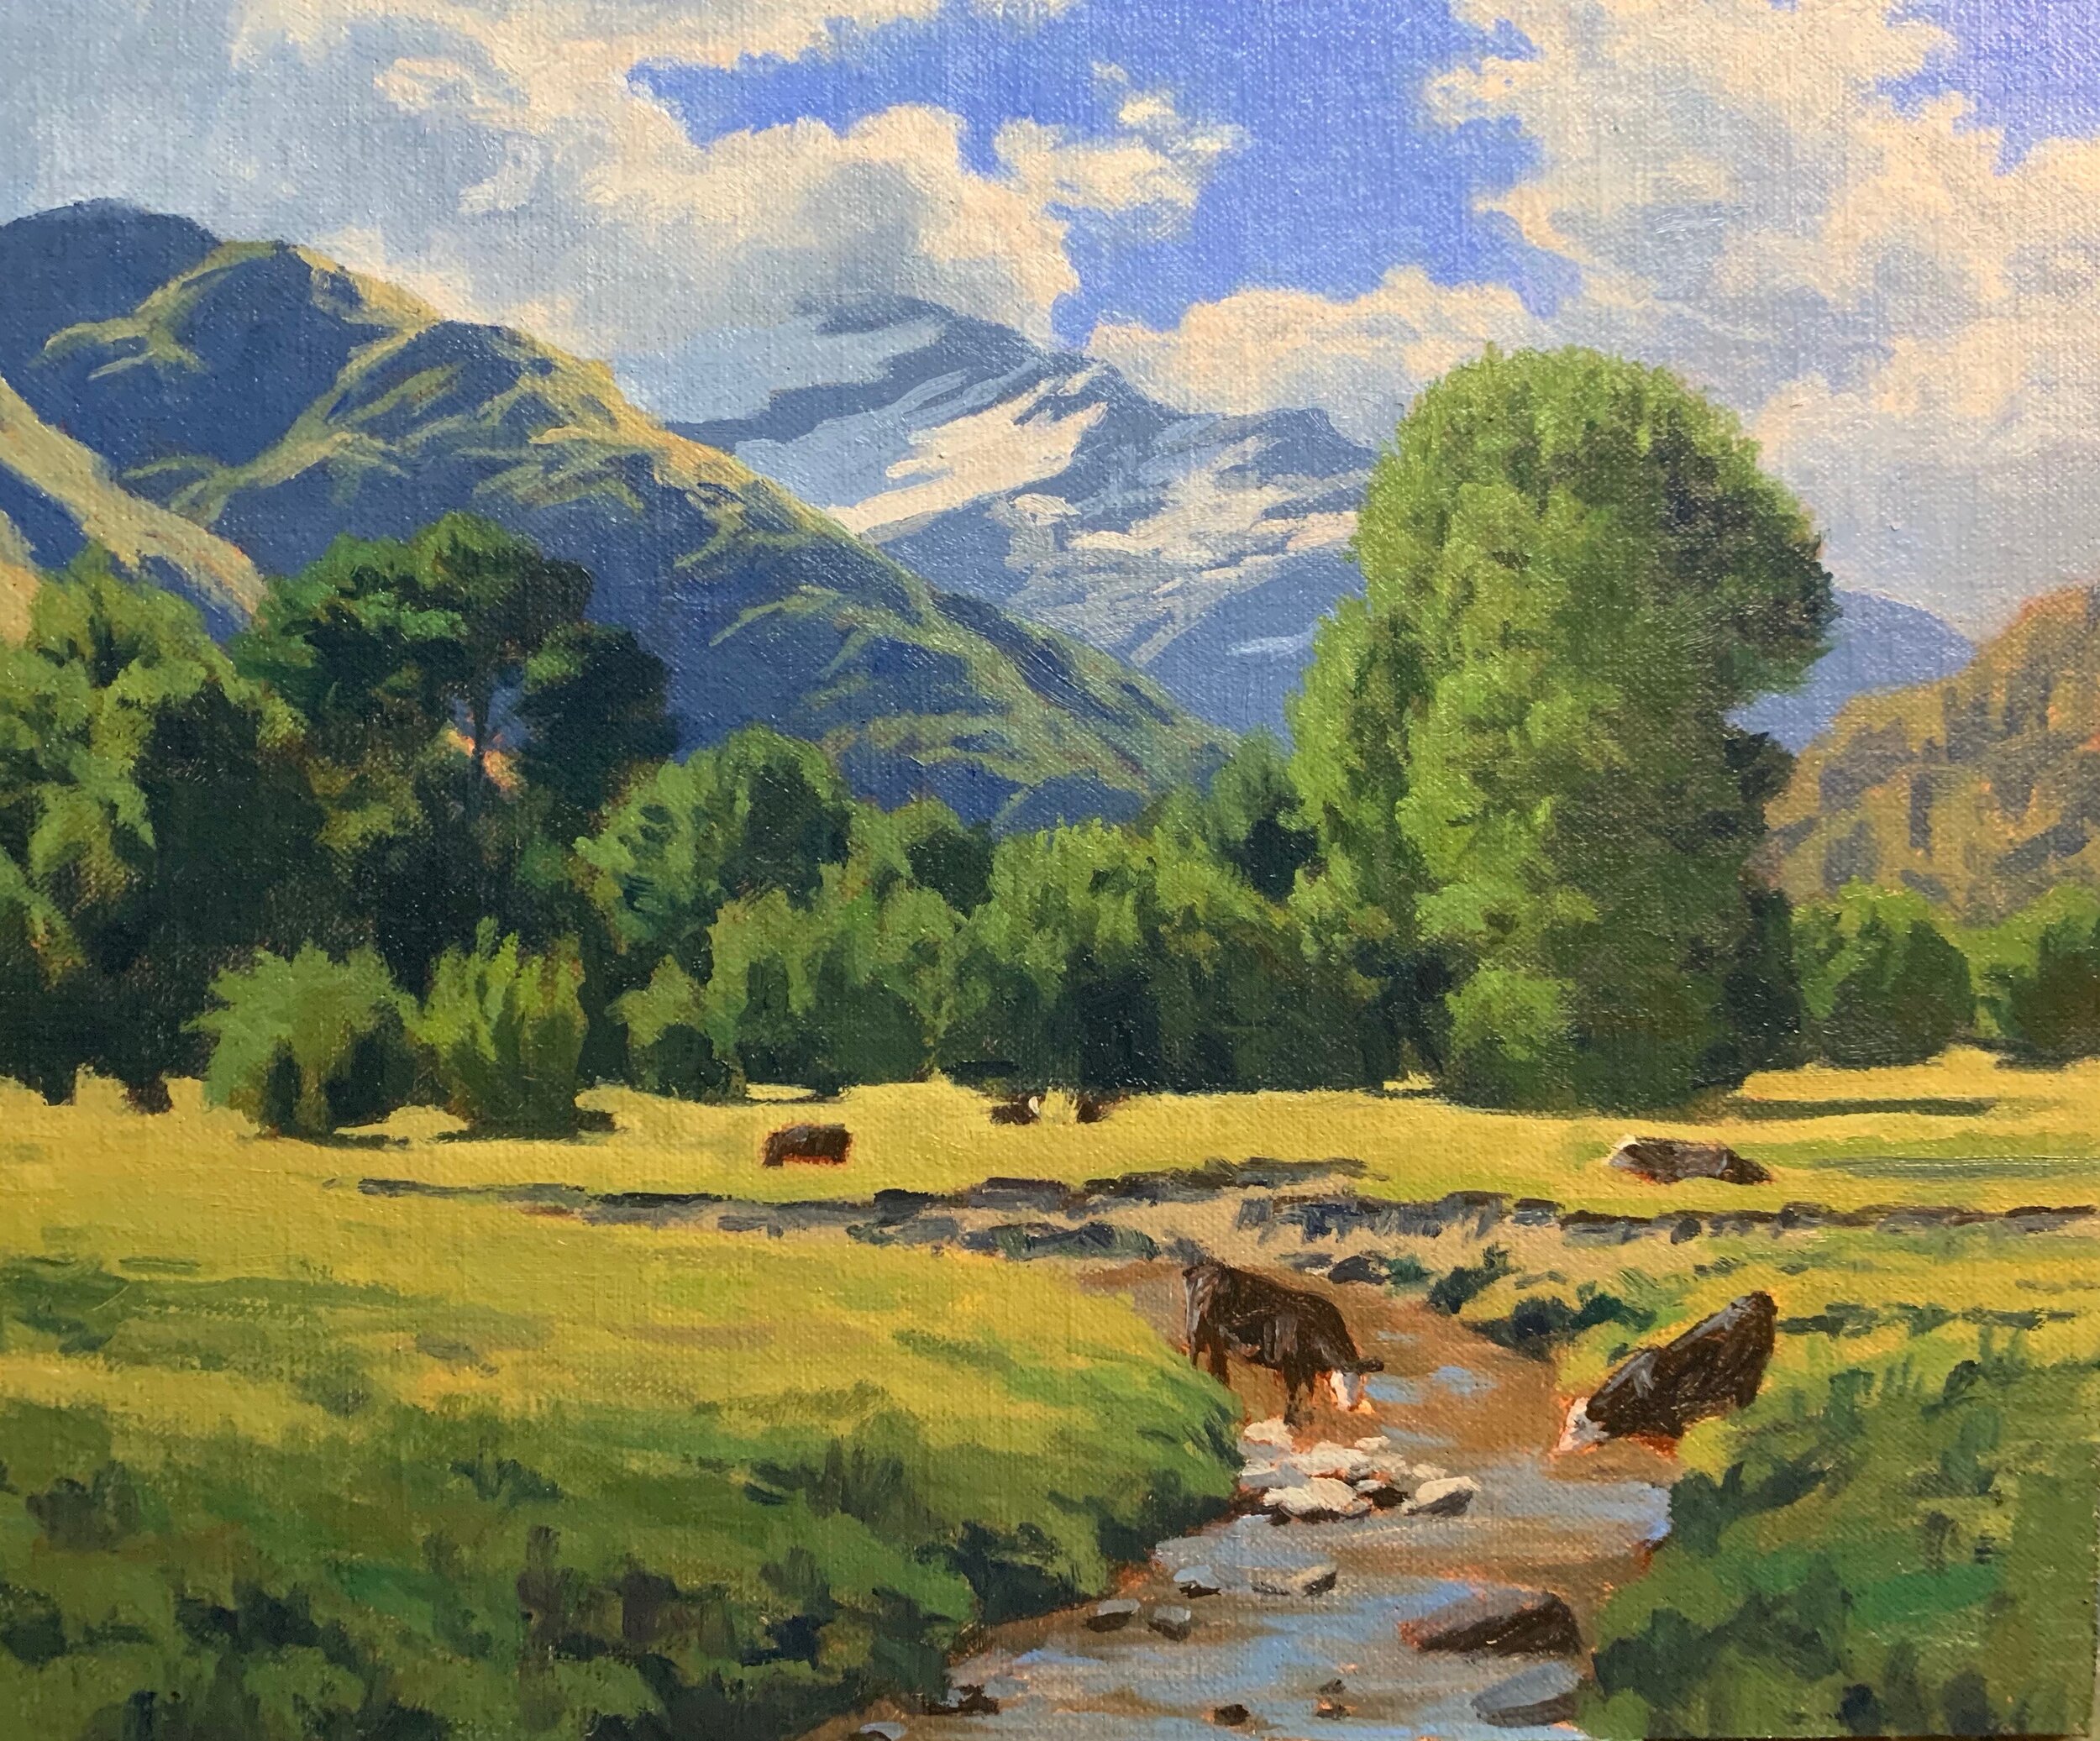
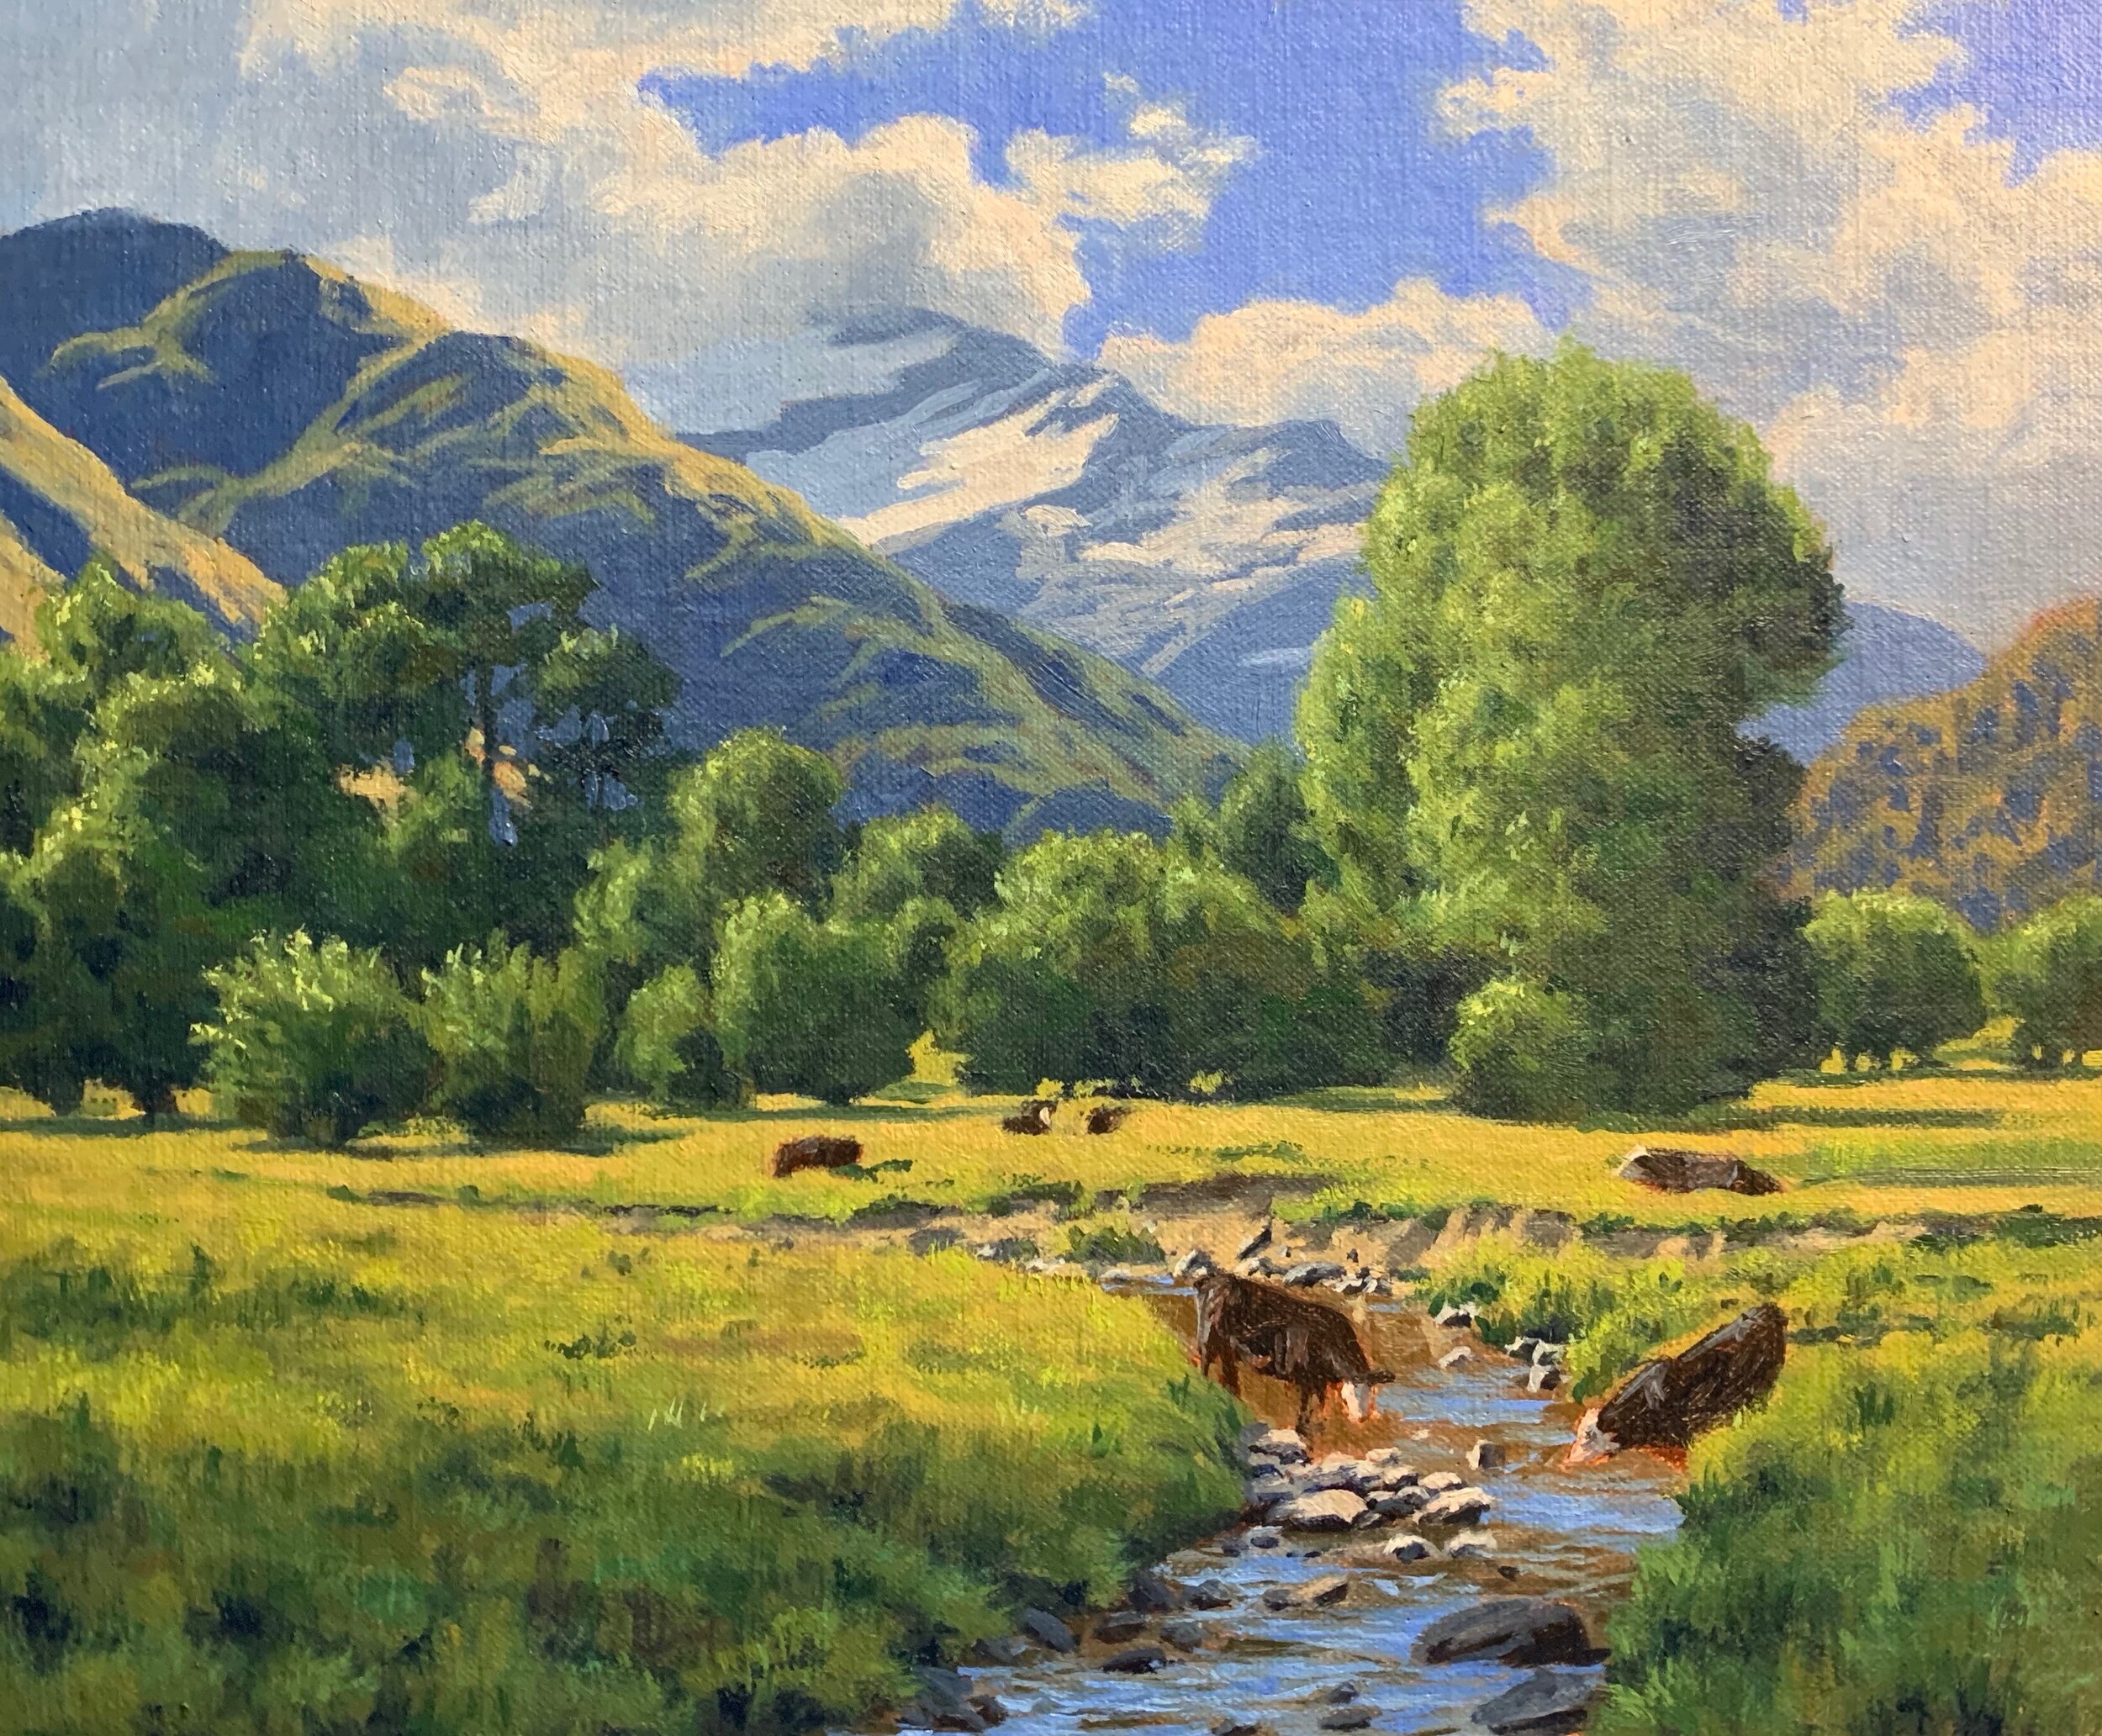
In this blog post I will show you how to paint this beautiful rural mountain scene inspired by the Matukituki Valley in southern New Zealand.
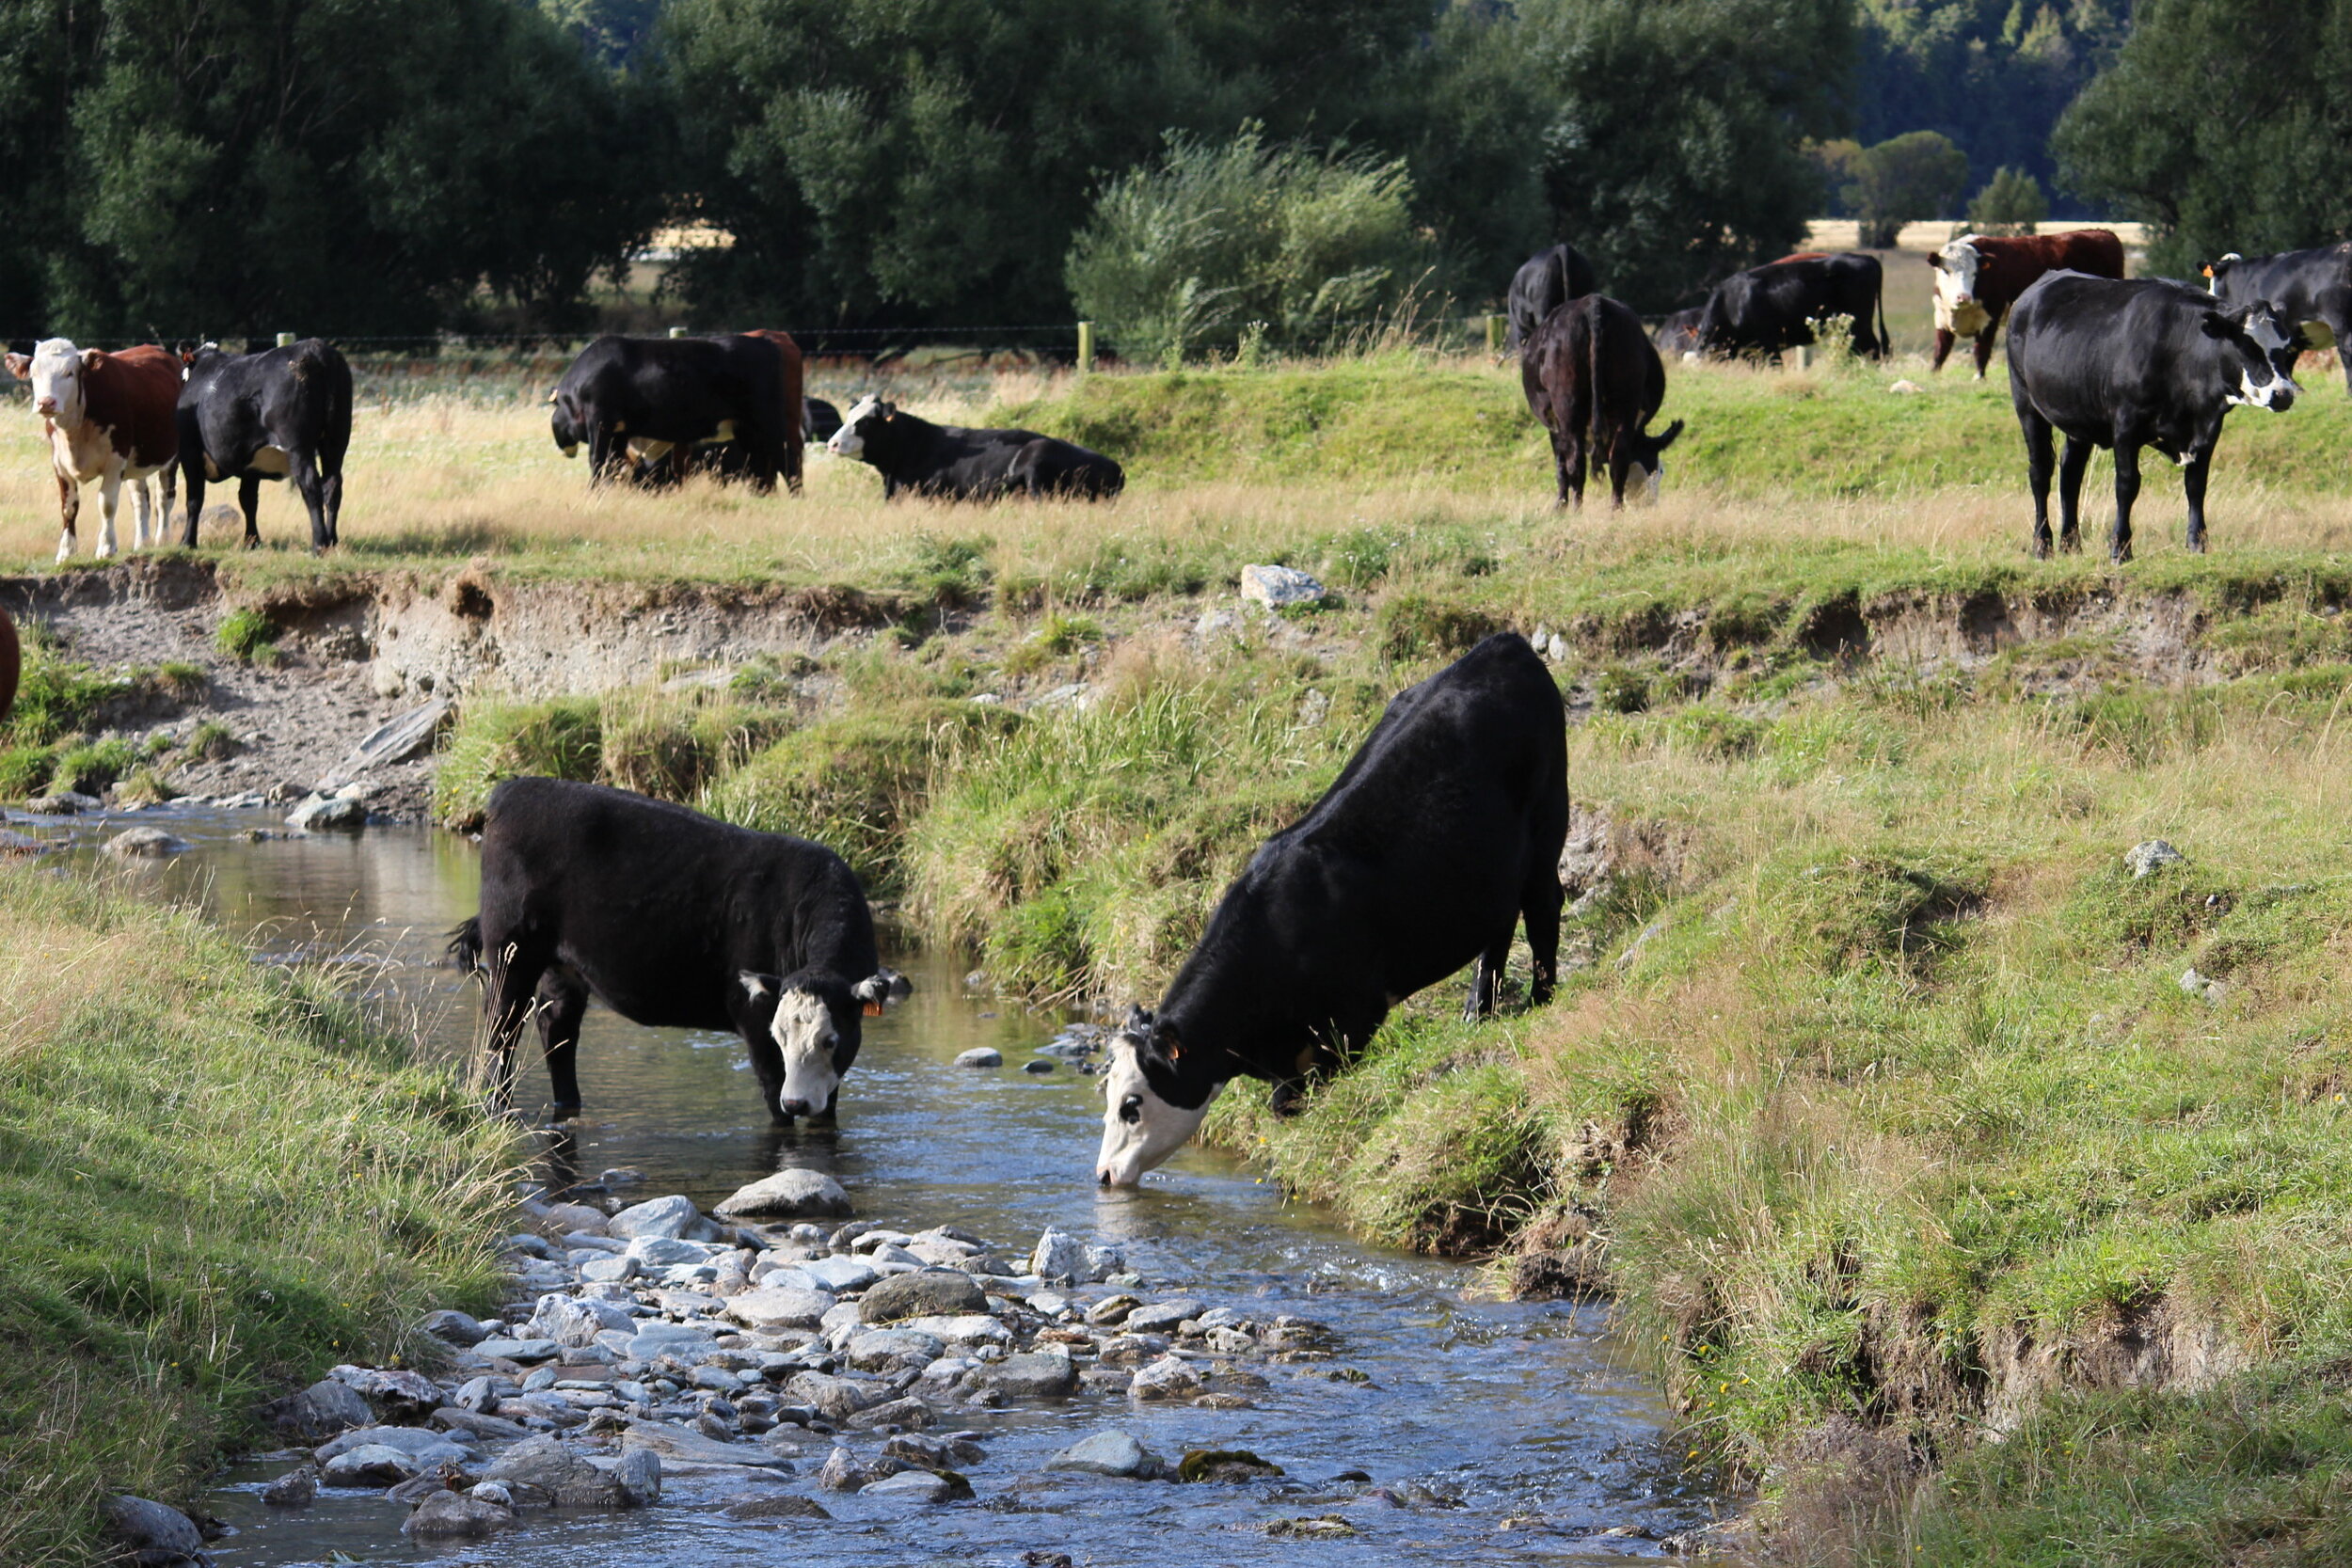
The inspiration for this painting came from a plein air painting trip I went on with a friend. As we were painting the mountain view suddenly loads of cows started surrounding us and many of them were drinking from the stream.
The presence of the cows were a welcome addition as I was able to include them in my original plein air painting. It then inspired the studio painting which I am about to demonstrate to you now.
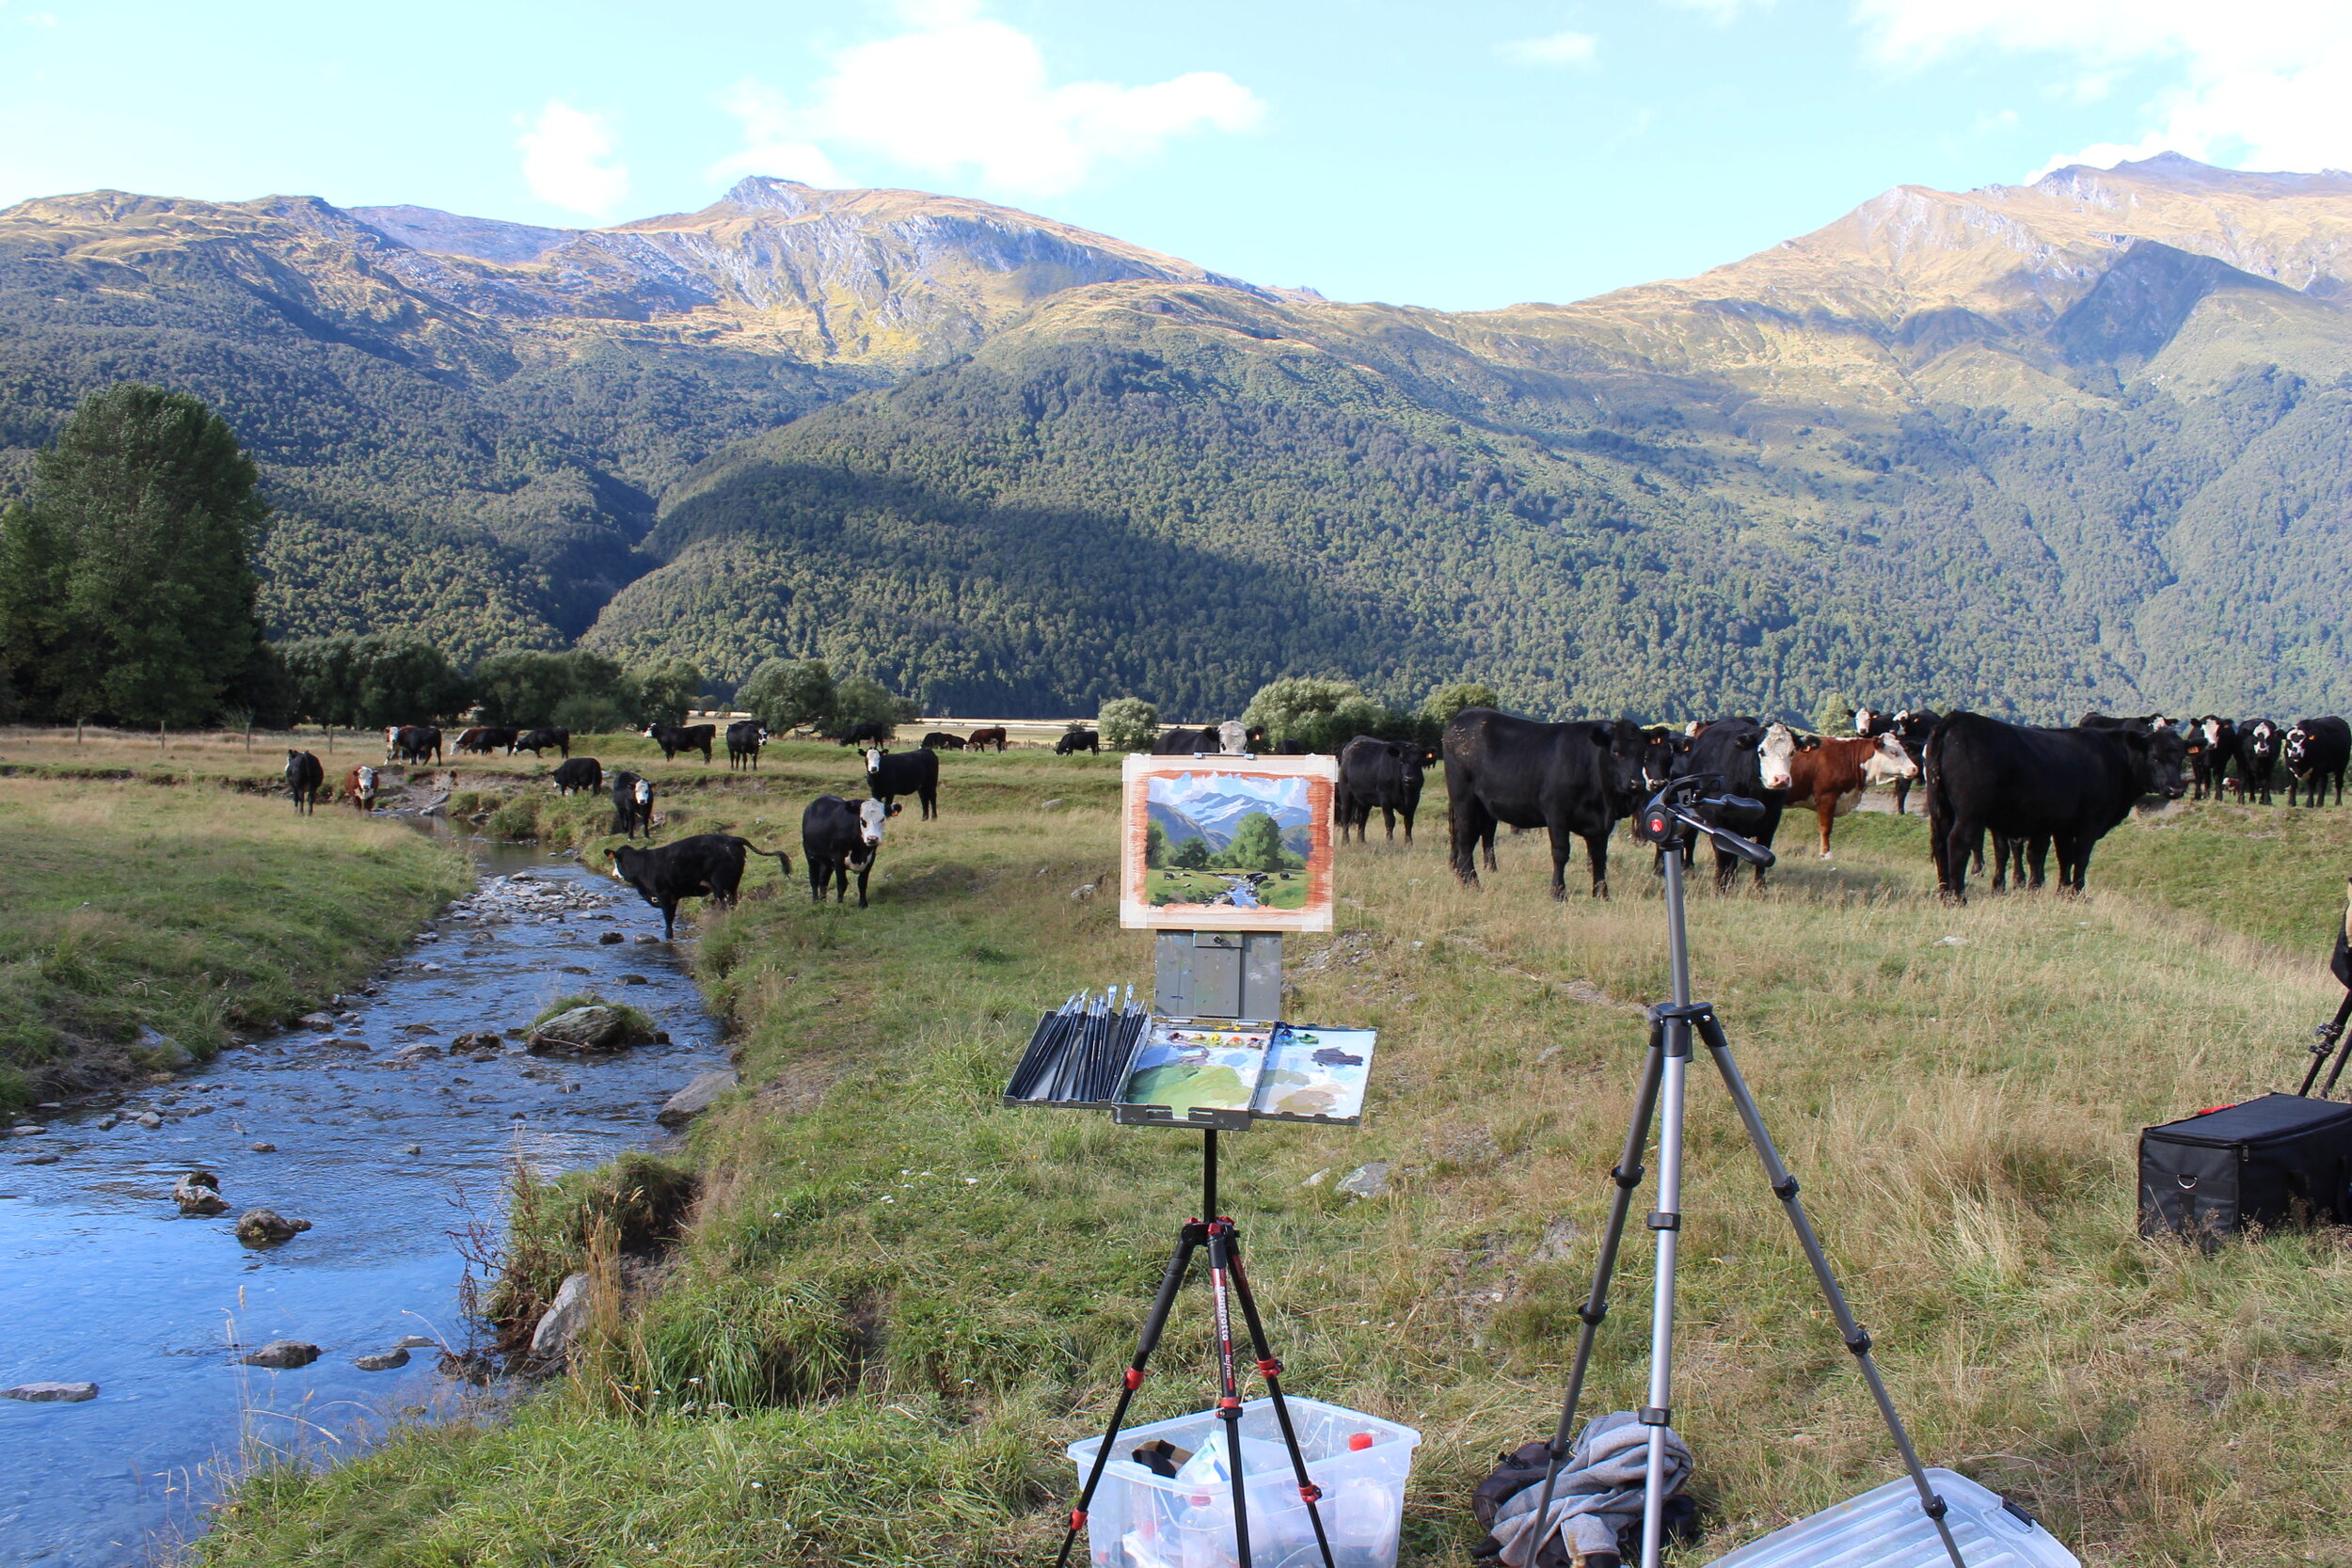
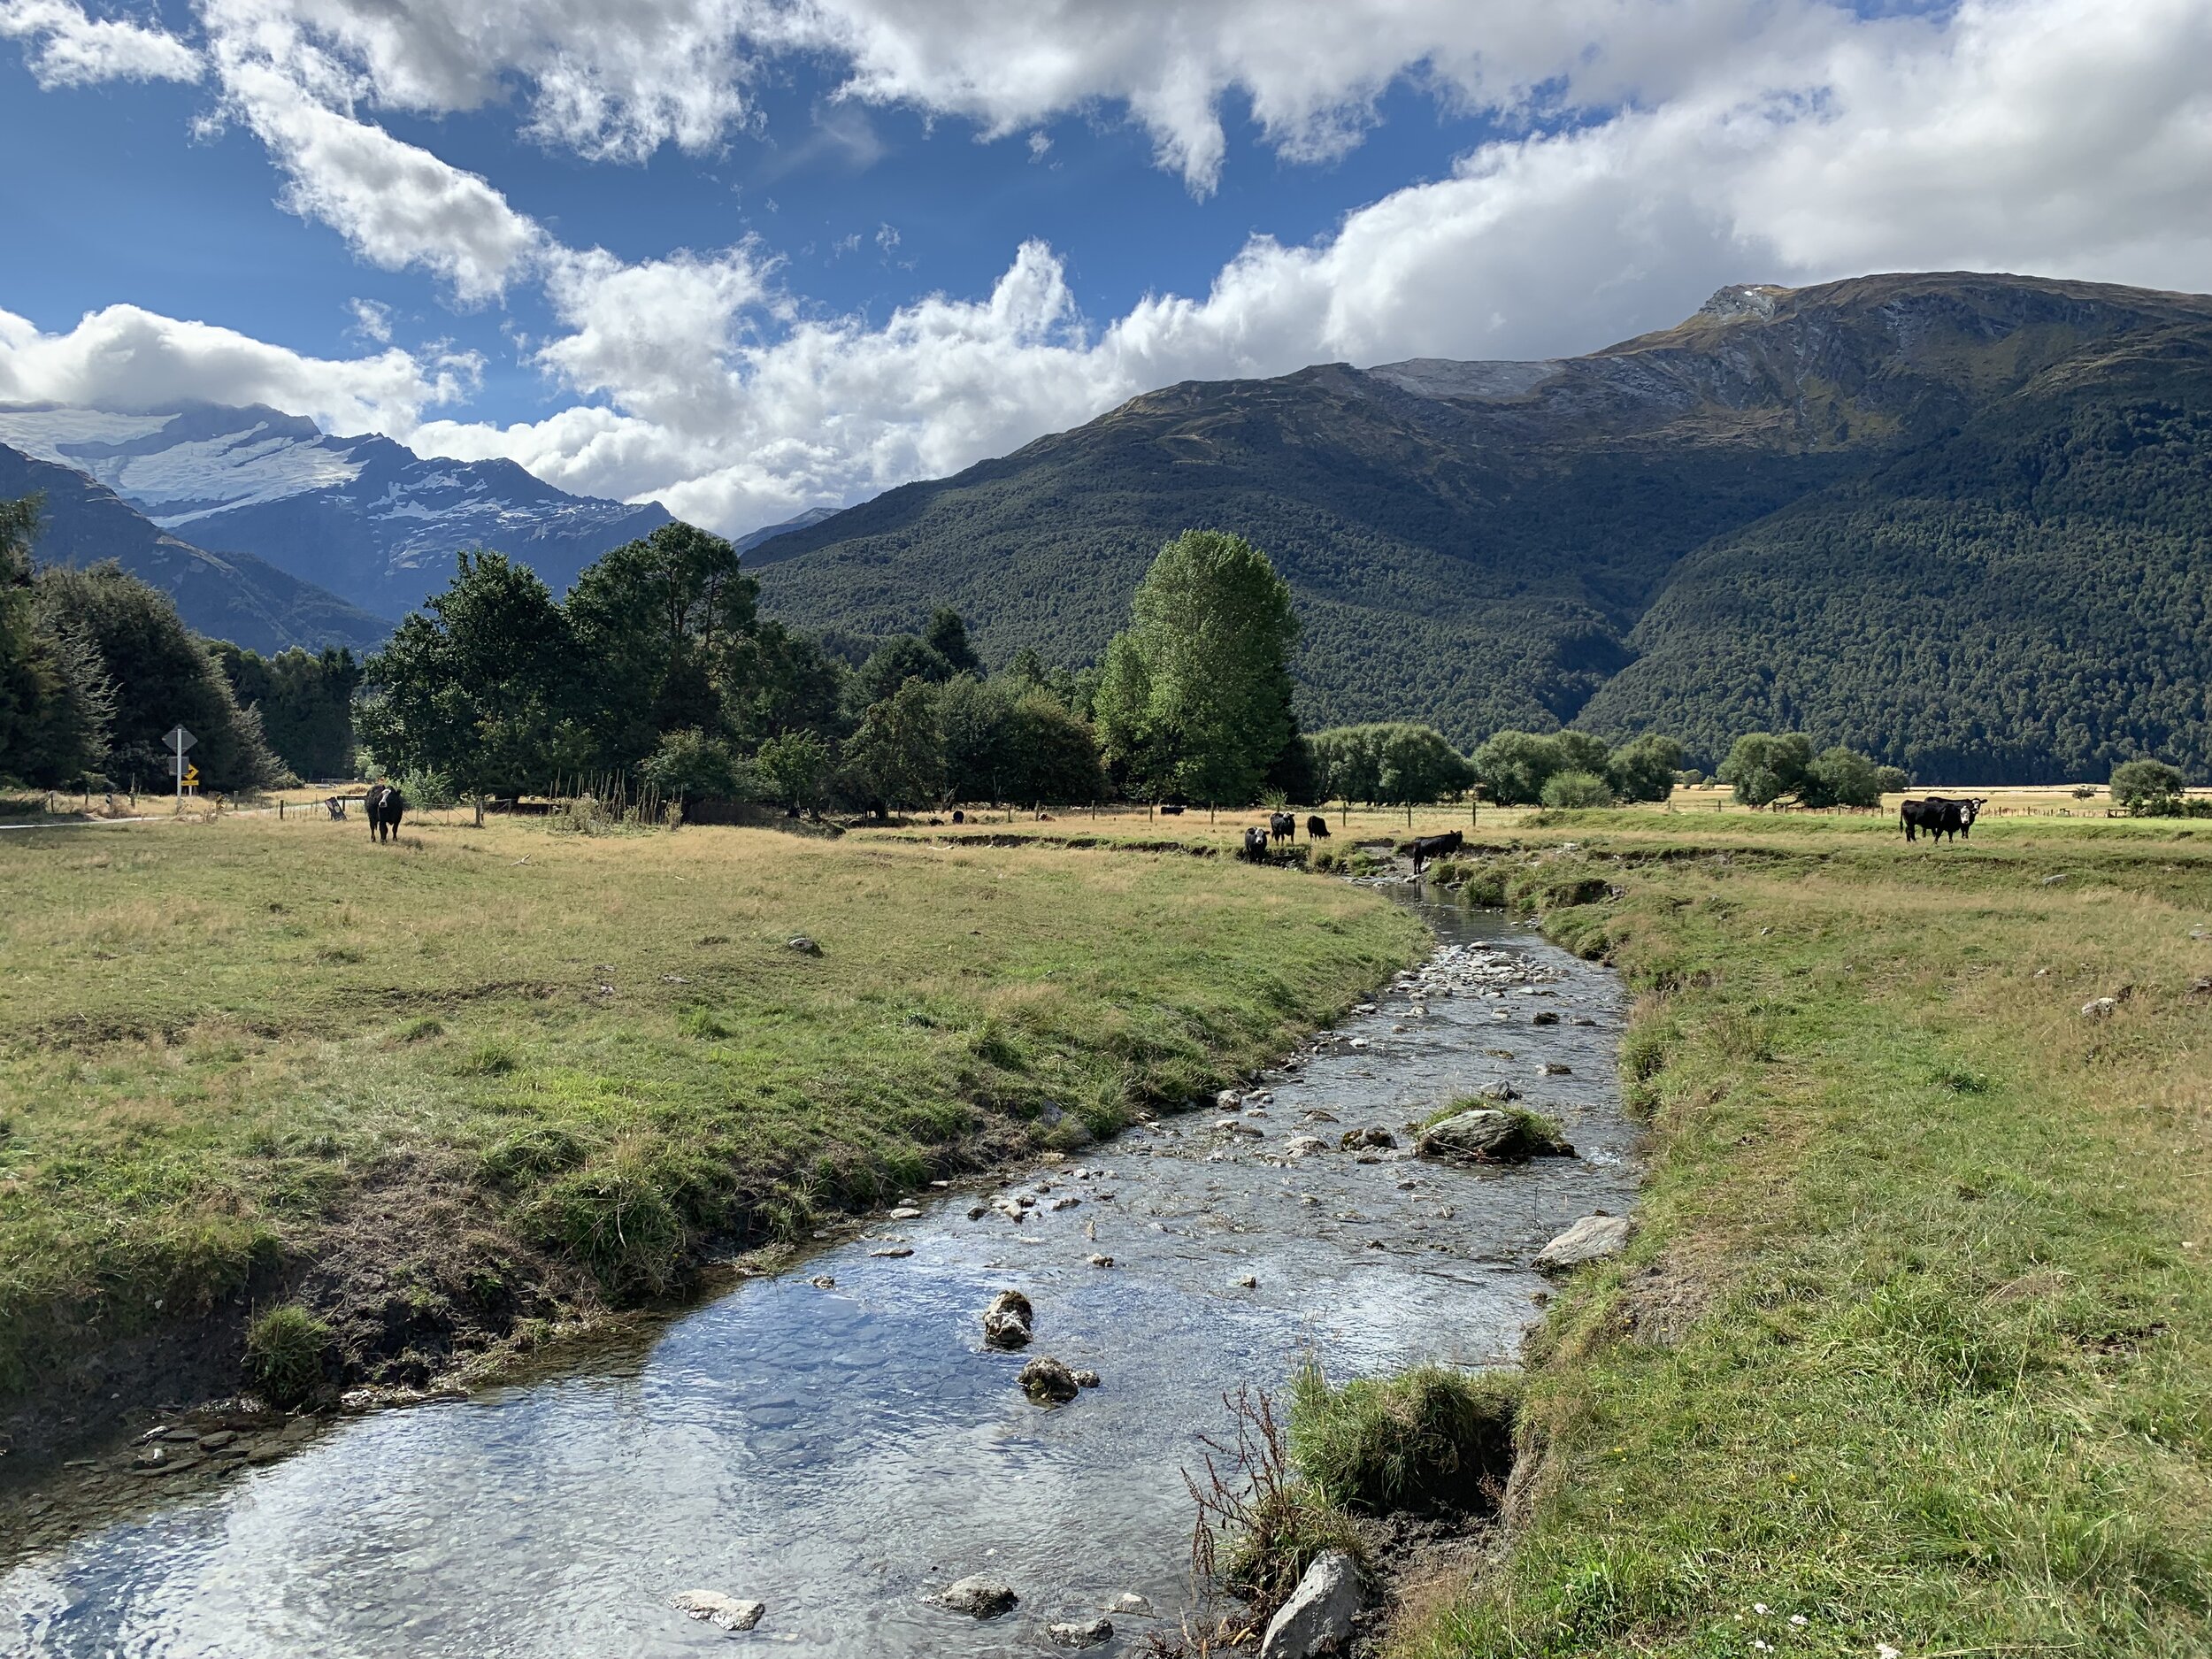
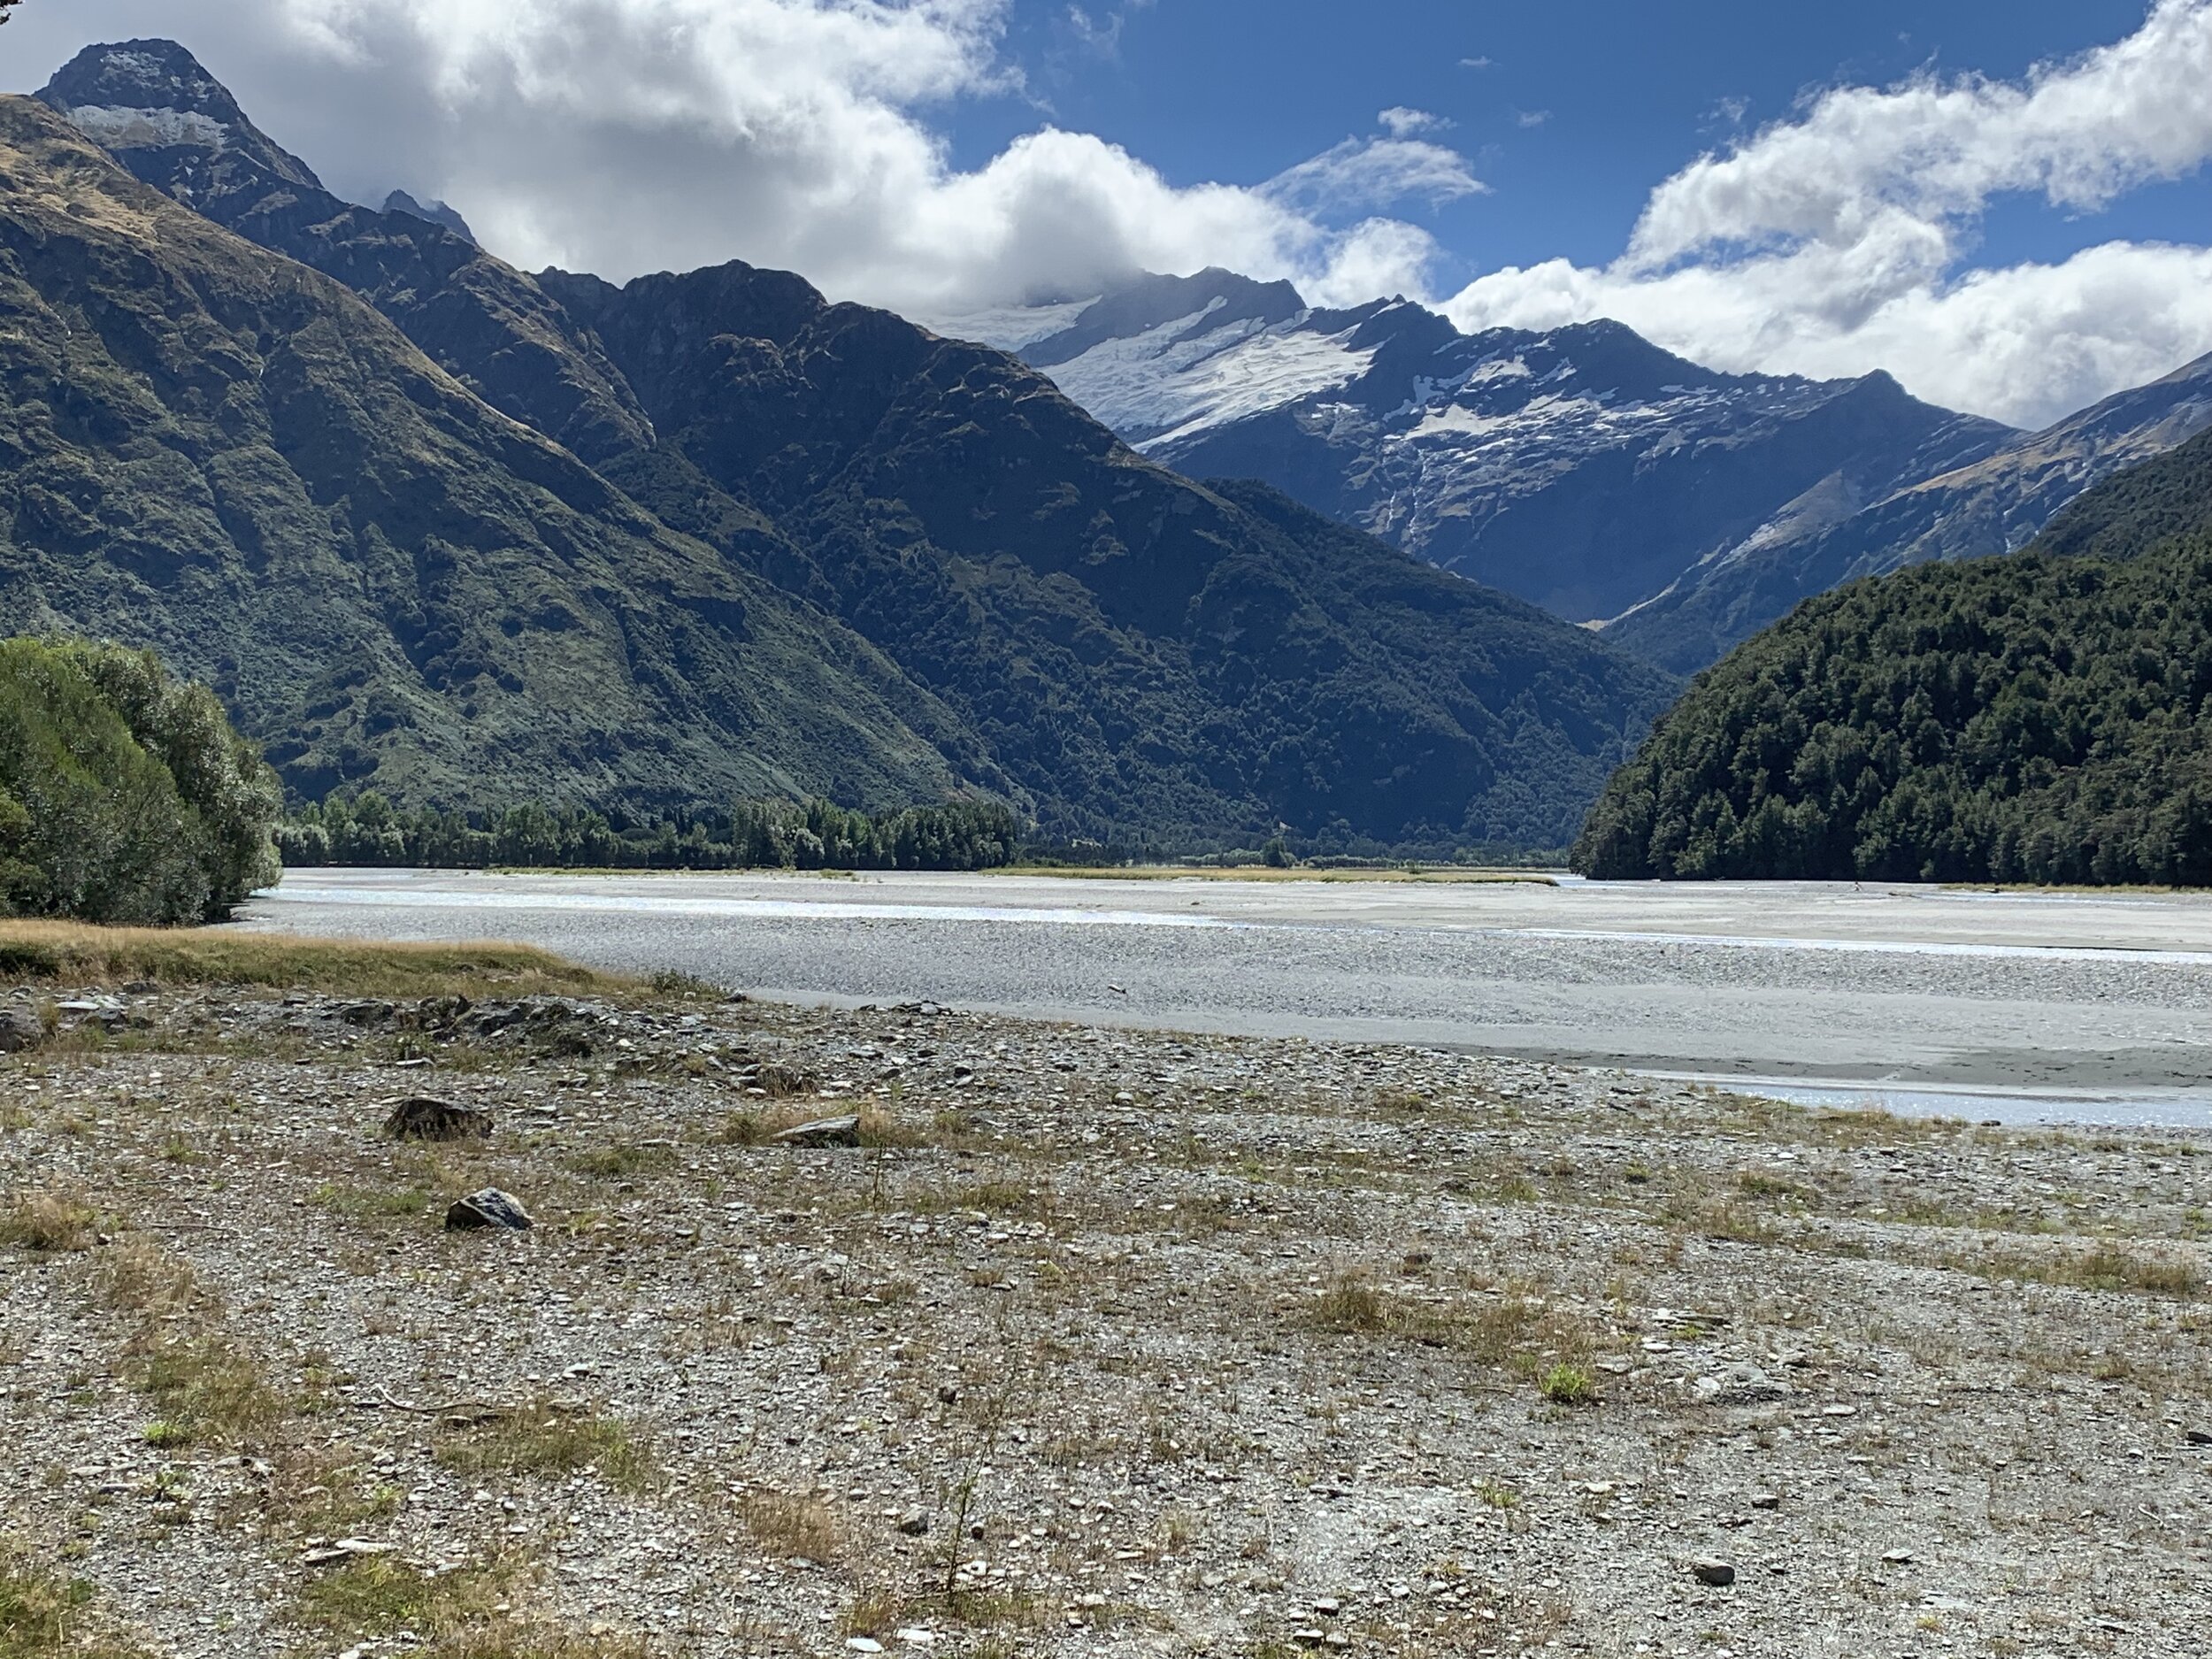
Reference Photos
Here are some of the reference photos I used to create this painting. Please feel free to use them or copy them if you would like to have a go at painting this art work.
Colours
I painted this artwork using oil paint and the colours I used in this painting are as follows:
- Titanium white
- Burnt sienna
- Yellow oxide
- Cadmium yellow
- cadmium orange
- Quinacridone magenta
- Ultramarine blue
- Cobalt teal
- Phthalo green
Brushes
Here is a list of the brushes I used in this painting:
- No.5 flat
- No.2 flat
- No.3 filbert
- No.1 round
- No.0 round
- No.00 round
- 1/4 dagger
Composition
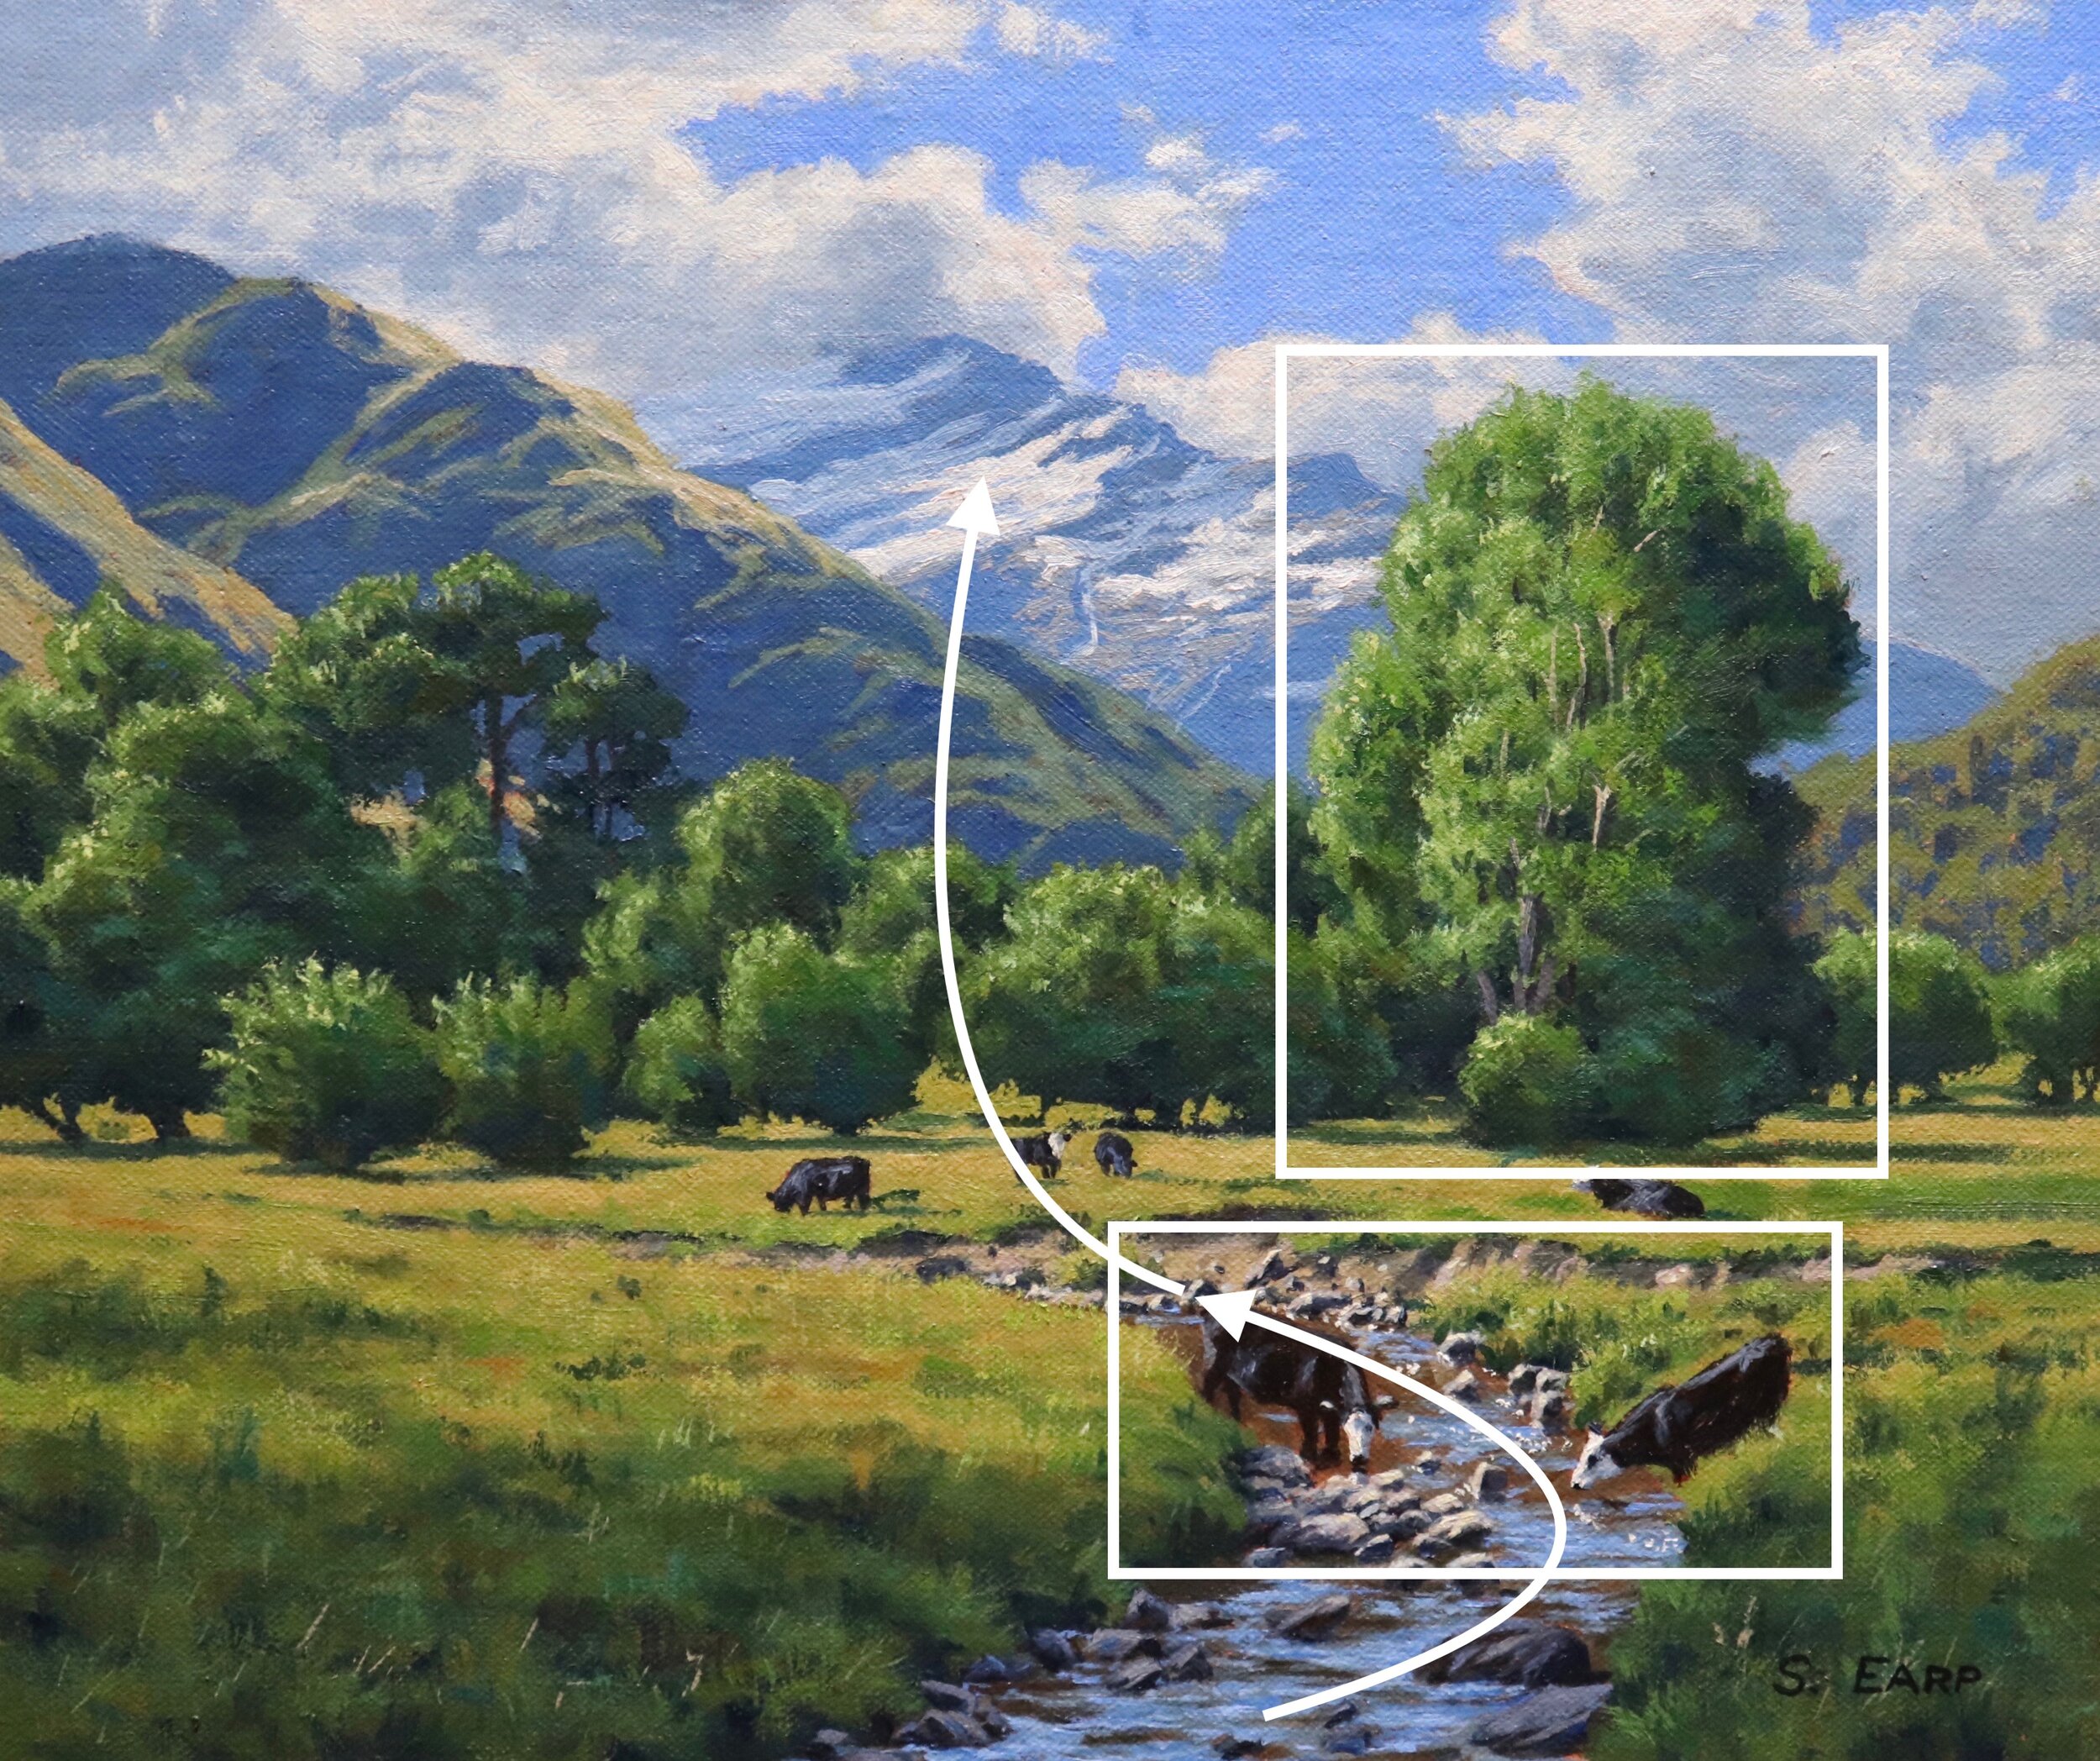
The cows in the stream are one of the main focal areas in this painting with the large black poplar as a secondary area of interest. The stream is providing rhythm in the composition which leads the eye towards the cows, trees and then to the snowy mountain in the distance. This is known as an ‘S’ composition.
When placing a focal area make sure it is never in the middle of your composition. Centred objects form a displeasing static within the painting and disrupts flow and rhythm within the composition.
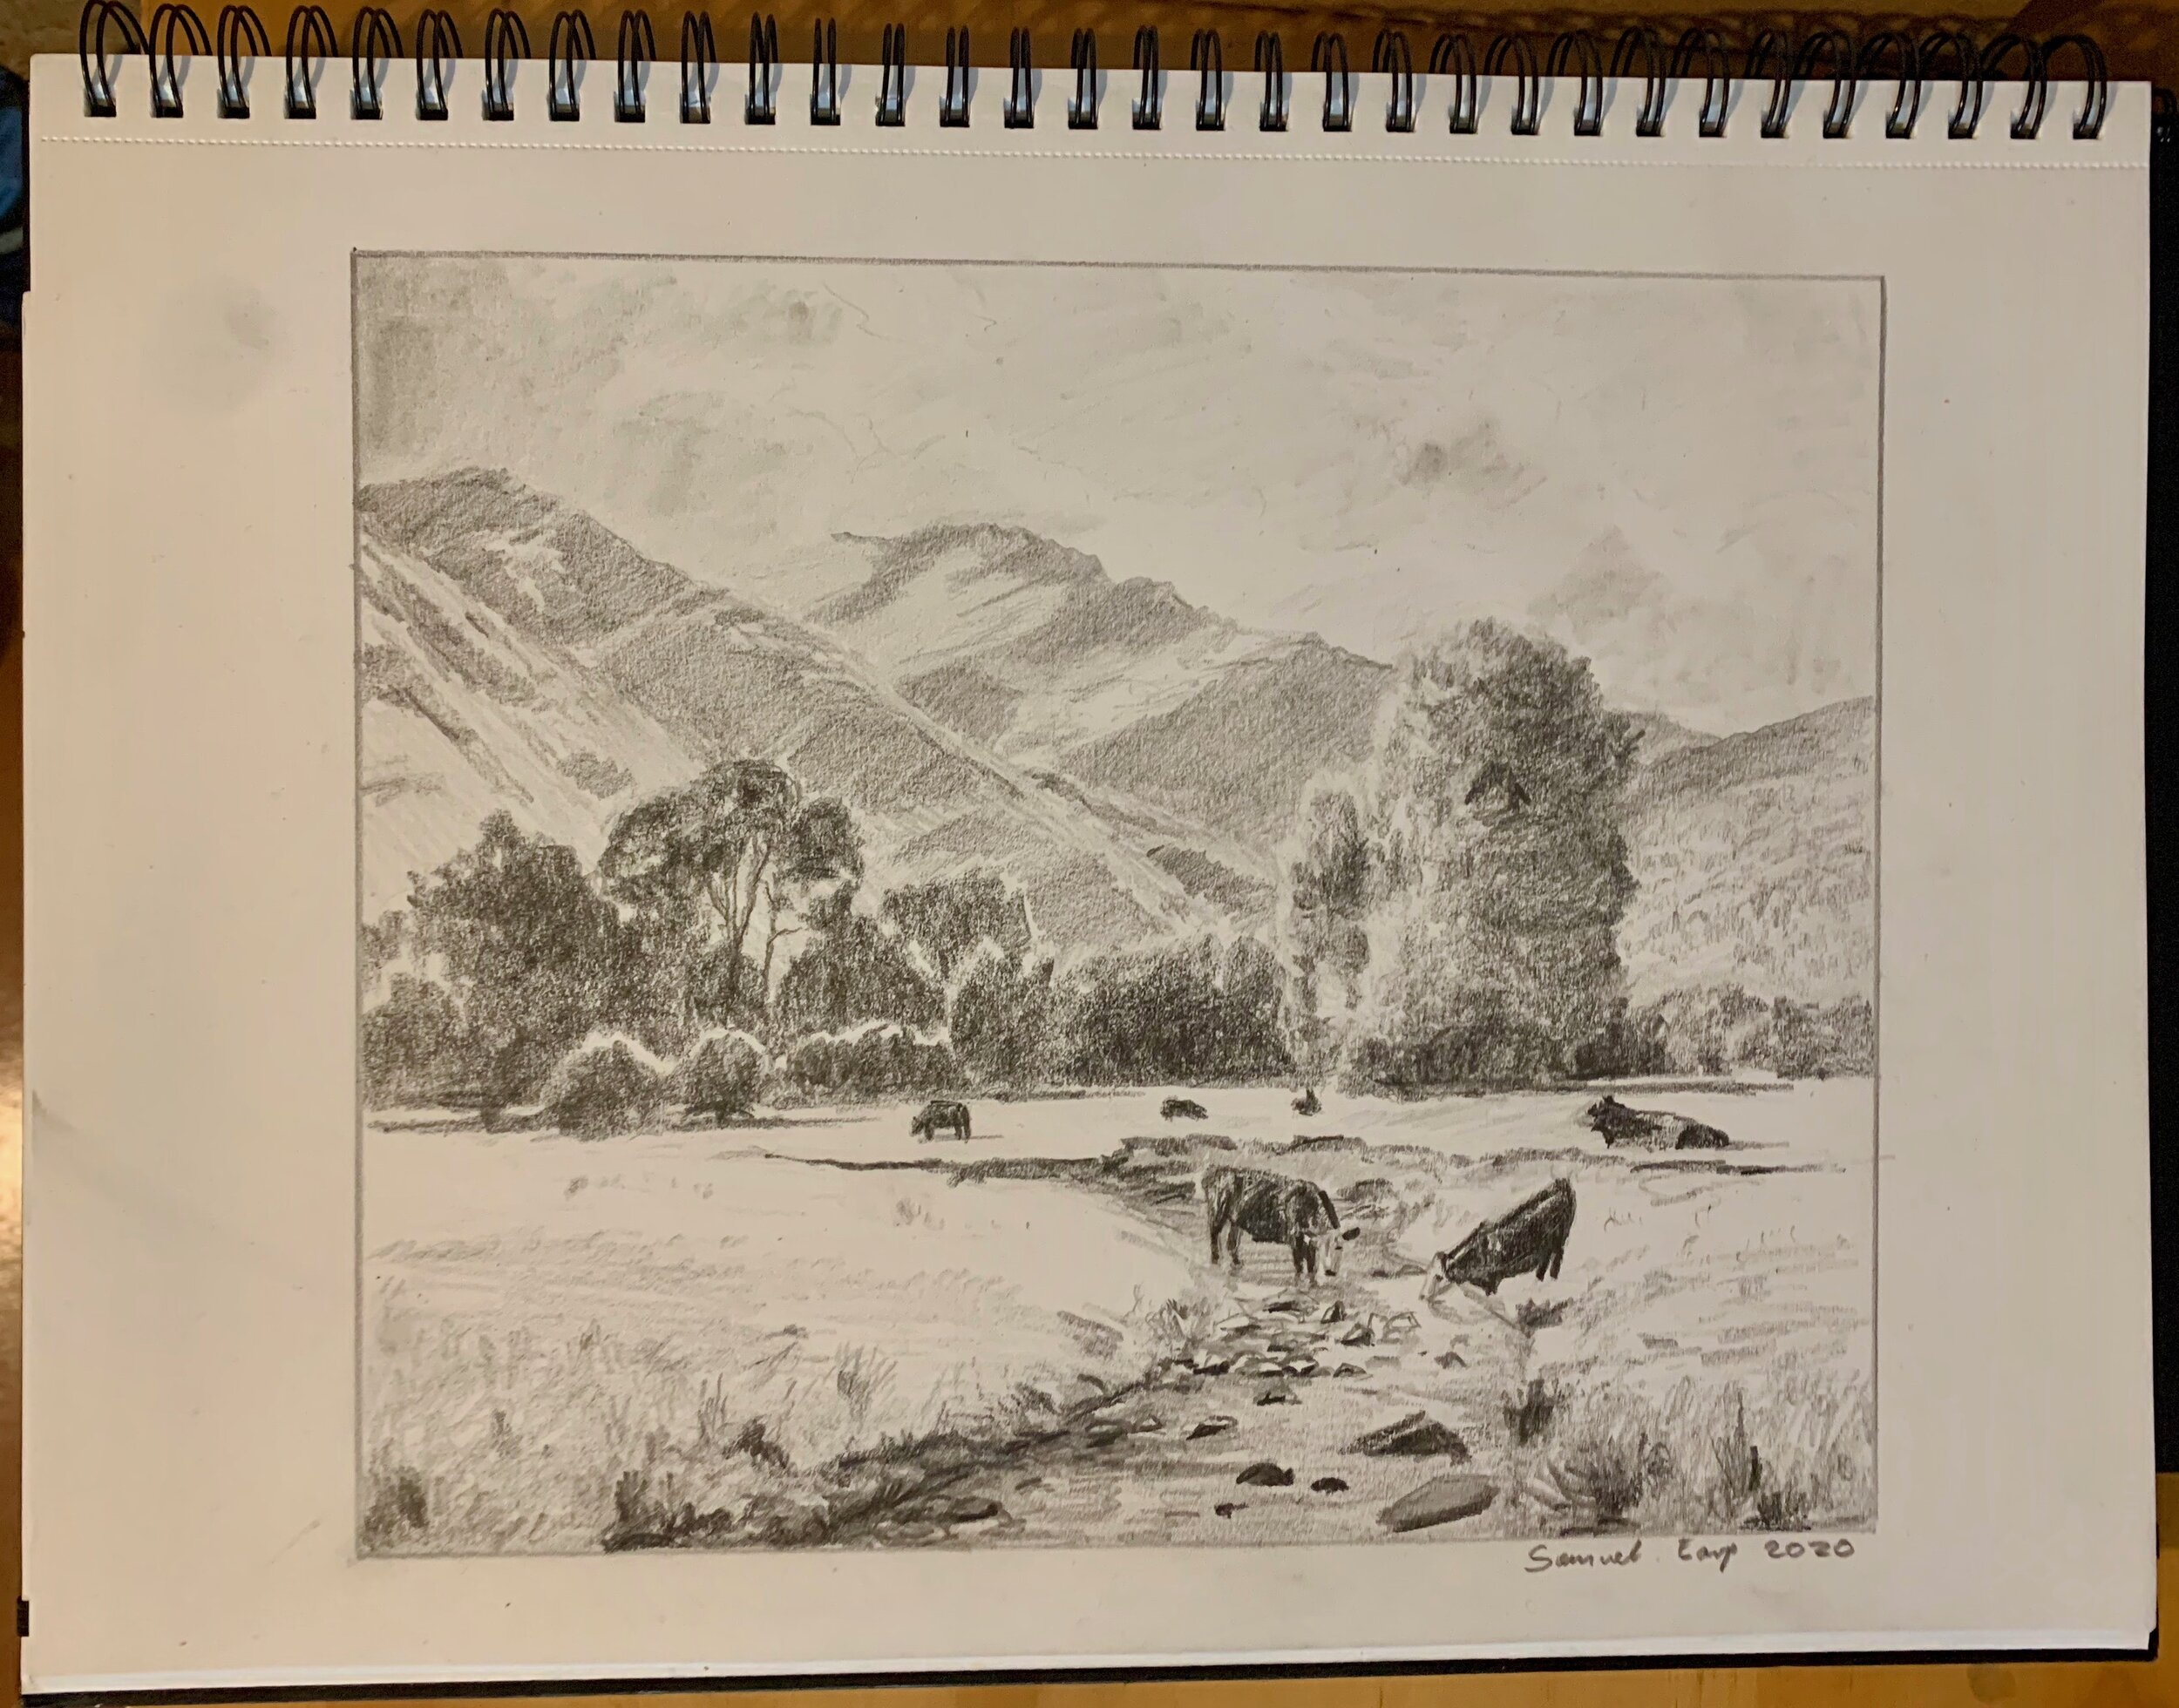
Sketch
Whenever I paint a studio art work I always do some prior sketching before I start. Sketching is an enjoyable part of the painting process and it can help you to see the road ahead. It can also help you to avoid potential problems when you come to paint your studio art work, especially compositional errors.
So if you can, I would always recommend doing some pencil sketches before you paint. They don’t have to be perfect, but they can be very helpful to you.
Blocking-In The Painting
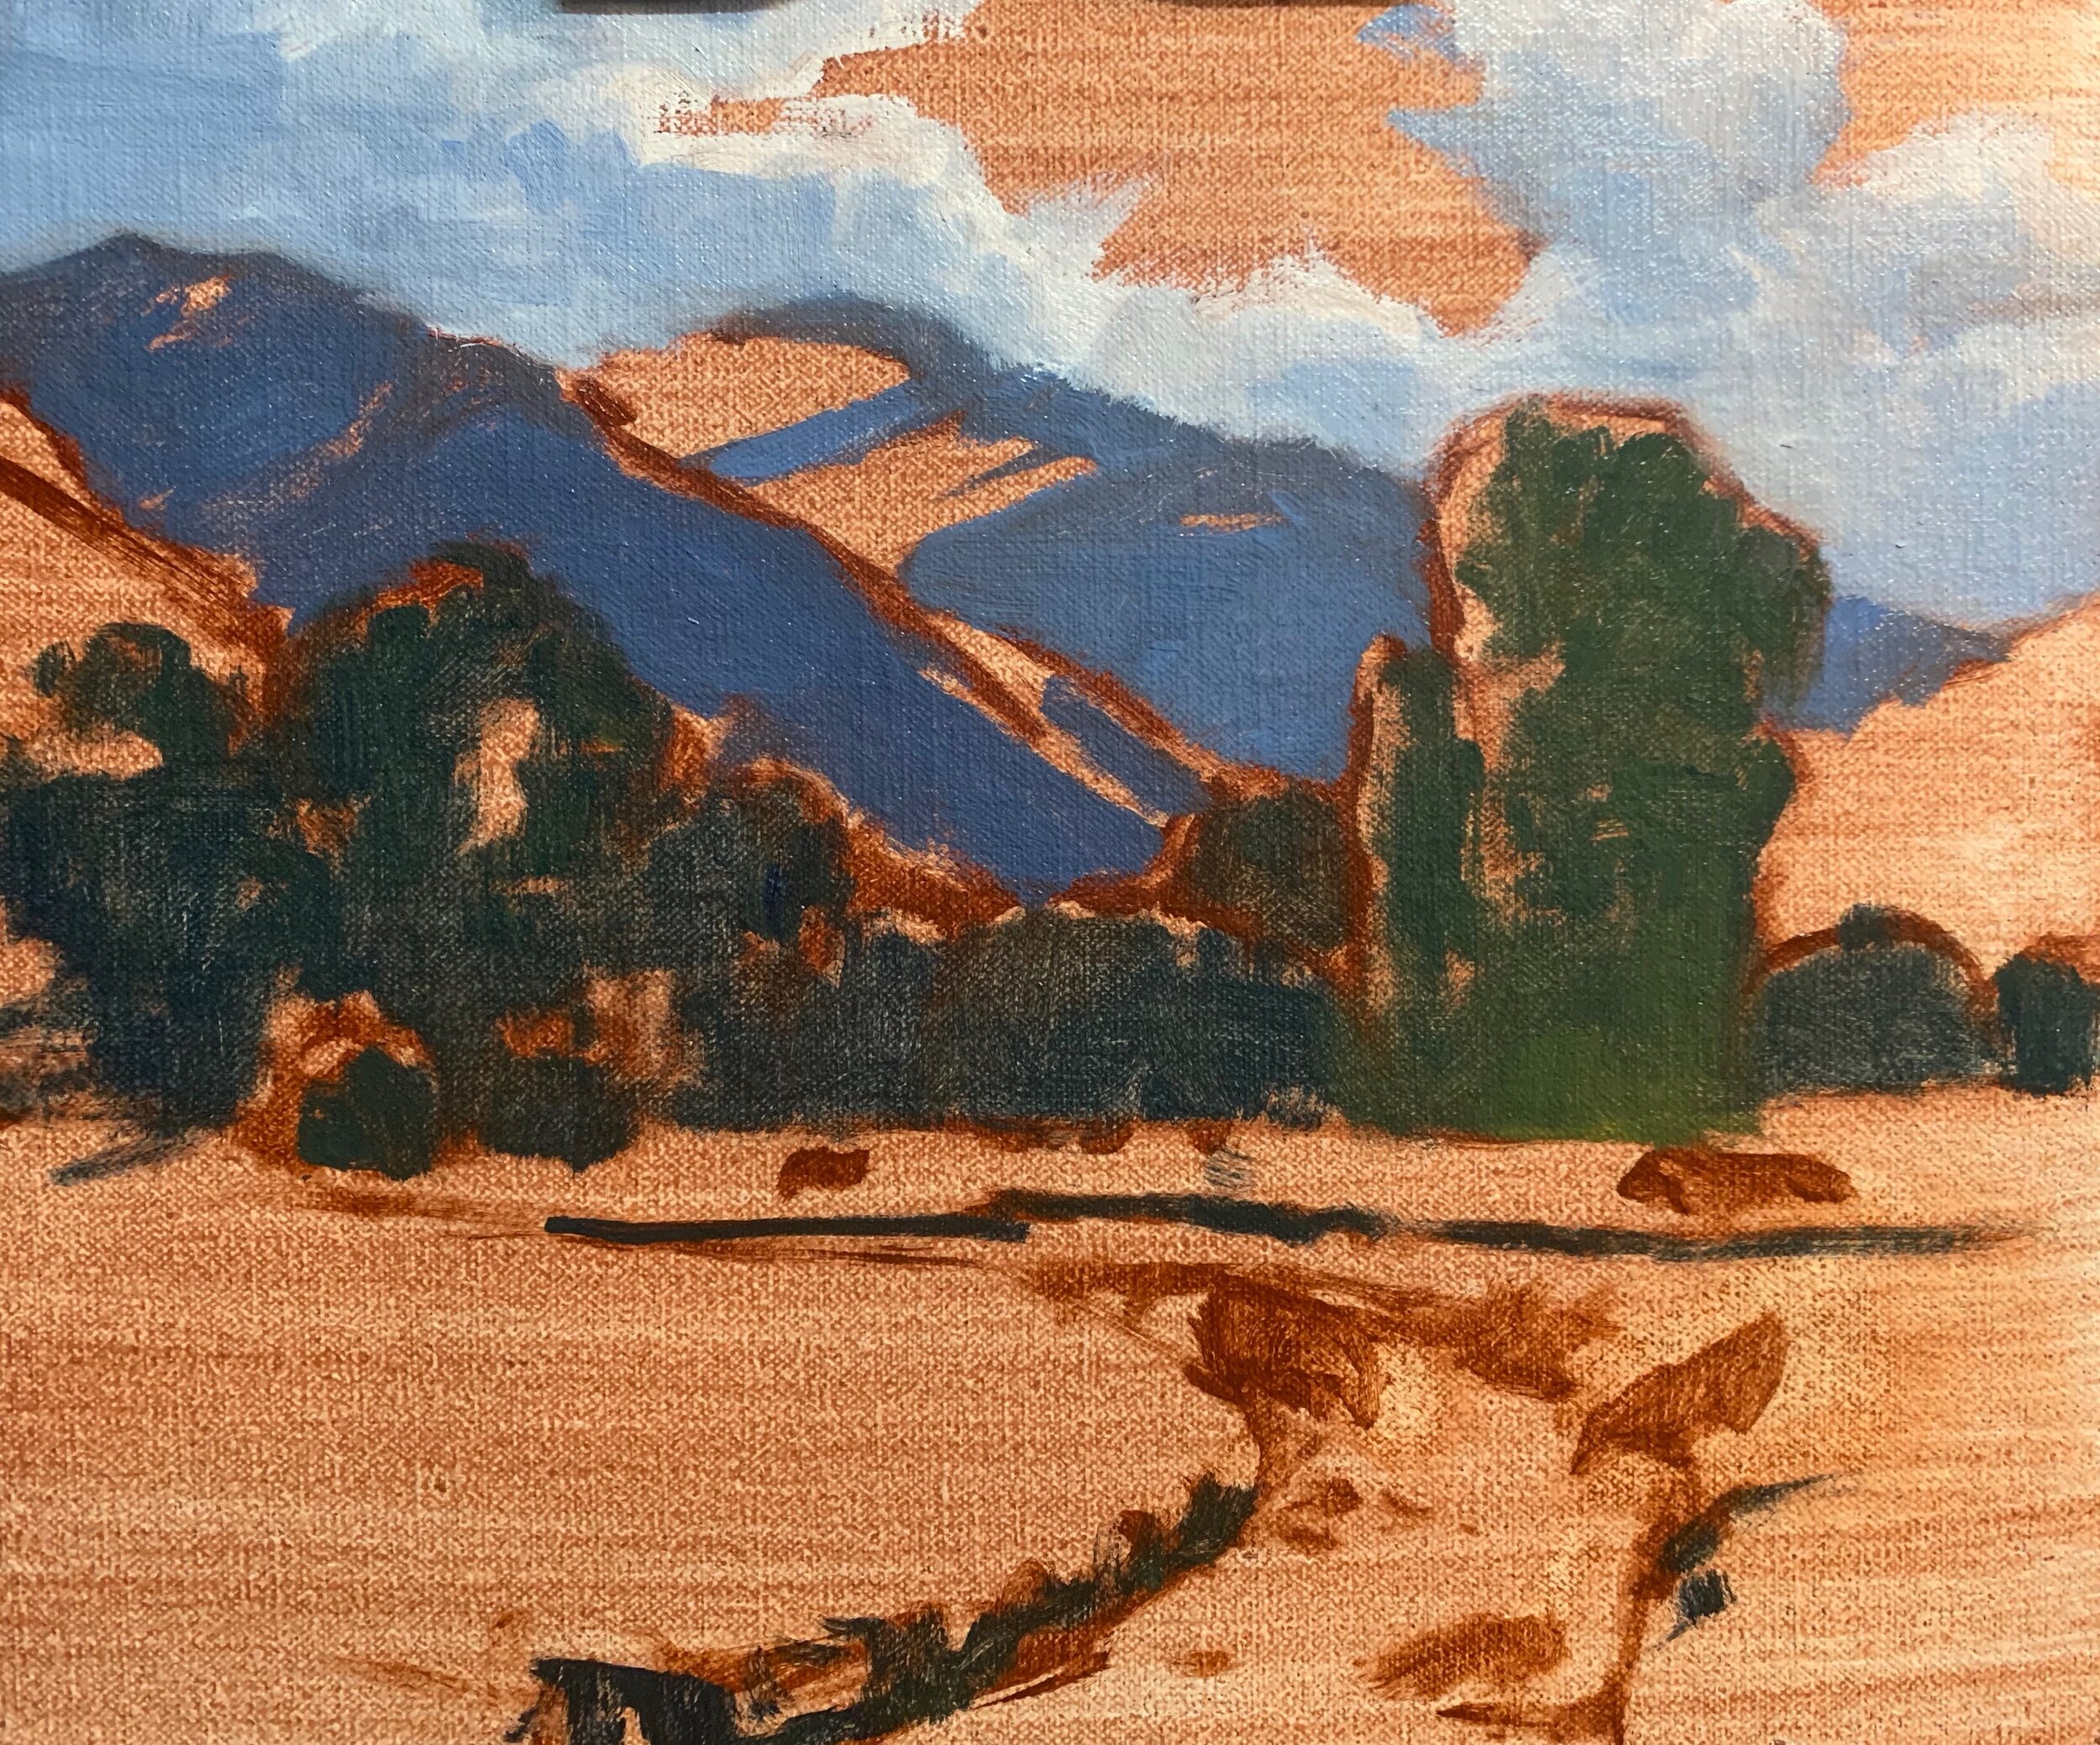
I am painting on an 10” x 12” linen panel which I’ve toned with a thin wash of burnt sienna. This warms up the painting and helps with colour and tone.
I sketched out the composition with a No.1 round brush and burnt sienna. I am using oil paint and I have mixed the burnt sienna with Liquin Original which thins the paint and speeds up the drying time.
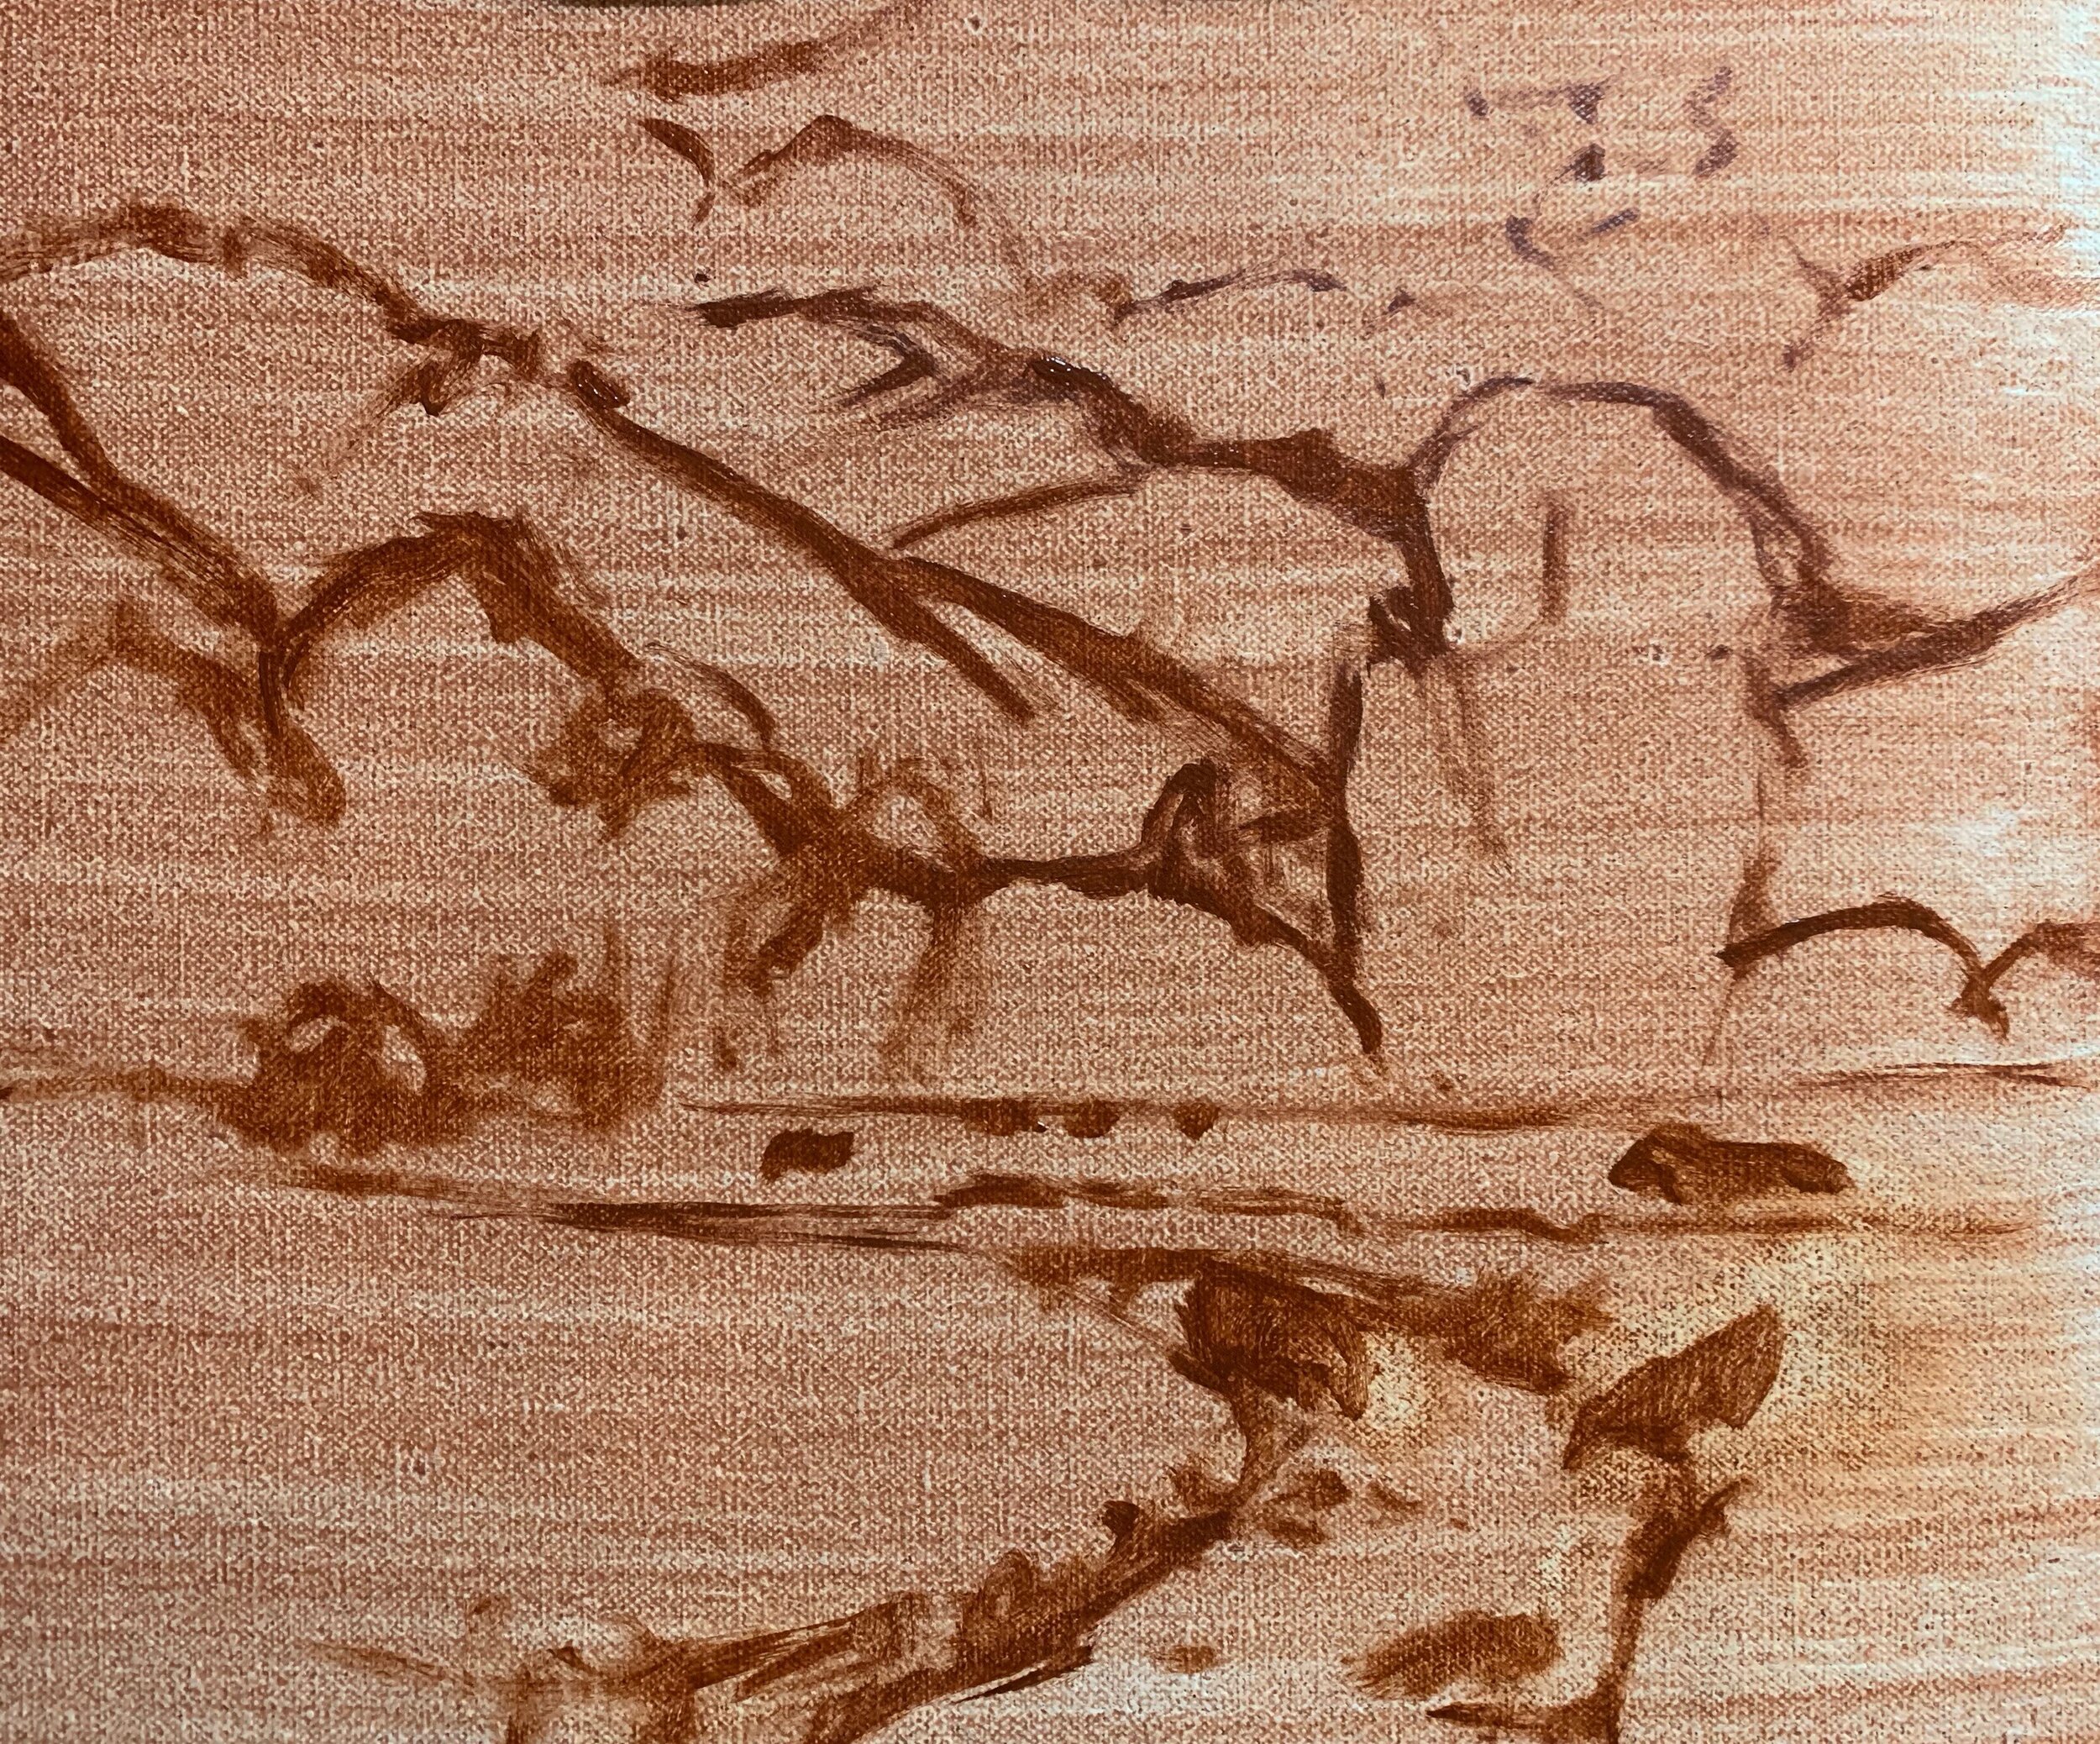
Whenever I begin a landscape painting I always start by painting my dark values and shadows first as this allows me to quickly set up the tonal dynamic in the scene.
Value refers to how light or dark a subject is. We will find our darkest and lightest values in the foreground of a landscape, however as landforms recede into the distance, the darks are not as dark and lights are not as light as the value scale narrows.
I begin by painting the lightest of my shadows first which are the clouds shadows and this is a mix of ultramarine blue, burnt sienna and titanium white. I am able to use the same colours in the mountain but I use less titanium white in the mix to make a darker value colour. I make the value of the shadows in the next tier of mountains even darker but still using the same colours.
The trees are some of the darkest values to be found in the landscape. I paint the tree shadows with a mix of yellow oxide, ultramarine blue and a very small amount of titanium white. For the large black poplar tree in the mid ground I also introduce a little cadmium yellow into my mix to increase the saturation.
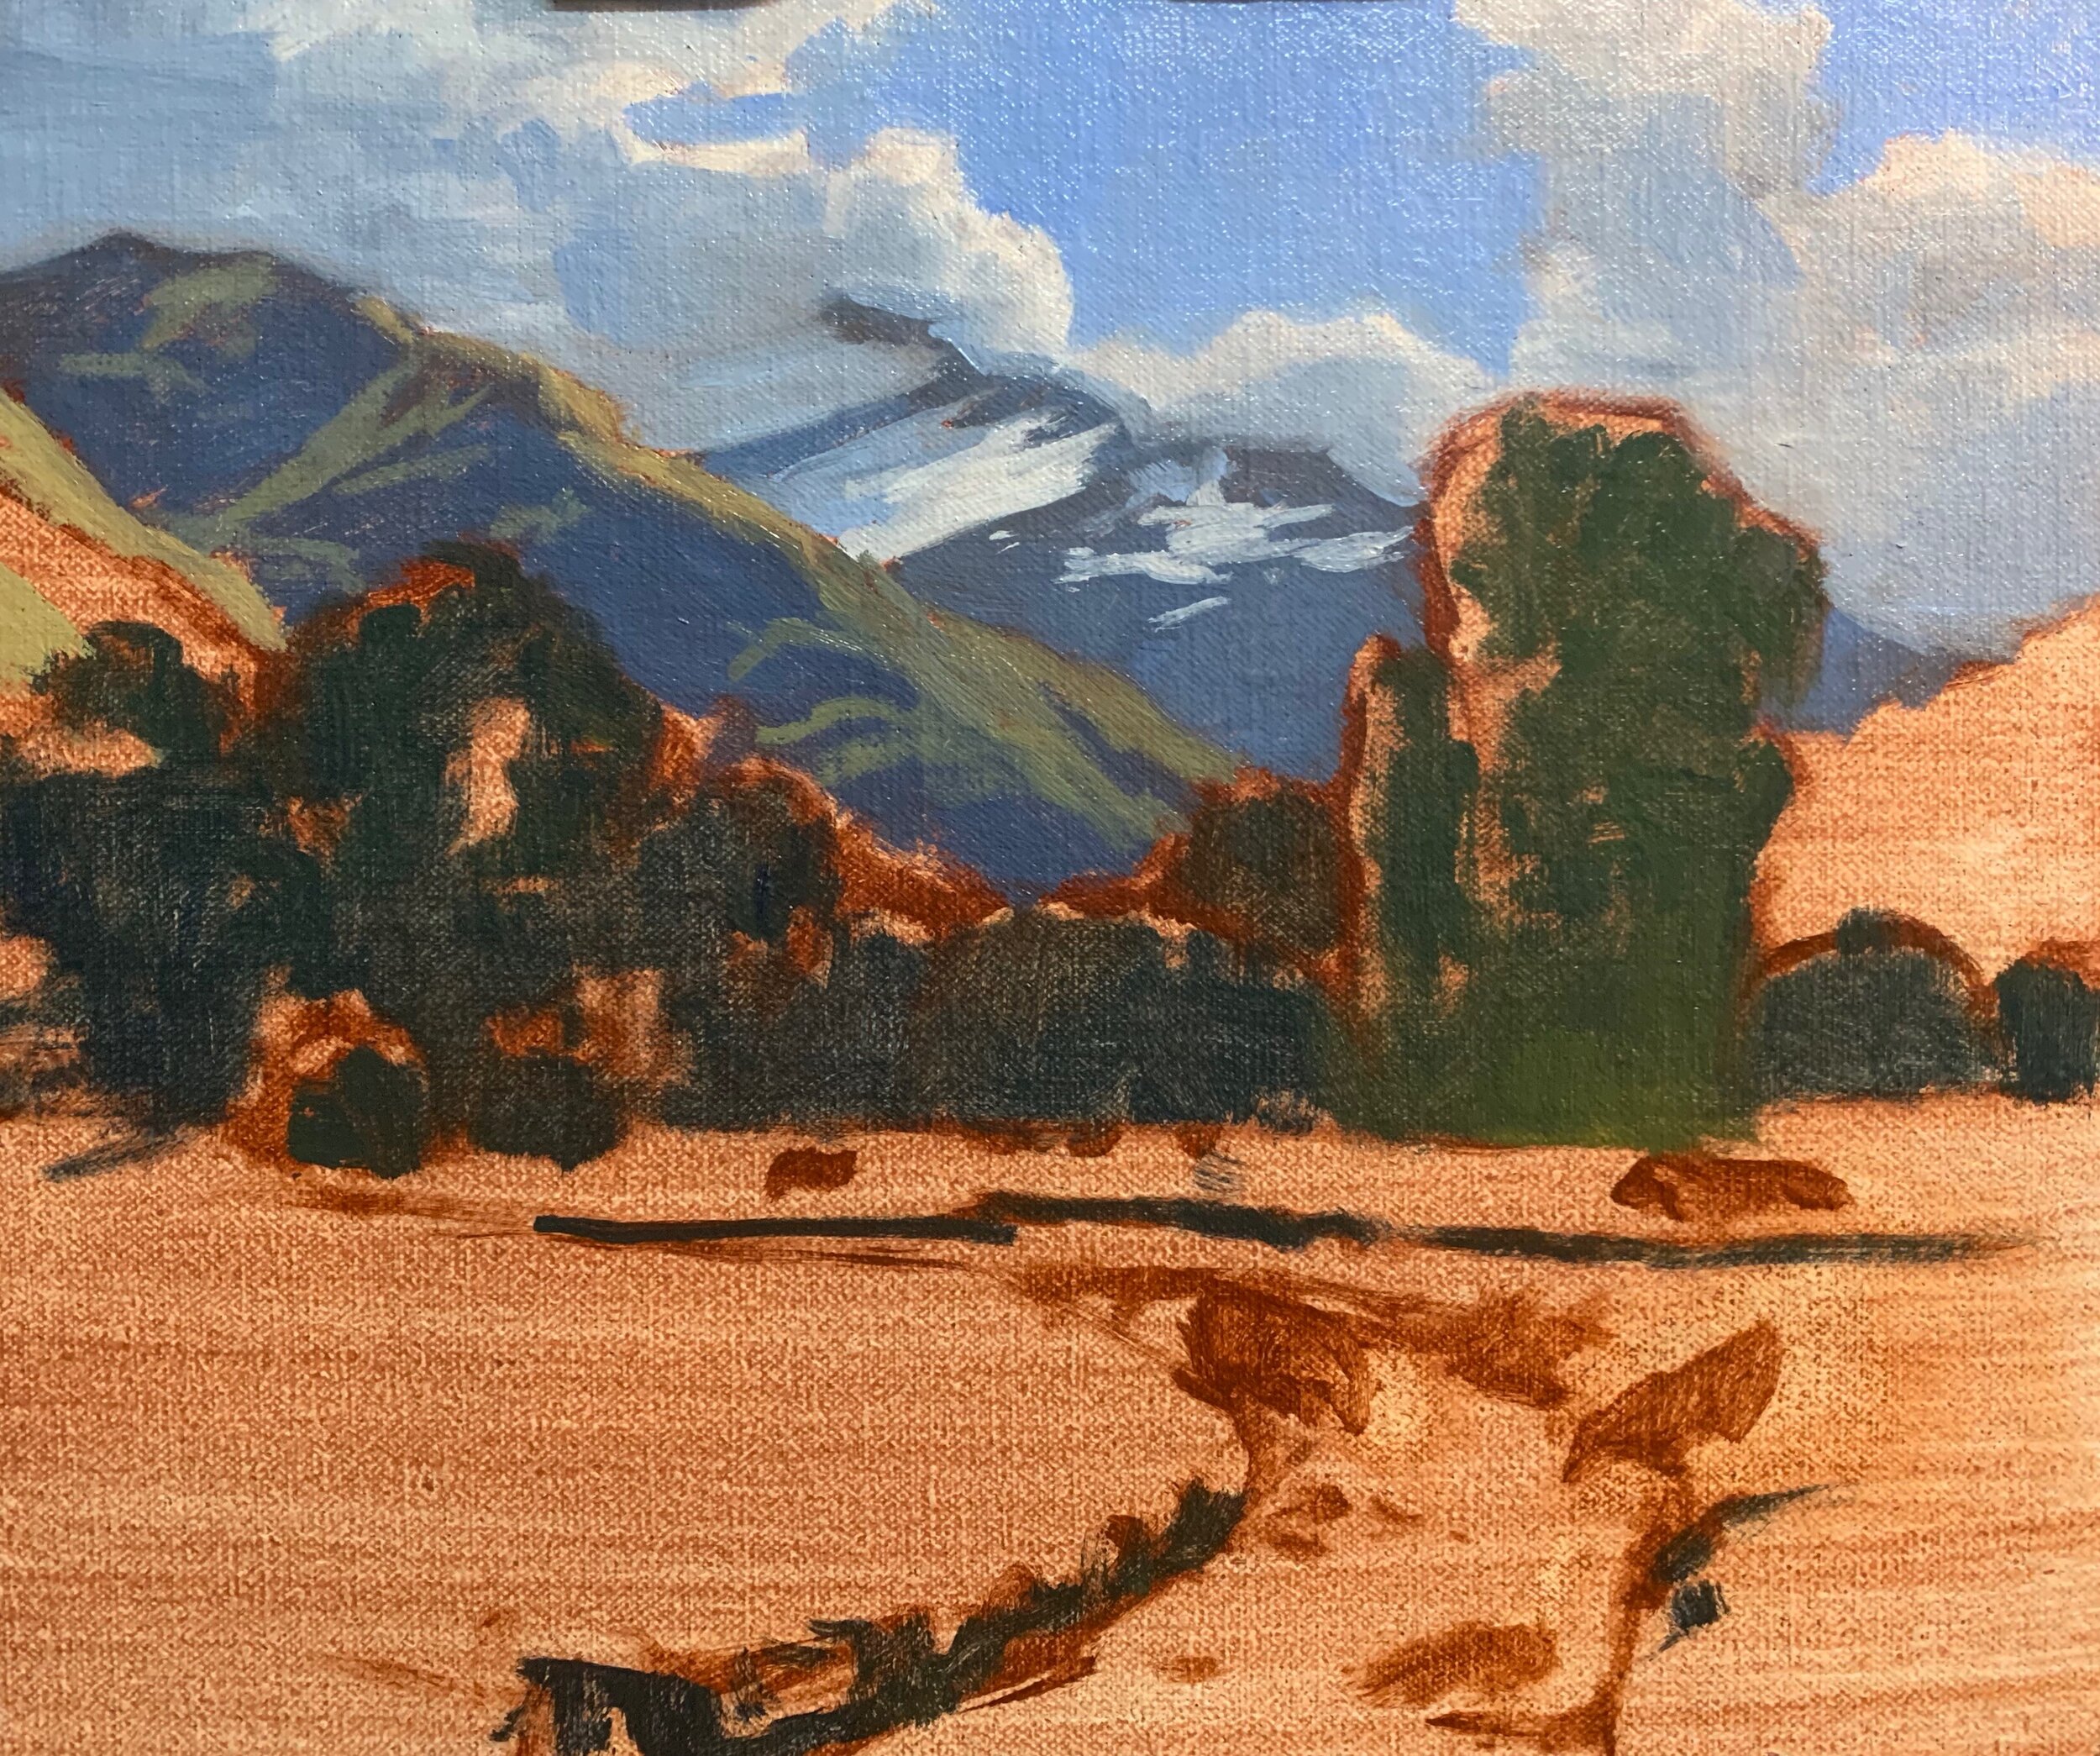
Once I have established all of my dark values I start adding some colour and begin working on the sky and clouds.
I paint the cloud highlights with a mix of titanium white and burnt sienna and then I blend in some of this colour with the cloud shadows. The sky is a mix of ultramarine blue and titanium white.
I use my cloud shadow mix to paint the snow on the mountain but I add a little more ultramarine blue into the mix. The snow highlights is the same mixture as the cloud highlights but I have also introduced a little of the cloud shadow mix to make the value darker. This will help the snow to sit back in the landscape.
The areas of foliage on the mid ground mountain is a mix of ultramarine blue, yellow oxide, quinacridone magenta and titanium white. It is important that I desaturate my colours here so that the vegetation sits back in the landscape.
Here I paint the areas of the tree canopies that are in the full sunlight. At this stage I am not worried about detail and instead I think of these trees as shapes which I mark out with blocks of colour. The detail will come later on in the painting.
For the tree foliage I start with a basic mix of yellow oxide, ultramarine blue and cadmium yellow. I also mix in a little titanium white and quinacridone magenta. I paint the tree foliage with a No.3 filbert brush.
For the grass I use the same colours but I have used a lot more yellow oxide, quinacridone magenta and titanium white to create some golden grass tones. Keep in mind that grass is one of the lighter values you will find in the landscape and much lighter than trees. In order for the trees to stand out the grass must be lighter in value than the tree foliage.
I finish up the blocking in stage by painting the water in the stream and outlining the basic shape of the cows.
The stream is reflecting the vegetation and the sky and so I mix yellow oxide, burnt sienna, ultramarine blue and a little titanium white. The combination of these colours is very useful in landscape painting and you can create a variety of earth colours with these three colours and white.
The immediate foreground of the stream is reflecting the sky so I use my sky mix here.
I paint the cows with a mix of ultramarine blue and burnt sienna which creates a near black. I create some of the half tones within the cows by adding titanium white to the mix.
The rocks and boulders are mainly a mix of ultramarine blue, burnt sienna and titanium white in varying amounts depending one whether they are in shadow or the full sunlight.

Modelling and Adding Details
Once the blocking in stage was complete I let the painting dry so that I could then begin to start building up the details with my landscape.
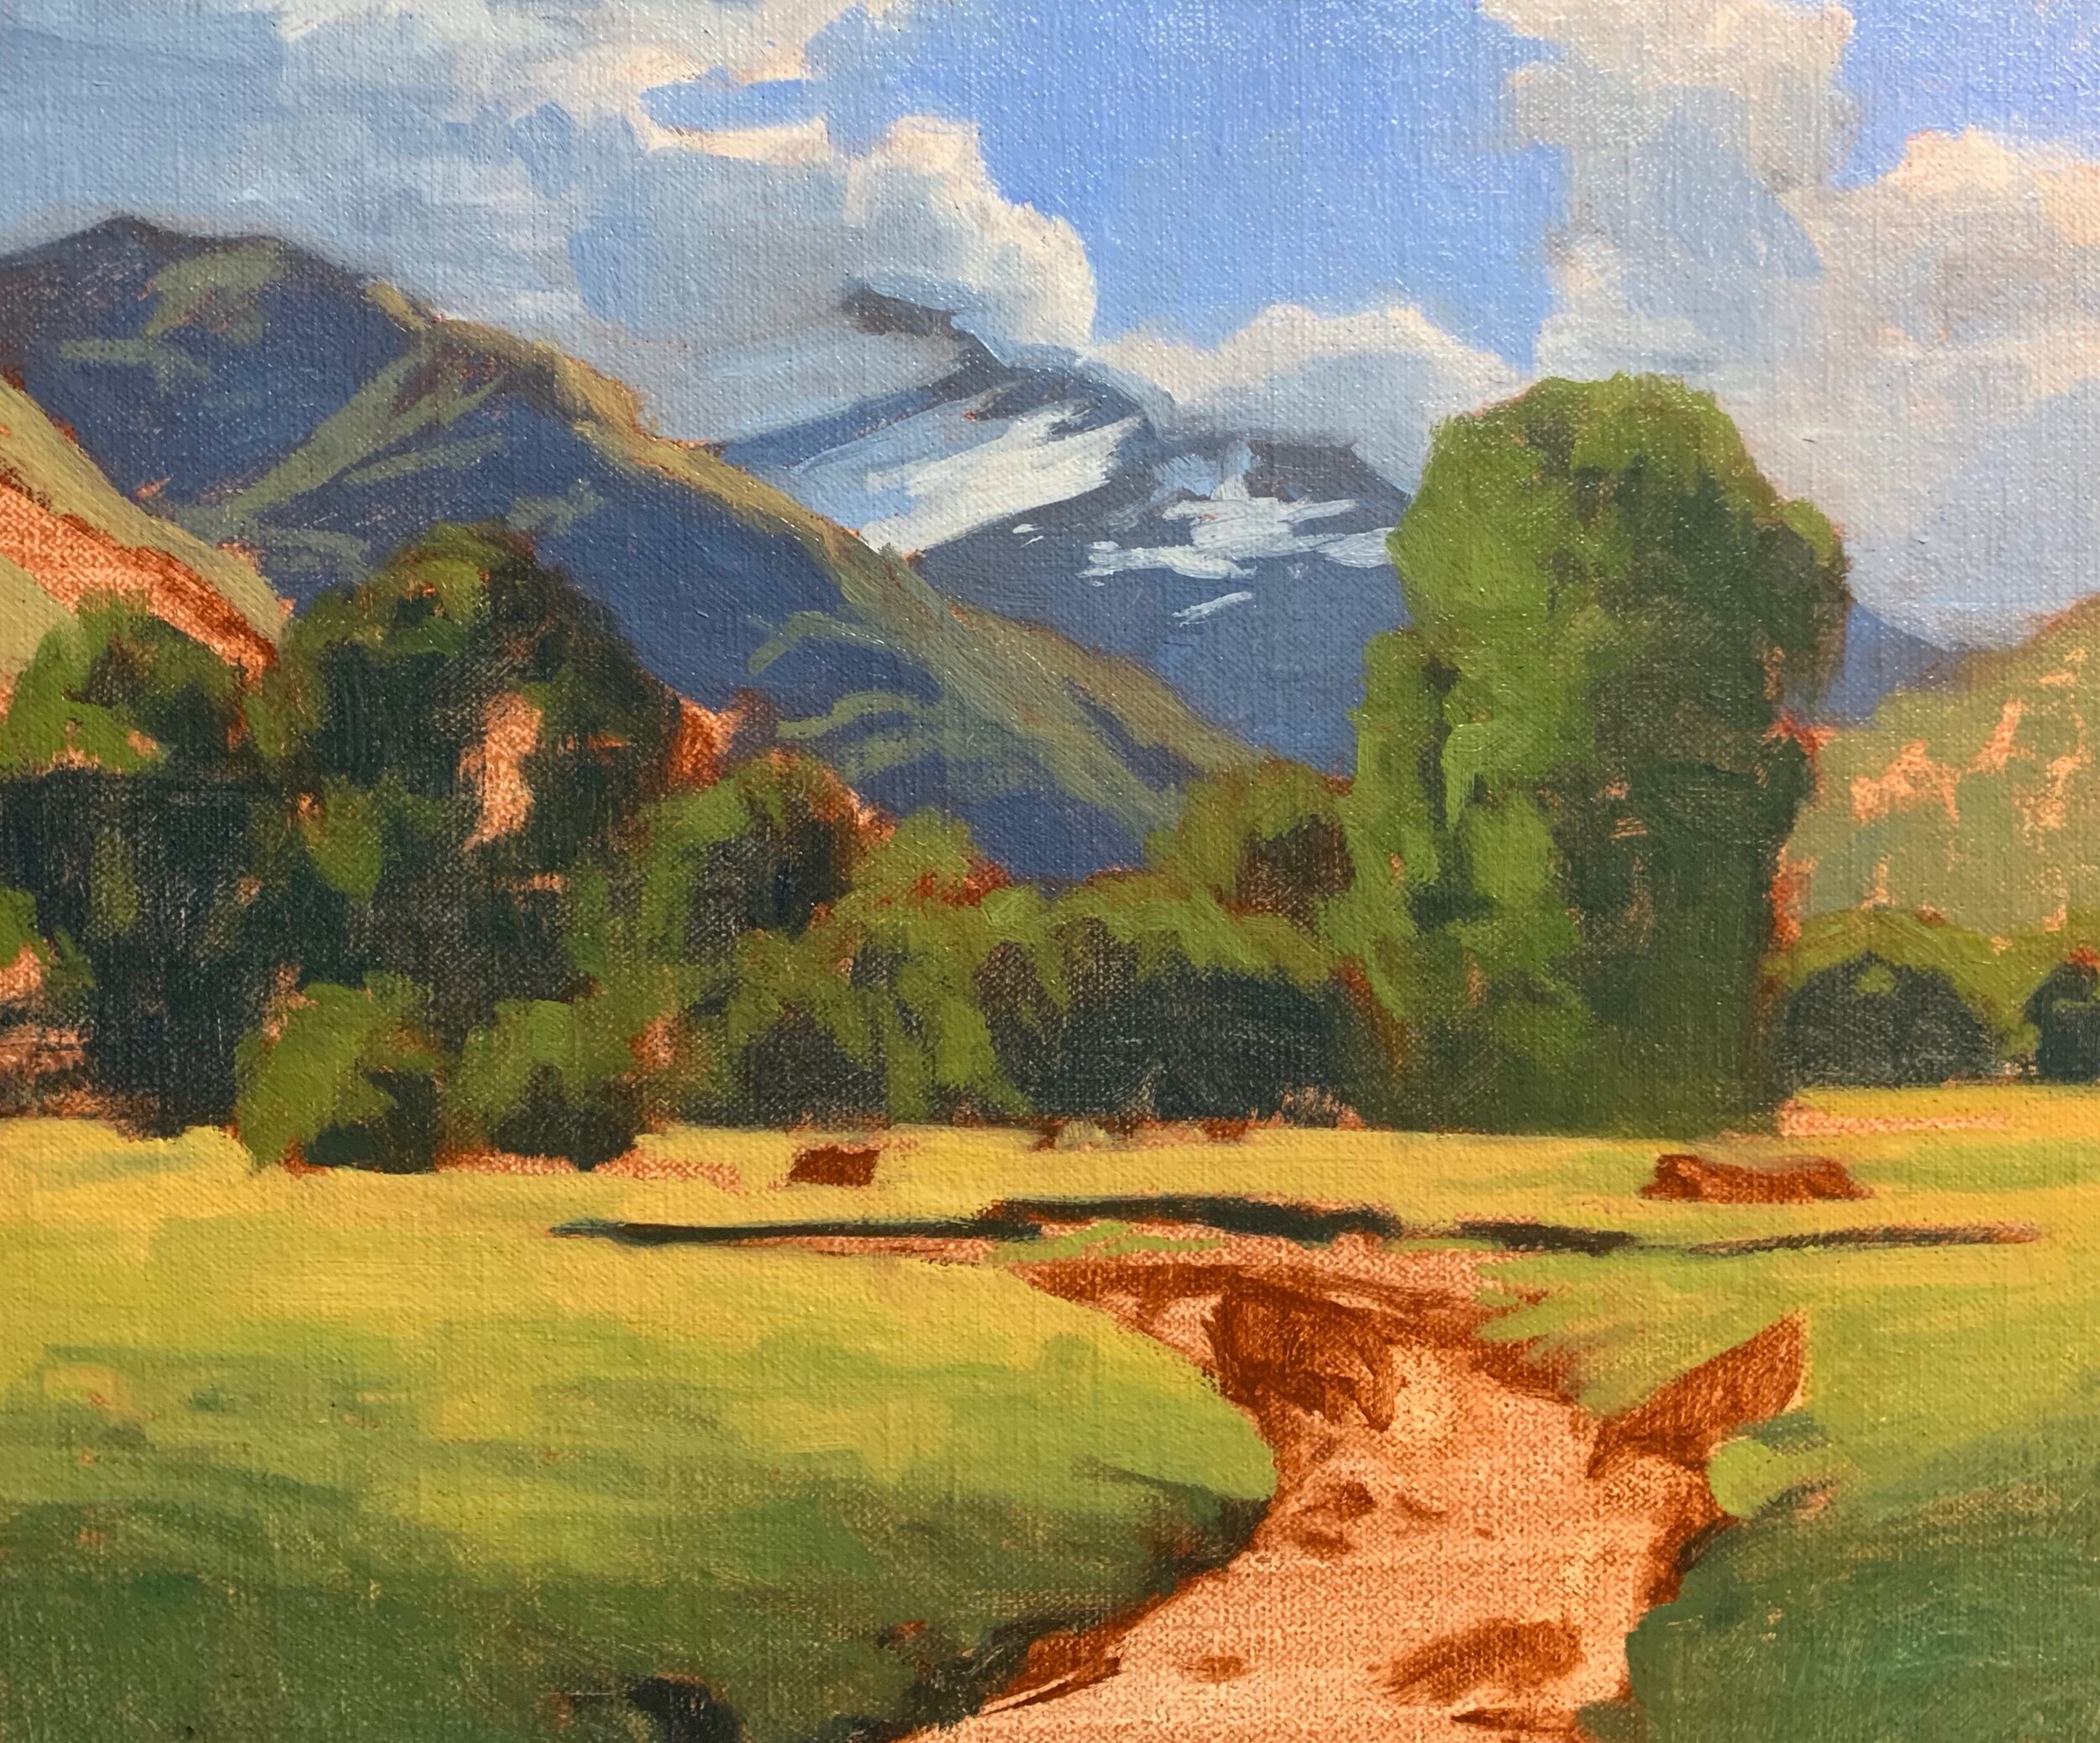
I start with the zone furthest away in the scene which is the sky and clouds. I’m using the same colours as I was during the blocking in stage but I am creating much more shape and definition to them. The modelling stage is where I prepare the various forms and zones so I can begin adding details.
I work my way across the mountains using the same colour mixes as before, but adding a little detail and lighter value colours.
When I begin painting the trees in the mid ground I begin using smaller No.2 flat brushes and No.3 filbert brushes.
My green mixes are the same as before but I add more titanium white to make the value of the colour lighter. If the mix becomes too desaturated I can increase it again by mixing in some cadmium yellow and even a little phthalo green.
I add more texture to the grass by creating some random brush marks which I can then use as a base to build finer details. I use the same colours as before which is mainly a mix of yellow oxide, ultramarine blue, cadmium yellow and titanium white and then I mix in a little cobalt teal which shifts the hue to create some nice emerald greens in the grass. If my greens are a little too saturated I can mix in a little quinacridone magenta.
I start to build up further details in the tree canopies using the same green mixes as before but with more titanium white.
It is here that I start adding much finer detail and this was done after I allowed the painting to dry again. I use a 1/4” bristle dagger brush to paint a few highlights on the tree canopies and I used my existing green mix but with a little more titanium white and cadmium yellow.
I add more details to the grass in the foreground and I use an old No.2 flat brush where old paint had gotten caught in the ferule causing the bristles to splay outwards. This however makes a great brush for painting grass as you can quickly achieve random marks to suggest blades of grass.
The shadow areas of the grass in the foreground are a mix of mainly yellow oxide, ultramarine blue, cobalt teal, quinacridone magenta and titanium white.
Adding Final Details
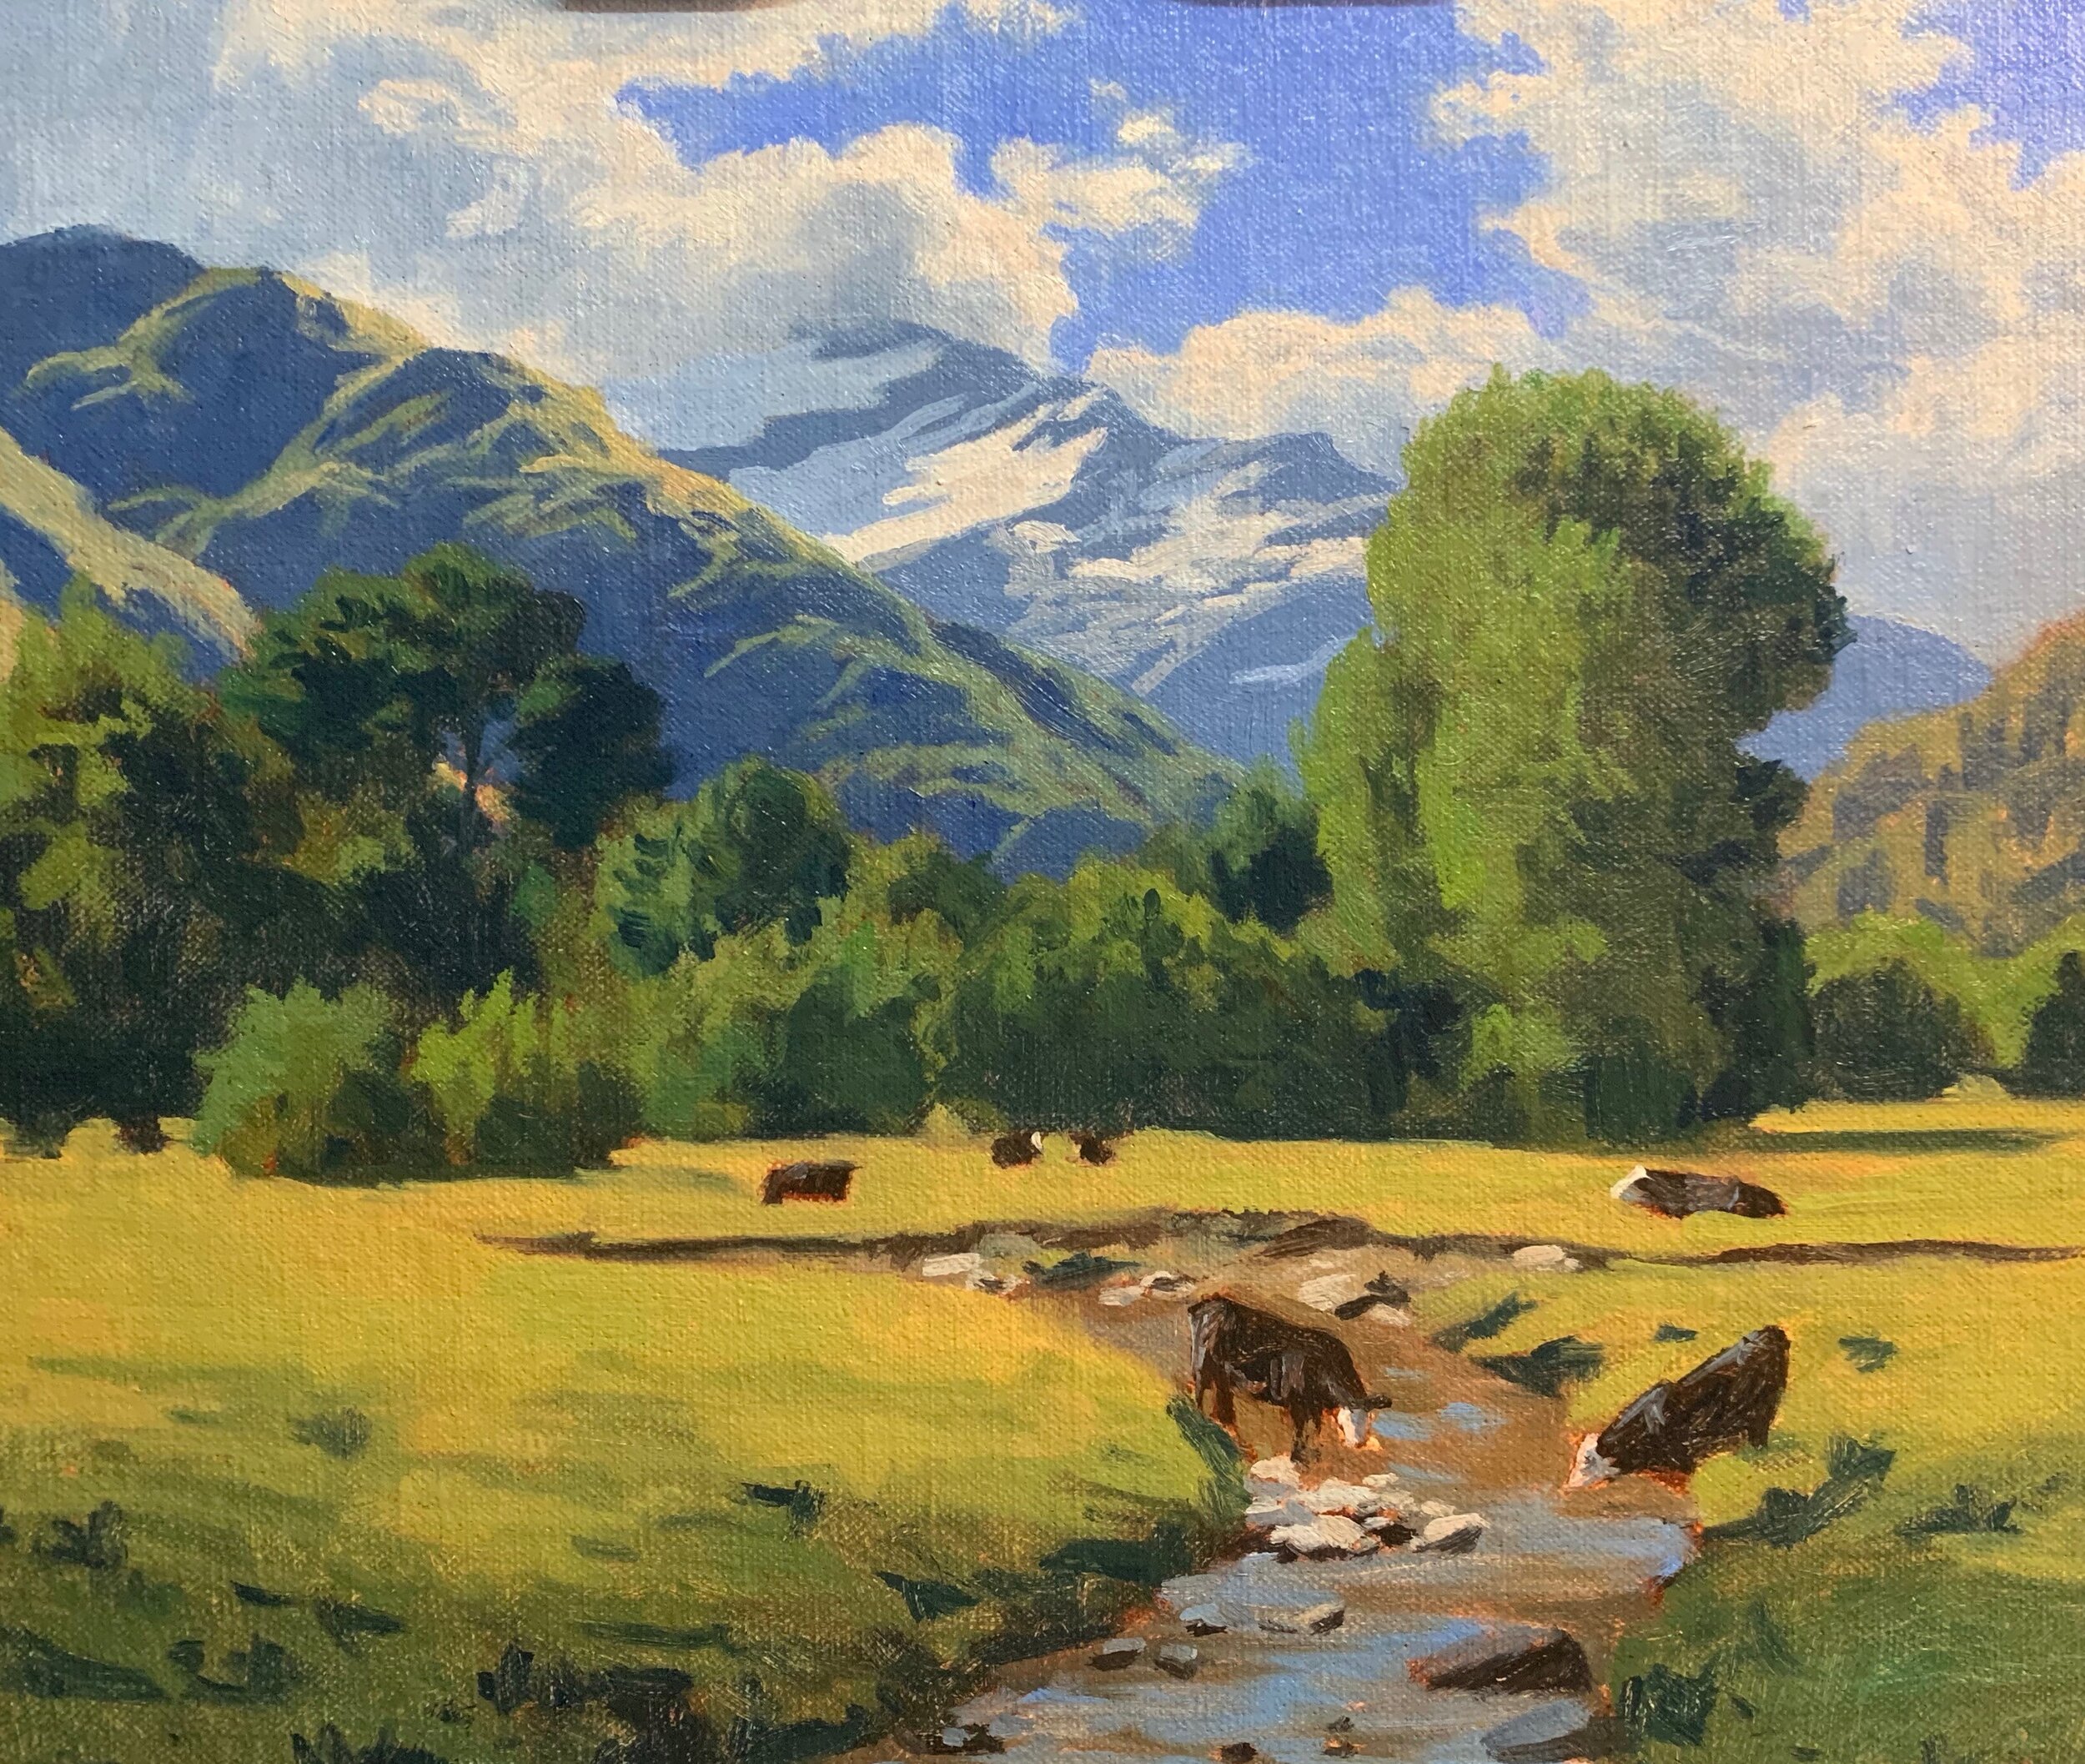
I have saved my lightest values and finest details until the end of the painting. My brushes have also gotten smaller and I have been mostly using No.0 and No.00 synthetic round brushes which hold their points really nicely.
I use a No.00 synthetic round brush to paint a few final highlights to the tree canopies to communicate leaves shimmering in the sun. This again is more titanium white added to my tree green mix and with a little cadmium yellow and phthalo green mixed in.
I add the final details to the stream, rocks and cows. I paint the suggestion of shimmering water in a small area of the stream with a mix of titanium white with a little yellow oxide. I also use this colour to paint the highlights on the cows faces and the reflections in the water.
I paint the suggestion of branches and main stems within the black poplar trees. The shadows are a mix of ultramarine blue, burnt sienna, quinacridone magenta and titanium white. For the highlights I mix titanium white, burnt sienna and a little yellow oxide.
I paint additional highlights to the rocks and boulders in the stream and I finish the painting by adding a few more details to the grass in the foreground.
Thanks for reading 😊
